Monday, September 30, 2013

Pink Survivor card

My mother and sister are both breast cancer survivors so it's only fitting that I get busy recognizing October and breast cancer awareness.   My sister battled all last year and came out with her fists in the air,  Rocky style.   *grin
And....I've been encouraged to enter this into the 3rd Annual Link up for Pink contest over at Link up for Pink.

So with that in mind,  I've made this survivor card, using a sentiment from the Unity Stamp Co.

I made the pennants out of pink sorbet twine from The Twinery and Mambi sheets from Me and My Big Ideas.  The pink hearts and survivor tag were cut from the same paper pack which was all about breast cancer awareness.  The dark pink heart came from the DCWV paper pad Blossoms and Butterflies.  The finishing touches were some stickles glitter glue to highlight the hearts, and the sentiment was stamped with American Crafts Taffy Pigment ink, my absolute favorite brand of ink.


Thanks for stopping by and God bless the women fighting this disease!
My Pinterest - click here

Friday, September 27, 2013

Owl love you gift tag

This was so much fun to make.   Day 6 of the UNITY STAMP CO.  tag challenge.   First I inked up my tag a bit with some yellow.   For some reason it doesn't show up well in this pic (can we say I need a decent camera?).   Next,  I used a Unity leaf stamp and stamped all over the tag as the background.  

Now for the fun part....
I placed mini glue dots all over and sprinkled gold glitter to adhere to the dots.   Easy peesy!   I made my own little tree branch with some scrap cardstock, then inked and distressed it and added some twine.   I had some cute owl stickers so I stuck it onto some white cardstock and cut around the edges,  then added some pop dots for dimension.

Finished it off with ribbon and a few other embellishments and voila....

Thursday, September 26, 2013

MUSIC/SONG BIRD gift tag

This is day 5 of a tag challenge over at the Unity Stamp Co. I've used a distresssing technique with the Tim Holtz tool that gives the paper a torn look. Now on the bottom, I did actually tear the paper but at the top I used the tool. Neat, huh? I've used 2 different stamps from the Unity Stamp Co. 

With both stamps, I masked out the part I didn't want to use and only stamped the part I needed.  Once you've inked your image, remove the tape and stamp.  I created the actual tag base and other embellishments from a paper pack by Teresa Collins Vintage Finds.  Love that set. 

Here is what else I used:
 Queen & Co. trendy tape and  Twinkle Princess cut yellow gemstones
Websters Pages ribbon
Unity Stamp Co Stamps (My Strength and Song, Lord-
Sympathy & Sadness)

Tuesday, September 24, 2013

Remember this Moment - gift tag craft

Here we are at day 4 of the tag challenge with Unity Stamp Co.   Instead of starting with a precut white tag,  I used a tag as a template and cut this from some designer cardstock.   So,  all I really had to do was add my stamped images and embellish.   Super easy!


Items used:
  Unity Stamps ''Remember this Moment'' stamp
  Inkadinkadoo bird stamp
  Colorbox dark green ink
  Paper Studio ribbon
  burlap twine
  Teresa Collins Vintage Finds ''cherish'' bar

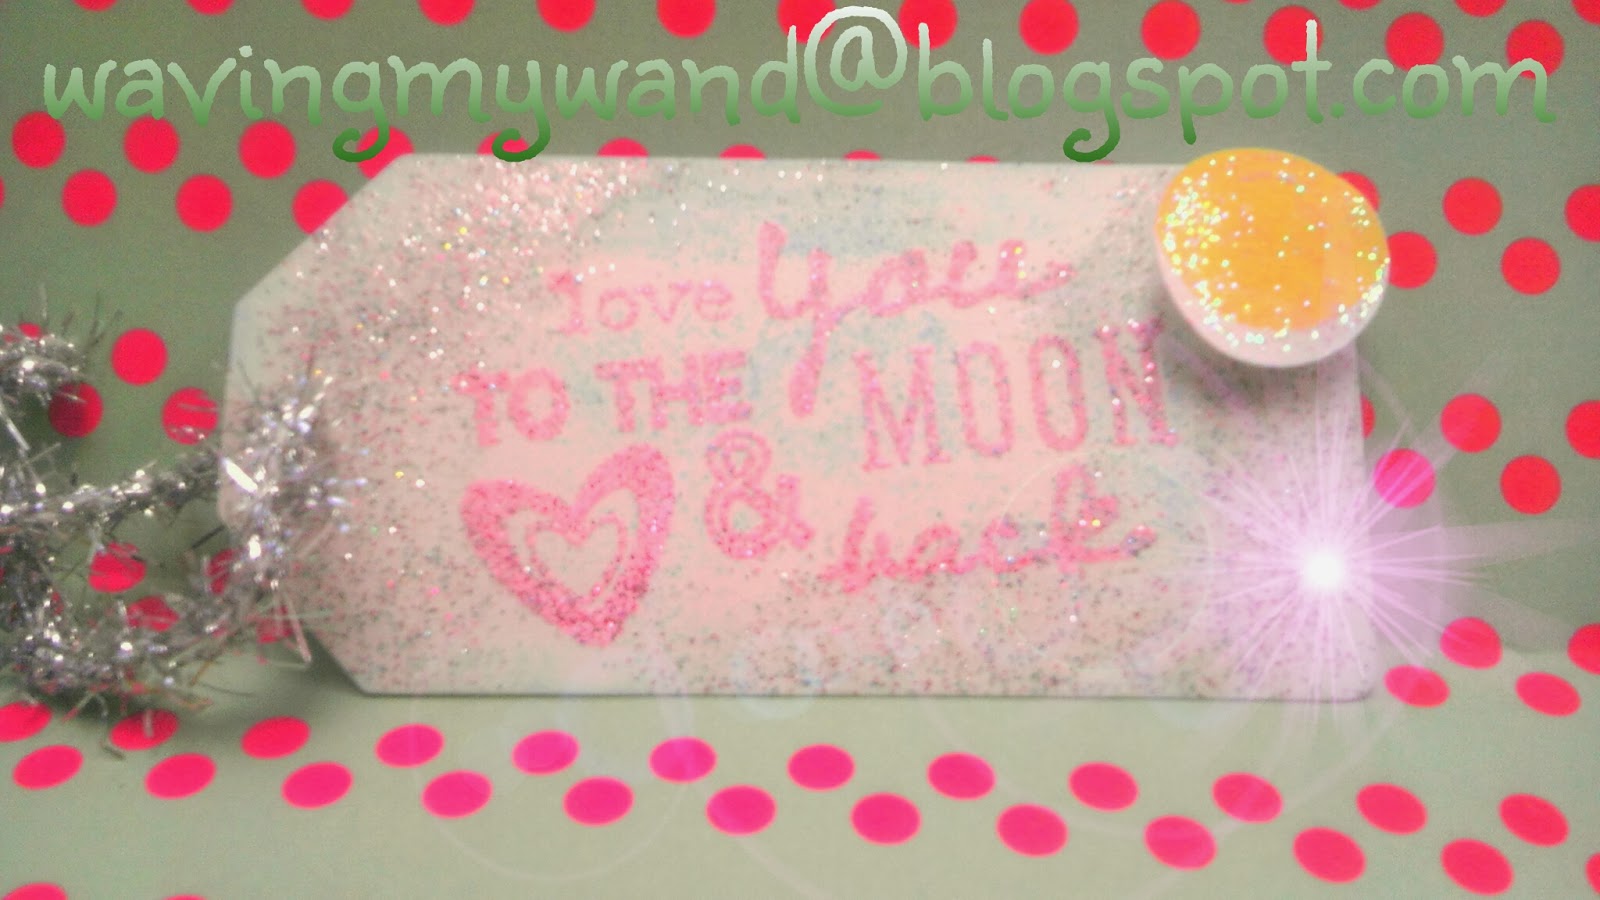
Gift tag - Love you to the Moon and back......glittery sparkly cuteness!

Day 3 day of the Unity Stamp Co. tag challenge.  This time I've done some heat embossing with American Crafts sparkly pink Zing! embossing powder.  I wish this picture could do it justice 'cause it is so much prettier in person but my limited photo skills will have to do.  *grin  


First I stamped my image with clear ink and sprinkled my embossing powder on the image.  Shake off the excess and then use your heating tool.  Be careful or you can burn the paper.  After I was done embossing, I blotted more clear ink all over the tag and added silver sparkle powder and dabbed on some light blue ink.  I used a 1" circle punch and punched out a yellow "moon" and added Stickles glitter glue.  Finished it off with Tim Holtz tinsel garland.


My Pinterest - click here


Saturday, September 21, 2013

PINK tag - cancer doesn't know who it's dealing with

This is day 1 of a tag making challenge at the Unity Stamp Co.   I've used the crinkle paper technique.  Simply crinkle up some paper (I used leftover gift wrap),  dip in ink and blot the tag.   Continue until you get your desired effect.  The ''angry'' eyes are from a different stamp set but the cancer sentiment is from Unity.  Love them.  They are awesome!


Items used: 
 Studio G pink ink and eyes stamp
  Unity sentiment stamp
  pink ribbon
  sparkle gemstones
 

Thursday, September 19, 2013

Woo - hoo! Let's have a giveaway!

Yes,  indeed,  we have reached the one month milestone here at Waving my Wand.  What better way to celebrate than a giveaway?   You know I love the Unity Stamp Co.  so I am giving away a $10 gift card which you will receive as a coupon for store credit to the Unity Stamp Co.   To qualify,  simply leave a comment on this post.   Contest ends 10/1/13 at 11:59 pm ET.  For an additional entry, follow me on Google+.  Comment for both entries separately.  Thanks and good luck.  Winner will be drawn randomly and announced by 10/4/13.

Wednesday, September 18, 2013

Customized stamps.... Do you have one?

I was thinking how much I would love to have my own rubber stamp to promote my blog and stamp on my crafts.   I  came up with this using the draw feature on my Picsart app.  I checked one site online and the rate was $14.95 + S/H for a 2''x2''.  If you have any recommended sites, please share in the comment section.  I'm sure I'm not the only one looking for a better deal.  Thanks!  Terri  
  My Pinterest - click here

Tuesday, September 17, 2013

Scripture card #2- To everything there is a season

This is my favorite Bible verse and has so much meaning to me.  I did a lot of distressing on the paper and the leaf, which I made from scratch.  Hmmm, sounds like I'm cooking!

There are a lot of elements used on this card, including the stamped Bible verse which came from the UNITY STAMP CO .  Here are some of the products:

Tim Holtz distressing tool
Teresa Collins Vintage Finds embellishments
Cuttlebug machine and embossing folder (to make the frame)
ribbon
plastic bendable flowers
Colorbox dark green ink

Thanks for looking.  What's your favorite Bible verse?  Tell me in the comment section.  Happy Crafting!  Terri

My Pinterest - click here

Monday, September 16, 2013

Apple barrel, a bushel and a peck card

Are you ready for Fall?   Living here in the South,  Fall can't come soon enough.   But we're having just a little sample of cooler weather which put me in the mood for an apple picking card.   My Mother used to sing this song when I was little and I sang it when my guy was a babe too.  

I started out running a piece of mauve paper through my Cuttlebug to emboss and adhered it to a 5x7 kraft card.   I really wanted to find a barrel template that I could print and/or enlarge to my desire,  but I ended up making my own.   I thought it turned out fairly good.   *grin

Next,  I cut 3 small pieces of yellow jute cord,  unraveled,  and cut vertically in several pieces to look like straw in the barrel.  The apples are stamps from the Unity Stamp Co.  I stamped the apples on cardstock, colored it and cut with an exacto knife.  The barrel is raised with pop dots and the apples and jute are glued to the backside.  

The centerpiece was punched with the mini 8 We R Memory Keepers Flourish punch and I added vintage musical washi tape from Queen & Co.  I've also added a little Teresa Collins Vintage finds paper to the mix, including the ''I love you'' bar at the top.  Topped it all off with the extra touch of red twine, burlap twine and musical notes.  Lets go picksome apples...or better yet, eat some!

Friday, September 13, 2013

Love you to the moon - card


Once again I'm using a stamped phrase from the Unity Stamp Co. This is such a pretty card and could be used for a number of occasions. I started with a white card and layered with some blue patterned designer paper. It reminded me of the sky although the blue doesn't show up good in this photo. I need a decent camera! Next, I stamped my phrase in black ink, added some pink to the heart, and began adding tiny little rub-on hearts that would lead to the moon. I also added some sparkly Stickles glue to the hearts. Below the phrase, I added a couple different swirly designs in white ink and also embellished with a touch of Stickles. The moon was punched with a 1 1/2'' circle punch in white and then blue sparkly cardstock which I embellished and layered with pop dots.  The final touch was a silver/white corded ribbon which outlines the card.  Gorgeous!  Stayed tuned for a special giveaway... My Pinterest - click here


Owl card - Owl are you

Ya know,  I think stickers are way under rated.   They can mix in nicely with your card making skills,  especially if,  like me, you're not so great at coloring inked stamps.   I admire those who can pull out a couple of Copic markers and create a Picasso,  however,  I am NOT one of those artists.   :-) 

So this is a very simple card.   I like simple.   Like stickers,  simple is also underrated,  in my opinion.  

I started out with a light blue 4x6 card and layered with a piece of mottled blue and white designer paper.   I cut the branch using my Cricut,  although, for the life of me, I can't remember which cartridge.  The moon was made with yellow cardstock and a 2'' circle punch which  I smudged with some ink and a sponge.  If memory serves me right, I think the owl is a sticker from Hero Arts.  Love their stuff.  And the phrase was made with clear acrylic alphabet stamps inked in black.  Come back tomorrow 'cause I've got a gorgeous card to show you.  My Pinterest - click here

Wednesday, September 11, 2013

Christmas card - Away in a Manger


Love this app - Picsart

If you've never heard of Picsart Photo studio,  you need to check it out.  I use this app all the time and I do mean  ALL the time!   I downloaded it free from the Google play store.   You can check out their Facebook page too for more information.  This is just a tiny sample of what you can do,  thanks to my models, my son and my cousin... (Surprise Tracy!)  
There are so many features to this app,  I can't possibly name them all but here's a few: sketch,  special effects,  color adjust,  frames,  stickers,  clip art,  collage,  grids,... and more.

Once you have downloaded the app,  you can access their store from your app and download tons of more free stuff for your photos like seasonal holiday themed frames,  clip art,  fonts... My favorite frames are the scrapbook and retro frames.   Try it out and let me know if you agree that it's an awesome free app.   If you already use this app, comment below and share a tip or your favorite feature.  Thanks!

Tuesday, September 10, 2013

Vintage style Notecard

This lovely notecard was made with the Teresa Collins Vintage Finds kit.   I started out with a gray 4x6 blank card and layered with a piece from the 6x6 paper pack.
Next I added a cute musical border across the top,  buttons and ribbon.   This was so EASY to make!   I found the kit at peachycheap.com which is a favorite site of mine for awesome scrapbooking deals.  Check it out some time. My Pinterest - click here

Monday, September 9, 2013

Vintage Rudolph Christmas card

 
I had a lot of fun making this card. Just about everything used was from items that I got on clearance. First I used a 5x7 kraft card and used a mistletoe ink roller. These self inking rollers are so cool! I'm in love. I hand inked the red berries with a super fine point sharpie pen. Next, I ran some mottled paper through a cuttlebug folder that had an oval frame and cut the frame out. Now for the good stuff.... I found a paper pack awhile back from Michaels called tinsel town. Rudolph is actually a sticker from that pack. Cute! Also, the Christmas message is also from the same pack. I tore it off the page and did a little sanding to give it that vintage look..< the creamy lace ribbon is from Websters Pages. I love, love, this card! Hope you do too.My Pinterest - click here

Sunday, September 8, 2013

Scripture card...The Lord is my Strength and my Song

This card was made with a stamp from the Unity Stamp Co.  I started out by cutting a piece of jute cord and unraveling it.  Next I stamped red ink on it and pressed it around the edges of a 6x6 card and the centerpiece.

I layered the card with a cut piece of musical scrapbook paper and placed the inked jute cord under the centerpiece which by the way, was embellished with the mini 8 We R Memory Keepers Flourish punch.  I also used some musical stamps from Inkadinkadoo on the side.  Love how it turned out.  Fits in with my musical self as I'm a singer and church musician (Shout out to Heflin Baptist!)
My Pinterest - click here


Wednesday, September 4, 2013

TUESDAY MORNING? Who knew?

My Pinterest - click here 

I rarely shop at Tuesday Morning stores as the nearest one is about an hour and a half away.   Wrong!   How did I not know that the next town over,  in lovely Gadsden,  AL,  resides a TM  store that has been there 7  years?   Wow.   I really need to get out more.   And,  on top of that,  this store had an awesome selection of scrapbook/craft supplies,  including clearance.   I was so excited to see my favorite ink,  American Craft,  and lots of Inkadinkadoo stamps like this Utopiary that I snatched up for 1.99 (retails for 9.99).   And all the ink was 1.99 as well?   Where do you find your best deals?

Tuesday, September 3, 2013

Birthday Present card - EASY!

Today I have a simple card which has the elements of a wrapped gift and can be for a girl or boy.  I've used the Fiskars everywhere punch window system scalloped tool.  I love that you can punch anywhere on your page.   I started with a blue card and then cut a piece of designer paper to layer.


Next I centered my ds paper over the Fiskars tool and punched the scalloped image, creating a ''window''.  Before adhering the paper, I centered it and stamped my birthday wish in white ink.  Then I used pop dots to raise the paper and give it that 3-D look.  Finally, add some ribbon and you are done.  I used the Hero Arts ''With love from'' stamp for the back of the card and signed my name.My Pinterest - click here

Monday, September 2, 2013

Cookouts and scrappin'?

My mom had a cookout Saturday for the college kids from her church,  and My Pinterest - click here of course,  I promised to help.   So I'm setting up a condiment table and it just doesn't look good.   What to do?   Decorate with scrapbook paper!   I even added a little washi tape to identify the flavored pickles.   What can I say?   It's in my blood.   *grin