Disclosure for Affiliate Links

Wednesday, October 30, 2013

Trick or treat the office! Or friends...

So I put together this cute basket for my coworkers to stop by my office. 

The '' trick '' is the mini jars of cupcake sprinkles.   These came as a 4-pack from Targets dollar spot.   Actually,  it's the trick that becomes a treat.   *grin
HAPPY HALLOWEEN!

Tuesday, October 29, 2013

Gone Fishing card

My coworkers asked me to make a fishing card for our male nurse who is retiring this week.   I had to pull some stuff out of the archives for this card!

Luckily,  I came across a great page of paper accents by EK Success,  the Bait Shop collection.

I tore the sign for that distressed look,  and hand cut the hat and raised with pop dots.   The fishing pole was a sticker that I placed on cardstock and trimmed so it would have more dimension.   I added a little Teresa Collins twine from the Vintage Finds trim collection.  

All in all,  this was a super fun card to make.

Sunday, October 27, 2013

Reindeer Christmas card

I made this sweet card with a Martha Stewart paper pack that I got on clearance last year.   I love this paper because it has such a serene feel to it.   I cut the frames using my Cricut and the Straight from the Nest cartridge.   The stamped images are from Hero Arts and Hobby Lobby and the fibers are from The Paper Studio.   The inks are Inkadinkadoo and the poinsettia ink also came with the stamp from Hero Arts.   That was a set from Target.   Basically,  everything I made to use this card was bought on clearance!   Gotta love it!

Saturday, October 26, 2013

The Magic of Christmas card

Here's another card I made with ''His Presence'' stamp from the Unity Stamp Co.  and Erin Schreiner.   I love this sentiment because it has so much meaning.   I used some washi tape and adhesive glitter ribbon too.   Baby Jesus is a sticker that I adhered to white cardstock and then cut around the edges,  and raised it with a pop dot.   I fussy cut the frame from cardstock that I ran through my Cuttlebug with an embossing folder.   Some ink,  burlap twine and blue gemstones were added and a 2-piece star at the top for the finishing touches.   Pretty!

My Pinterest - click here

Wednesday, October 23, 2013

Making the right choice - life lesson for a child

My son had a dilemma this week.   Go camping with his church group or support his soccer team in a tournament.
I must say,  it's been interesting watching him struggle with this issue and most definitely has been a defining moment as far as a teachable life lesson.
There was a little pressure from his coach and my husband and I expressed our opinion but ultimately,  we were leaving the decision making up to him.   Some of you might say we're wrong in letting him decide,  that we should tell him what he's going to do and that's that!   But the boy is almost 12 years old.   He needs to know that the choices he makes in life have consequences ; some good,  some bad.   And,  I'll admit,  I really wanted him to make the right choice.
So,  we let him stew on it all week.   The camping trip would be the last one with his age group before moving up to the youth.   There would probably be some time for Bible study devotions - an overall good time with friends from church.   On the other hand,  he's been the goalie for his undefeated soccer team.   The team depends on him and he made a commitment when he joined this team at the start of the season.
Let me say,  I am not a parent who puts sports before church.   The team has practice every Wednesday,  Thursday  and Friday.   We have not been to Wednesday practices as we feel church is more important.    So there's also the issue,  is a Christian event more important than this tournament?   Some would say yes.   God SHOULD be first in your life. 
So after all is said and done, and with a little prayer for guidance,  my child informed us that he would be giving up the camping trip and supporting his team at the tournament.   You cannot tell me that God is not honored by his decision.    I'm proud of him and believe he made the right choice.    He placed the needs of others before his own selfish desires.

My Pinterest - click here


Monday, October 21, 2013

Boo! Happy Halloween from my kid

I tried to get some card making done yesterday but my 11 year old was not having it.   Instead,  I was instructed to hand him the glitter glue... hand him the ink.... hand him the stamps.... You catch my drift?

He also instructed me that I better put it on my blog too.   Ha!   Well,  I wouldn't want to get in trouble so I better do as I'm told!    So,  according to my young 'un,  Halloween is here.   Enjoy some time with your kids this week.......

Saturday, October 19, 2013

Rudolph the red-nosed reindeer card

If you know me,  then you know I'm a Rudolph lover.   I decorate my Christmas tree every year in Rudolph ornaments and plush toys (pictured below).   So when I saw this 4-piece stamp set online last year,  I HAD to have it.   And,  believe it or not,  it was promoted as a kids stamps.   Forget the kids,  this bad boy is mine!   Ha!

The Unity Stamp Co is having a new ''Be Inspired '' color challenge and I thought I'd give it a whirl.  I spent a whopping 4 hours on this last night,  much of which was trying to figure out what I wanted to do,  taking it apart rearranging.... you get the idea.   So let's break it down.   I used a ton of products on this,  starting with a lovely piece of soft green designer paper.   I ran the top part through my tiny dots embossing folder and Cuttlebug.   I wanted to have the appearance of snow so I topped each of those dots with a white gel pen,  let it dry and then smudged in more white ink.   Remember when Rudolph ran away and was caught in a storm?   I had that wintery scene in mind on this project.

I couldn't wait to start on Rudolph so he was next.   First,  on the back of the cardstock,  I drew the circumference of the stamp so I could work within that circle.   I had plenty of room as this is a large stamp.   I hand cut the circle and stamped my image in brown ink.   I used 3 different shades of brown but started with an outline using a Permapaque brown metallic pen.   The other shades were sponged in and I used a the white gel pen again to highlight the white fur.   More Permapaque pens were used for the black and red on Rudolph.   I also sponged a soft green and red ink along the lower circle to give some dimension and drew some black lines and highlighted with Stickles.
I cut a larger dark red circle from heavy cardstock and used some snowflake rub-ons and edged/smudged white ink all around.   Snow storm,  right?   {*grin}
I fussy cut the Christmas trees from a piece of designer cardstock and embellished with more Stickles.

A neighbor,  God bless her,  gave my Mom a huge trash bag full of ribbon and lace.   Can you believe it?!   Found this great eyelet cream colored lace that I fanned and layered behind the centerpiece.   I also added some red/white striped craft ribbon.

Now for the tag:  It is ALL Unity!   As luck would have it,  Unity sent some cool freebies in my order this week,  including a Manila tag tucked inside a sweet little scalloped kraft mini envelope.   So what do I do?   I tear up the envelope!   I had to though,  it was perfect!   I hand-ripped it for that torn look but kept the scalloped edge.   I didn't have a ''Merry Christmas'' Unity stamp,  but I do have another awesome Unity stamp with the wording.   I simply masked out the part I didn't want to ink with a little washi tape I had on hand.   Then added more Stickles.   And I glued this adorable Holly felt piece that Unity sent with my other freebies,  and added a Sparkly red Brad.   Whew!   Enjoyed my evening crafting with my Mom until 11:00 pm.   I love how Rudolph turned out.   He's no misfit on this card!

SUPPLIES:  Unity Stamp co stamp ''Rejoice for our silent Night'' Wit & Wisdom collection,  Studio G Rudolph kids stamp,  American Crafts Christmas Book One Snowflake rub-ons,  Permapaque metallic pens 1.0 mm fine point,  Colorbox inks,  Inkadinkadoo brown ink,  Unity Stamp Co embellishments,  Stickles Crystal glitter glue,  K&Company designer paper,  Walmart craft ribbon
My Pinterest - click here

Friday, October 18, 2013

Beautiful sympathy card

It's Friday which is Friends with Flair time over at the Unity Stamp Co  blog.  So I just finished this as part of a set.  This is one of those cards that I have no idea what direction to take but then the juices get flowing and this is the end result.

I started with a great piece of designer paper to layer my white card.   Next,  I took a  6x6 white doily,  cut it in half and edged it with some blue /green ink.   I glued both pieces with the flat side facing out and then glued a piece of lace fabric on top.

I then ran a piece of pretty paper through my Cuttlebug and cut out the oval frame.   The sentiment is from the Unity Sympathy and sadness set.   The butterflies were stamped with white ink and then I added some little swirly tails with a white gel pen and a touch of Stickles.   This is part of a coordinating set of cards I just made for a customer.   I think she will love it.

Supplies:  Colorbox ink, Unity Stamp sentiment, Inkadinkadoo butterfly stamp, Cuttlebug and embossing folder, fabric lace, white gel pen, Stickles diamond glitter glue


Sympathy card

I've been working on a set of coordinating cards for a customer and wanted something simple but elegant.

This started with a great piece of designer paper that I layered over a white card.   Next I stamped my image with Apricot ink from American crafts and used glue dots to adhere some lace.   A few simple paper flowers with a little bling and more mini glue dots and we are done.   Beautiful!

Wednesday, October 16, 2013

Gift tag - Spooky Halloween

This week I'm submitting my tag in a contest over at the Paper Issues Blog.  Let me show you a cool technique you can use.

 Crinkle up some paper and dab it in your ink,  then blot your tag / paper.   In this instance I tore off some gift wrap to crinkle as I had just wrapped a gift and had leftover paper.   I used 2 different shades of orange and some purple.

Next,  I added a few embellishments before stamping my image and to finish it off,  I added some fluffy orange ribbon.   Spooky..... but cute! 
Item's used: 
 American Crafts Apricot ink
Colorbox orange ink
 Studio G purple ink
 Unity Stamp Co Spooky Halloween stamp
 Stickles glitter glue
  Target washi tape
KC & Company Candy corn

Halloween and The Flintstones

I'm submitting this layout in a contest over at the Paper Issues Blog.  I made this 12x12 scrapbook page of my nephew and his family when they dressed up as the Flintstones for a Halloween party.

I used my Cricut die cutting machine a lot on this project, in particular the Playful Pups Cartridge.   The pumpkins,  the lettering and the bone were all cut with the Cricut.  This was so much fun to make.  Hope you like it too!


Tuesday, October 15, 2013

Dangling Christmas Ornament card

I've always wanted to do one of these.   We've all seen them on Pinterest and other crafting sites and they are so pretty and look easy enough to do.   Plus,  I have a new Christmas stamp I need to break in with a favorite scripture verse, Luke 2:10.


So,  I'm over at my Mothers house where we share a craft room off her garage.   She says I've pretty much taken over the space and she's right.   (At least I share my stuff!)   I came across this ornament stamp that a friend gave me last year,  and went to work.   Sure enough,  it was super quick and easy.   And so pretty!


Supplies:  Zig 2 way glue pen
 Studio G inks 
American Crafts Taffy ink 
gemstones 
Twinery Pink Sorbet twine 
 6x6 white card
 Unity Stamp sentiment ''Tidings of Great Joy'' stamp 
Stickles diamond glitter glue 
Studio G purple glitter glue

Guilt-free Pumpkin bread pudding from Hungry Girl

I love all things pumpkin.   Pumpkin bread,  pumpkin pie,  pumpkin ice cream.... I  could go on and on like the character in Forrest Gump who could name a bazillion different shrimp,  but I won't. 
So when I saw this today from Hungry girl,  I just had to share.   It's made with vanilla soy milk and Brummel & Brown spread to lower the calories.   This is on my must-try-immediately list!
You can check out Hungry Girls recipe here: Guilt-free Pumpkin bread pudding


Saturday, October 12, 2013

October breast cancer awareness & my family

I thought I would share the impact that breast cancer has had on my family since October is the month of awareness.

My Mother was diagnosed about 7 or 8 years ago.   She was the first woman in our family to be diagnosed so we were really shocked.   Thank God,  hers was self contained in one area.   She had a mastectomy one week after diagnosis.   Mom did not want to wait.   The good news is,  she didn't have to have chemo or radiation and has done great ever since.

My younger sister survived breast cancer after a year long battle last year.   Her story was much different.   She had a lump that she ignored.   She hadn't had a mammogram in many,  many years.   She noticed the lump getting bigger and finally,  after much urging,  she finally went to the doctor and got a mammogram.   Because there was movement of the lump and it wasn't stationary,  the doctor didn't think we had cause for concern but a biopsy was done.

To our shock it was an aggressive form and my little sister had a mastectomy and chemo and radiation.   It was a tough year but she came up fighting and as I like to say,  waving her fists in the air Rocky style!   Yesterday,  she found out the results of her BRCA genetic test.   It was negative which was wonderful news.   I'll admit I've thought about my odds with my Mom and sisters diagnosis and definitely feel a sense of relief at this good news.

Ladies,  check yourself regularly.   Don't ignore symptoms.   Don't believe that because your symptoms are not the usual suspect,  that you have nothing to worry about. 

Lastly,  if you are concerned you may have a lump and are uninsured and that is preventing you from pursuing getting checked out,  there are often options.   Check with your local public health department to see if you qualify for any type of Medicaid waiver.   Check with local hospitals and local breast cancer awareness groups and find out if you can get a free mammogram.   Our local group,  Steel Magnolias gave us a ton of helpful information and even delivered my sister a tote bag full of goodies including handmade items and things to help her on this journey.  
Thanks for letting me share our story with you and God bless!

My sister Judi in the
background, 6 months before her diagnosis.

Thursday, October 10, 2013

So thankful for you card

I thought I'd try a new-to-me technique of dividing a card into 4 sections for this set I'm working on for a customer.

I layered a white card with beige textured cardstock and used 2 coordinating pieces of designer paper on the right.   Then I laid a piece of ribbon down the middle for the division and used a different stamped image in both left blocks.   Finished it off with a pretty piece of blue lacey ribbon. 

Here's what I used :
Inkadinkadoo butterfly from the Brenda Walton set (Tuesday Morning store) 
So thankful stamp (Target dollar spot) 
American Crafts Apricot ink 
  1. Colorbox brown ink


Wednesday, October 9, 2013

Christmas Cardinal Joy card

This is my new favorite stamp from the Unity Stamp Co.    It's the Silhouette songbird.  Isn't it sweet?

Look real close and you can see a tiny drop of Stickles glitter glue for the cardinals eye!

The ornament and the little partridge were cut from a piece of  Martha Stewart Christmas cardstock.  I also misted a paper doily with a red shimmering mist and tucked it under the centerpiece.  Love it!

My Pinterest - click here

Sympathy card with butterflies

This card was made with a sentiment from the Unity Stamp Co.    If my memory serves me right,  the butterfly came from a Pink Paislee clear acrylic stamp set.


I layered a white card with a piece of striped designer paper and centered a piece of beige paper that I punched with the mini 8 We R Memory Keepers Flourish punch.   The butterflies were stamped using Tim Holtz distress ink and I used a white gel pin over the looping trails of the butterflies.   I finished it with a tiny butterfly at the top corner and added some Stickles glitter glue,  then tied a piece of burlap twine.  

My Pinterest - click here
Unity

Tuesday, October 8, 2013

Christmas card - Silent Night

I'm so ready to start making Christmas cards.   We're finally getting a little cooler weather here in the South which is just the motivation I need to get started.   This is a super versatile Christmas stamp from the Unity Stamp Company's Wit and Wisdom line.   This is the first card I've made with this stamp and I went with a star theme.
I used white cardstock and edged about 1/2'' all around the card with Studio G black ink then added a piece of blue designer paper that had glittery white stars.   Next,  I used a small star shaped paper punch on some blue,  gray and white glitter cardstock.   I strung the stars with Tim Holtz glitter garland and stapled the garland to my page with black/white striped Fastenater staples.


For the next step I took a 6x6 paper doily and cut it in half,  folded it in layers and glued both pieces so they fan out.   Then I stamped my image on a piece of black scrapbook paper, tore it for a vintage look and placed it over the doilies with a couple foam dots to give it the raised effect.   Topped it off with a couple blue gemstones.   And now I'm ready to make some more!

Monday, October 7, 2013

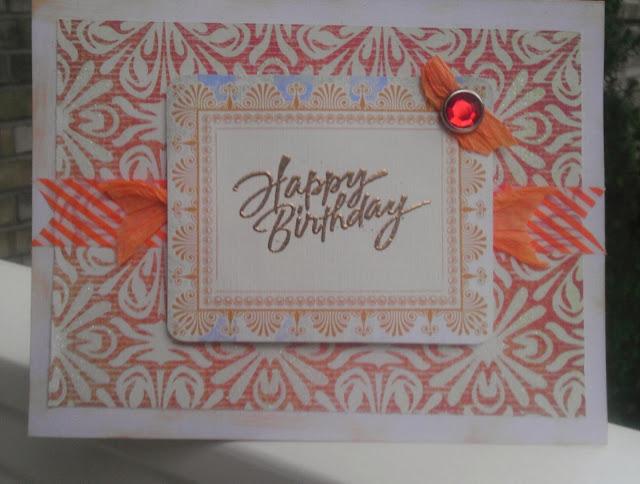
Birthday cards, heat embossed, washi tape

I'm working on a set of cards for a customer and wanted to share what I've done today.   Each one is different but has some of the same elements.   You can see some washi tape,  ribbon and all have been heat embossed with gold embossing powder.   I love the colors.  

Friday, October 4, 2013

What do you think? Logo

I was thinking about having this made into stickers for the back of my cards and as a promotional tool for my blog and /or other crafts that I make.   What do you think?   Yay or nay?   Any suggestions on where I can find a good deal on having these printed?


Thursday, October 3, 2013

We have a winner!

Congratulations to Deb Sanderson who won the Unity Stamp Co $10 gift card.   Deb has been contacted and her gc is on the way.   Deb is new to the Unity world so let's give her a warm welcome!


Thanks to everyone who commented,  followed and shared.  Check back again as I'll be having more giveaways in the near future.   I'm thinking a Black Friday giveaway next?     Hmm..... Why not!   Details to come..... Happy crafting!   Terri


Pink ribbon freebie

I just found Sandy over at Scribbles Designs.  She's got a few digital freebies so pay her a visit and give her some Blogger love.    This is the month to pay tribute to all our friends and family who have and are still fighting breast cancer.


Tell her Terri at wavingmywand sent you.


Wednesday, October 2, 2013

Baby boy skull gift tag

Ok now, bear with me.... My niece has a thing for skulls (In a cute way), and the theme is in her nursery and some baby clothes.   I think she and her husband are rock n roll wannabes, lol. Anyway when I wrapped her gift I decided to make a keepsake tag that even had the gift wrap incorporated into it. I started by sponging 2 different shades of green with black to color the tag. Next I used part of a stamp with the word baby in it. All you do is cover the part of the stamp with tape that you don't want to ink. Then I did some heat embossing with alphabet stamps for the babys name. The skull was a Halloween embellishment that I added googly eyes to and I finished with a metal piece and fabric. Finally I used a 1/2'' circle punch to punch the gift wrap and ran it through a Xyron sticker maker. Adorable! And...... she loved it.
Items used: 
Studio G ink
  Websters Pages fabric wrap
  KC &  Company skull
  American Crafts embossing powder
  heat embossing tools
  clear Versamark ink
 clear acrylic stamps
  Xyron 2.5'' Sticker maker

Pumpkin Spice Lattes.... Oh my...

Fall is officially here so today I'm going to share with you my absolute favorite latte recipe.   This comes from the Pillsbury website but can also be found at the Betty crocker site.  Whenever I make pumpkin bread,  I usually use half of the canned pumpkin and save the rest for making lattes.   You can store your leftover canned pumpkin for several days in the refrigerator in an airtight container.Try it out and let me know what you think.   Trust me,  you are gonna love it.   You can thank me later.  ;-)


PUMPKIN SPICE LATTE
# of ingredients 6-9
prep time 10 Min
total time 10 Min
Servings # 2

Ingredients:
Lattes:
2 cups milk (I use 2%)
2 tablespoons canned pumpkin (not pumpkin pie mix)
1 to 2 tablespoons sugar (to taste)
1/2 teaspoon pumpkin pie spice (or see below how to make your own pumpkin pie spice)
1 tablespoon vanilla
1/2 cup hot brewed coffee (I make mine strong)

*Garnish, if desired:
   Whipped cream
   Dash pumpkin pie spice
   2 cinnamon sticks

1)   In 2-quart saucepan, heat milk, pumpkin and sugar over medium heat until hot (do not boil). Remove from heat. Stir in 1/2 teaspoon pumpkin pie spice, the vanilla and coffee.
2)   Pour into 2 large mugs. Garnish each with whipped cream, dash pumpkin pie spice and a cinnamon stick.

**Expert Tips:
Allow the Pumpkin-Spice Latte to cool, and serve over ice for a cold version.

(If you do not have pumpkin pie spice at home, make your own by combining 1 tablespoon of ground cinnamon, 2 teaspoons of ground ginger and 1/2 teaspoon of ground nutmeg. This will make about 2 tablespoons of pumpkin pie spice mix.)

Tuesday, October 1, 2013

Sweet birthday card, scraps and washi

So my husband said I needed to make a birthday card for his sister.   And it needs to go in the mail tomorrow.   And I don't have much time.   What to do?   Bust out some scraps!   A dear scrapping buddy  (hey Nancy!)  convinced me years ago to save those scraps.   They come in handy,  believe me.  


This is actually a one sided piece of kraft card that I saved from a project gone wrong.   Had the faux sewing marks already on it (love my white gel pen).   All the scraps were pulled from a zip bag that I keep on hand.  All I really had to do was start layering.  


The washi tape was from a Target clearance find.   I paid  58 cents for a 4-pack of Tapefitti because the plastic casing was broken.   I'll take that deal!   Another neat thing I like to do?   Keep your sticker paper backing like from a Xyron machine. Place a strip of washi tape on the backing and use your shaped punches.  Then just peel your backing off and adhere to your project.   In this case I used a regular single hole puncher to punch some dots to match the strips on the card.   I also added some twine so this one sided card could be hung,  and signed our birthday wishes on the back.   Sweet!