Disclosure for Affiliate Links

Monday, January 30, 2017

Masculine Valentine for Coffee Loving Cardmakers

I'm up on the Coffee Loving Card makers blog today with this project for the guys,  featuring the Cuppa Love stamp set from Stamplorations, plus an svg file.


Head over the Coffee Loving Card makers blog for all the details and extra photos. 

Thanks for stopping by!

Terri

Linking to these challenges:


#coffeelovingcardmakers #stamplorations #cuppalove #coffee #valentine #masculine #wavingmywand #barista #basic grey


Sunday, January 22, 2017

Guest Designing with Deb and Celeste

My crafty pals, Deb and Celeste, asked me if I'd join them on their coffee crafting journey this month, as a guest designer and, of course, I'm not one to turn down the chance at making pretty, coffee themed cards, so I fell to my knees and kissed their coffee stained inky fingers, for allowing me to join in.


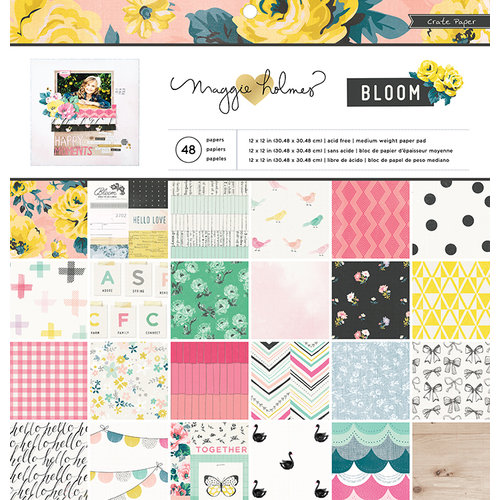
I broke out my Crate Paper Maggie Holmes Bloom 12x12 stack, along with the new Hampton Art Stamp designed by my other crafty pal (yes, we're all craft related in this world...) Gloria Stengel.   You can find this awesome coffee stamp at Scrapbook.com.  I do have affiliate shopping links scattered about, for your convenience, if like me, you have to have some of these goodies.

Celeste provided an inspiration mood board as pictured below, and I drew inspiration from the black/white stripes and subtle pinks.


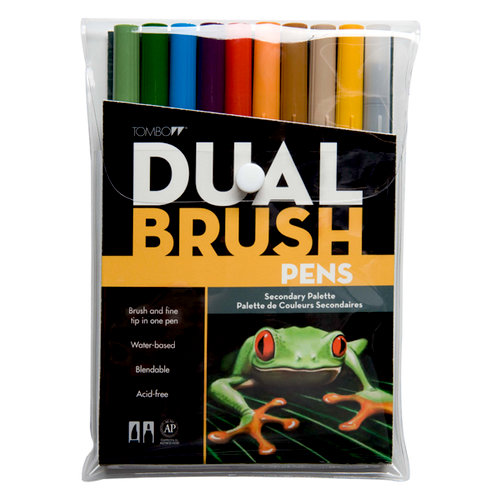
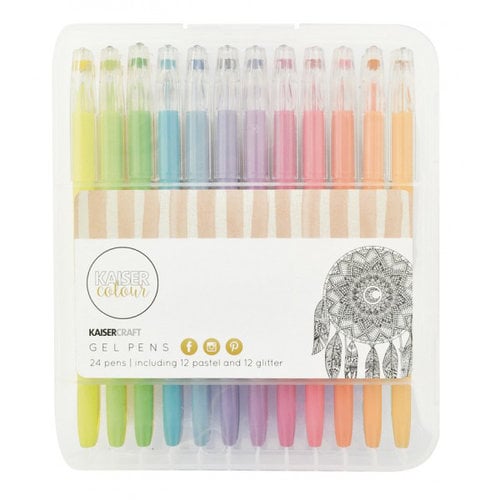
To begin,, I inked my sentiment on a pink piece of my Bloom cardstock, using a Tombow marker to swipe across my stamp for the word "coffee".  For the upper half of my coffee wording, I used a waterbrush and blotted with a paper towel to give a slight faded look.  For the lower half of the coffee word, I added sparkle with my copper Kaisercraft glitter pen.  I love the contrast. 


I added that same pink cardstock to the inside of my card and stamped with the rest of my sentiment by masking with washi tape that I had on hand.


I used chevron ribbon and folded the center of each loop inwards and secured with a piece of Thermoweb glue line, to create a fun double loop effect.   The frame around my sentiment was created by using my Spellbinders Celebration pierced square.  I trimmed a strip of adhesive rosettes and cut them in half lengthwise, to frame my sentiment, adding strips of more Bloom cardstock patterns and Maggie Holmes Crate Paper sequins.


The teacup was also part of the Bloom collection and I fussy cut the image and popped it up on foam mounting tape.  I thought it would be a little too girly to give to my husband for Valentine's Day, so I may just save it and give it to my mom for Mother's day.  What do you think?


Thanks ladies for having me along.  I loved the inspiration mood board! Of course, I have to share what I'm drinking today and that would be Seattle's Best #4 from my French Press and guzzled from my Pfaltzgraff mug that I picked up last year from Big Lots for $4.00.  Love this cup.


 Be sure and check out 
Deb's project here, and Celeste's project, here.


Follow me on social media:


Sharing at these challenges:


Products Used:


Shop Your Fav Brands at Scrapbook.com


#wavingmywand #cratepaper #maggieholmes #bloom #gloriastengel #hamptonart #morethancoffee #coffee #coffeecard #card #cardmaking #DIY #terriburson #tombow #kaisercraft #glitter #ribbon #spellbinders #celebration #pierced #dies #teacup #coffeecup #mug #blackandwhite #stripes

Friday, January 20, 2017

Using Your Die Cutting Machine as a Money Maker (+Coupon Code!)

You all know that I love my Cricut Explore.  I mean, really, really, love it.  So much so, that I signed up to be an affiliate a couple years ago.  I use it for so many things.  During the holidays, I spend a lot of time making custom vinyl decals for tumblers and mugs by custom order.  Not only is it a super fun crafting tool, but I'm actually making money, using it!  Let me share a couple things that relate to my Cricut, but the general information I give will apply to other brands as well.


Having a little side income is an added bonus and if you love to tinker with technology, you can visit many free font websites and load up some really fun fonts to play with.  I love hand lettering fonts and calligraphy fonts and have used many for my own personal use.  Some of the artists who design these fonts do require that you purchase a commercial fee license if you plan on making items for sale, but these are usually very small, generally starting at $5.00.  Not a bad price, if you're going to use them as a money maker.  Do your research and google how to upload fonts to your computer.  Once they're loaded to your computer, you simply right click on the folder that holds your files and click to install.  

If you use Cricut Design Space™, once you log in, you'll find your new fonts under "system" fonts.  They may not be in alphabetical order, so be sure to scroll to the end of your list to find them.

I'm seeing so many hand crafted die cuts being sold on Etsy and I really need to get in the game.  One of my goals this year is to stop letting things accumulate and start listing.   I'm an avid cardmaker and have quite the stock pile from doing design team work.  I'm so busy, I haven't taken the time to whittle down this stock pile.  I've come to realize.....THIS IS MONEY JUST SITTING HERE!  I need to sell my handmade cards!

I really want to find a niche item that I can sell, as well, using my Cricut to cut multiples.  I haven't decided yet what my "niche" item will be.  Are you making money with your die cutting machine?  I would LOVE to hear how you're using it, what you're selling and where you're selling.  Please feel free to share in the comments section.  I really want to know!  Share your Etsy page, if you like, also.

If you don't own a die cutting machine then let me share this good news.....

I'm sharing this news and my affiliate links because I believe in Cricut.  I've been a loyal brand user for many years.  You can even download the Cricut Design Space™ app to your iphone or Android phone and design using bluetooth technology.  What will they think up next?!  You have a little time to get in on the sale and free shipping but don't wait too long, as these offers don't come around very often.

If you already own a Cricut and just want to check out what's on sale, go here.  You can use the coupon code on sale items too!


By the way, the bundle deal that you see in the photo above is on sale.  Combine that with the coupon code and you've got a pretty sweet deal.


#cricut #affiliate #sale #cricutexplore #cricutexploreair #couponcode #diecuttingmachine #cricutdesignspace #wavingmywand #terriburson #vinyl #bundle

Monday, January 16, 2017

Mug Hug Love for Coffee Loving Cardmakers

Happy Monday to all my coffee loving papercrafting friends!  I'm up on the Coffee Loving Cardmakers blog today with my Coffee Buzz feature, and it would be awesome if you'd pop on over and check out all the details on my project that features Sunny Studio Mug Hug Stamps. *afflink


Check out my project, here. For more coffee, cocoa and tea papercrafting inspiration, visit coffeelovingcardmakers.com.  


Visit Sunny Studios Stamps for more product selection and fun!


Shop Your Fav Brands at Scrapbook.com


#coffeelovingcardmakers #wavingmywand #sunnystudiostamps #sunnystudio #mughug #winter #valentine #valentinesday #starbucks #birthdaycakepop #coffee #coffeelovers #coffeecard #cocoa #cocoalovers #cocoacard #marshmallows #heart #tea #tealovers #watercolor #dcwv #tombow #tombowusa #terriburson #fishtailbannerdies

Glittery Snowflakes for So Suzy Stamps

I've got another project for you that features So Suzy Stamps.  Today, it's all about the snowflakes.  I'm working with two of Suzy's stamps, "Snowflake Trio" and "No Midnight".  


If you're needing to spice up your crafty mojo, follow along with our theme/technique inspiration for January.  Then, share your creation with us on the So Suzy Stamps Flaunt it Facebook Group.  It's where the cool kids hang out!


First, trim a piece of 4" x 6" watercolor paper.  I use Bristol Strathmore 300 series.  Grab your Snowflake trio and stamp in Versamark clear ink in the pattern that I used above, or one of your own.  I stamped a couple clusters, then masked and stamped individual snowflakes in a cascading pattern.  Sprinkle with Nuvo Shimmering Pearl Embossing powder, tap off the excess and heat with an embossing heat tool.

Now, for the fun part.  Coloring and blending.  Grab your watercolor pencils and a water brush.  If you don't have any, it's time to go shopping!  I used just a couple blues and purples, coloring randomly then blending the colors with my water brush.  


You can see below, how the waterbrush blends and moves the color around.  I love this technique.  It's so easy, yet yields fantastic results almost every time.  Ignore the embossed sentiment.  Originally I was going to use white but it disappeared into the background, so I opted to instead emboss on vellum.  Allow to dry, then use a baby wipe or wet paper towel to wipe across your embossed snowflakes to remove the watercolors.  If you're too impatient, to let it dry, (yes, sometimes that's me....) you can use a heat embossing tool to quickly dry.  If it buckles or warps your paper, grab your iron and some parchment paper.  Place your painted image facedown, between the parchment paper, and iron your image.  This will straighten out any warping.  Take care not to iron too long, so you don't damage or burn your watercolor paper.


I used my Nuvo Silver glitter Moondust crystal drops and just added tiny drops on the center of some of the snowflakes.  I heat embossed my sentiment on a torn strip of vellum, adding  more individual embossed snowflakes, then popping everything up on foam squares, placed under the snowflakes, so as not to show through the vellum.  If you zoom in, you'll see some fringed silver ribbon peeking out from under the vellum as well.


Measure layered purple cardstock and trim your watercolored paper so that they line up appropriately on an A2 sized white card.  


Thanks so much for stopping by.  Remember, there will be shipping delays due to staff heading to the Creativation Conference.  Thank you for your patience!


Supplies include:


No Midnight
Snowflake Trio


Glitter Silver Moondust


Shimmering Pearl


#sosuzystamps #wavingmywand #nomidnight #snowflaketrio #snowflakes #embossing #watercolor #bristolstrathmore #nuvo #glitter #crystaldrops #vellum #terriburson #card #cardmaking #diy #craft

Wednesday, January 11, 2017

Kisses, Snowflakes and Bunkie Bags

Hop on over to the So Suzy Stamps Blog today, and check out this brand new custom made Bunkie Bag that you can only find at Suzy's store.  


Plus, get some fun tips on how I made this matching card, complete with puffy hearts made with a snow marker.  


Supplies include:

Snowflake Trio stamp. 


Please note there will be shipping delays as shown below while Suzy attends the Creativation Conference.  We appreciate your patience!


#sosuzystamps #snowflake #kisses #winter #snow #wavingmywand #bunkiebags

Tuesday, January 10, 2017

Design Team Blog Hop with So Suzy Stamps

Welcome to the first So Suzy Stamps Blog Hop of 2017!  If you arrived from Oleysa's blog, you're in the right place.  


Today, I'm featuring the "All You Do" sentiment, paired with the "Spire Sage" foliage stamp.  I'm doing a lot of Thank You cards this month, as January is National Thank You Month.  Plus, I need to send gratitude for all the holiday gift giving.  Take a minute and scroll through the brief tutorial below. 


Begin by inking the Spire Sage stamp with white pigment ink, onto black cardstock.   I'm using my Misti, along with a strip of washi tape to provide an even edge.   Use a water brush to distribute some of the ink, or a small wet paintbrush.  Use this same technique for the sentiment.


You can also tint with another color if you like.  I used Mellow Mint from the So Suzy Ink Bites Coastal Breeze collection.  Just dab onto your craft mat (I like to use leftover sticker paper from my Xyron sticker maker) and grab the color with your water brush or wet paintbrush and touch up with the color.  Stamp sentiment using the same technique above and when finished, trim cardstock "border" to 2" x 4".  Pop up with foam mounting tape.


Next, I used my Tim Holtz Crackle stencil.  I did a little sponging with ink then gave it up for some Stickles glitter glue.  Squirt one color all over (Diamond) and spread with a popsicle stick, then fill in the gaps with another color (Lagoon) and do the same.  Dry with a heat embossing tool to speed things along.


I thought it would be fun to add a little "snow" so I grabbed my snow marker and touched up any additional empty spaces that I could find.  Use a very thin coat, allow to dry for a few minutes, then use your heat emboss tool to "puff" up the snow.  Take care not to overheat, or it will leave burn marks.  I found my snow marker on clearance at Hobby Lobby in the Christmas Craft section.


See the puffy snow?  I also added some tiny Lagoon stickles on my foliage.  A thin strip of embossed vellum, DoubleClick Skittles, sequins and adhesive glitter ribbon complete my project.  (photo blurred below to view sparkles!)  This card also follows our January theme and technique inspiration: Baby It's Cold Outside/Use Vellum.


I was going for a wintry, mountain look.  It is so pretty in person with all the sparkle and glitter. 


Next up, is Giada.  Head on over to her blog.  


If you get lost along the way, head back to Suzy's blog.  Be sure and leave a comment on all the design team blog posts to be entered for a $25.00 gift certificate to So Suzy Stamps.  Begins 1/10 and ends 1/14/17 at 11:59pm MST.  Winner announced on 1/17/17 at sosuzystampsblog.com.  Good luck!

Please be aware that due to the Creativation conference, shipping delays are as pictured below.  Thank you for your patience.  Please be aware that shipping is usually lickety split!


#sosuzystamps #winter #sage #spiresage #thankyou #nationalthankyoumonth #wavingmywand #ranger #stickles #stamps #card #cardmaking #DIY #craft #scrapbook #vellum #timholtz #crackle #stencil #terriburson #snow #babyitscoldoutside #coastalbreeze #sosuzyinkbites #mellowmint #americancrafts #glitter #glitterribbon #bloghop #designteam

Tuesday, January 3, 2017

Creating A Scenic Card With Adornit

Today, I'm going to show you how easy it is to create a scenic card, featuring many of my favorite products from Adornit.  My inspiration?  That adorable little gnome from the Floral Jars Art Play collection.  Let me share a few quick tips on making this business sized #10 card, roomy enough for a fun, fantastical scene.


First, choose your images.  I chose to incorporate several different Adornit Art Play collections, looking for elements that would coordinate well together.  The mushrooms and flowers from the Today is Best and Adventure collection were perfect.  Mixing and matching is a great way to get creative and, at the same time, stretch your craft supplies.  


Next, pick your coloring medium.  I'm using Adornit watercolor pencils with my water brush.  This set comes with 36 amazing colors, however, I had specific colors in mind so I limited myself to using just a handful of  my watercolor pencils - teal, black, gray, red, two yellows and two greens.
 
Good quality watercolor pencils are essential, to achieve subtle blending, shading and smoothness.  The best tip I can give on shading with watercolor pencils is, start with the darkest color and outline your image.  Next, use a lighter color to fill in, leaving white space in the middle.  This will be your "reflective light", which helps give a three dimensional look to your colored images.

These are not your basic crayons in a box.  A little goes a long way.  You don't need to color your entire image.  Your water brush will spread the colors around and help blend.  If you feel that you have too much color, grab a paper towel and blot.  This works great for achieving "reflective light", as well.


When you've finished coloring your images, grab your scissors and begin fussy cutting.  I like to use my Fiskars fine tipped titanium scissors for this task.  

For the layered hillside, I'm using a multitude of Adornit scrapbook papers, including the Nested Owl  Mint papers, Laura Kelly papers and blender paper.   Some are available at adornit.com and others are available at scrapbook.com.  I love to shop both stores for my Adornit products.  The prices are excellent and shipping is very reasonable.  I do have affiliate links scattered throughout, for your convenience.

Back to the hillside.... the more layers the better!  Mix and match patterns and colors for that extra wow factor.  The double sided black and white dot papers designed by Laura Kelly for Adornit are one of my favorites.  It was a true lightbulb moment when I thought to color a few of my dots from the scrapbook paper, to match my mushrooms.  Don't you love when that happens?  You can easily use scissors to trim wavy strips, however I used a stitched border die with my Cuttlebug die/emboss machine.  


Because the card dimension is 9.25" by 8" (scored at 4"), most stitched dies are shorter in length.  
For those of you who do like to use these, simply run one pass through your machine, then tape down your die at the end of your first cut, and run through again.  This lengthens your stitched border cut.  If you'd like product info on the die that I used, go here.  I love when my crafty supplies play nicely together!  Don't you?


Lastly, I used a sentiment from the Owl Charcoal stickers, chopping it up and spreading it out a bit for more visual effect.  

Thanks so much for popping in today.  I hope I've given you a little inspiration to try out a scenic Adornit card.  If you decide to give this a try, please share with me on my Facebook page, Waving My Wand, or tag me on Instagram.  Be sure and follow me, too.  Of course, you are always welcome to share in the Adornit Art Play Facebook Group as well.  We'd love to see you there!


from: Scrapbook.com


from: Scrapbook.com


Adornit has so many amazing products for planner girls and guys, scrapbookers, sewing/fabric products, coloring and more!  Thanks so much for stopping by!


Shop Your Fav Brands at Scrapbook.com


#adornit #adornitambassadors #scrapbookcom #afflink #gnome #floraljars #laurakelly #scrapbook #cardmaking #cards #sceniccards #watercolor #pencils #coloring #artplay #paintables #DIY #adventure #owl #wavingmywand #terriburson #stamplorations #stitched #die

Monday, January 2, 2017

Coffee Buzz With Terri and Coffee Loving Cardmakers

I'm so excited to be sharing my first design team post today over at Coffee Loving Cardmakers.  I've been a fan, follower and participant since it's inception and couldn't be happier to spend more quality time with my "people";  coffee loving crafters!  
Head on over to my blog post at CLC to get all the details on this card that features Verve Stamps, my Misti and lots of coloring, here.


My new feature at Coffee Loving Cardmakers will showcase every other Monday.  
I hope you'll stop by!


Shop Your Fav Brands at Scrapbook.com


#coffeelovingcardmakers #designteam #wavingmywand #vervestamps #thanks #thankyou #latte #coffee #cup #teacup #coloring #tombow #tombowusa #zigcleancolor

Galaxy Fairy Canvas for So Suzy Stamps

I hope you all had a splendid New Year's!  I'm kicking off my first individual design team post of 2017 with a canvas project featuring the Moon Fairy and the sentiment, Talk To The Moon.  Yes, I'm an avid card maker, but once in awhile, I like to stamp and paint.  So, today is your lucky day.  I'm mixing it up, here at So Suzy Stamps!


You can see from the graphic below, we have a theme and technique challenge for the month of January.  Does it get any colder than outer space?  I don't think so.  Ok, so maybe it's a stretch, but I can promise, you'll be seeing more wintry projects from me this month, as well.  I am, however, taking full advantage of the technique challenge and using vellum to heat emboss my image and sentiment.


I've got a step-by-step tutorial for you so let's get started.  You probably have most of it these items on hand already, but if you don't, it's a great excuse to go shopping.  In addition to your stamps, you will also need:

- 6"x 6" black canvas (art section of craft/hobby stores)
-white gesso
white acrylic paint (DecoArt)
-medium and small paintbrush
-chalk ink in purple/blue hues + white
-sponge dabbers
-glue pen 
-clear liquid glue (Tombow)
-black embossing powder (Nuvo)
-black extra fine glitter
-vellum
-heat embossing tool
-craft knife (Pen Blade)
-popsicle stick or large nail file


1.   Grab your medium paintbrush and squeeze some white gesso onto a craft mat or similar surface and begin painting random circles on your canvas.  Keep in mind where you wish to place your image and sentiment so that the white circles serve to bring them to the forefront.  You don't want black embossing to fade into the black canvas.  

The gesso is needed to prep your surface for the paint.  To speed things along, dry quickly with your heat emboss tool.  Paint one or two layers of acrylic paint on top of your gesso painted circles, drying in between each layer.  I used DecoArt Multi-surface satin paint in Cotton Ball.


2.  When circles are completely dry, take sponge dabbers and dab colors onto the right side of your circle.  I envisioned a crescent moon shape and dabbed first one color of purple, another shade of purple, then blue.  You can vary and have multiple colors on one circle or just one color.  Mix it up - it's all good fun and you can pretty much do what you want here.

I decided I needed smaller circles and paint "dots" so I painted a little more.  I also added some  sponged "faded" circles with white chalk ink as shown in the original photo.  I failed to get an extra shot of those faded sponged circles but it's pretty easy.  Just dab circles and make some lighter and some a little darker for a shadow effect.  

You can also add extra tiny paint splatters by dipping a wet toothbrush into your paint and running your thumb across the paint dipped brush and "splatter" your canvas.  Be sure to have a clear area or do this in a box so you don't mess up your table!


3.  Heat emboss the sentiment and fairy onto separate pieces of vellum.  For the fairy, it works best to fussy cut after the glitter process.  The vellum offers a wide berth (yes, I just said, "wide berth") to work with and will prevent the image from curling while gluing.  Use a glue pen (Zig) and add a layer of glue to the fairy.  Quickly, sprinkle with black glitter, tapping off excess and use heat embossing tool to dry.  Now, you can fussy cut your fairy.  Use a craft knife of Pen Blade for the smaller section in the middle.


4.  Use clear glue, such as Tombow mono aqua, to glue the backside of your fairy and sentiment to the canvas.  It helps to grab a popsicle stick or similar item to hold down your image to keep it adhered and avoid curling while drying.  Just a minute or two will do the trick.   As you can see, I cut my heat embossed sentiment into four lines and spread out on my canvas for more visual appeal.


Thanks so much for stopping by.  I hope you enjoyed today's project.  I'll see you next week for the design team blog hop.  Be sure to visit Suzy's blog to look around for more design team inspiration and check out the store   So Suzy Stamps is a one stop shop and you'll find a wide variety of stamps, stencils embellishments and more.  

If you're not already following me on social media, it's a great way to keep up with the latest deals, crafty inspiration and giveaways!