Showing posts with label scripture. Show all posts

Tuesday, March 11, 2025

Lakeside Sunset Scripture Card

Hello friends! I'm sharing this card today that features Angie Blom Digital Designs with OLO Marker coloring. I used a lot of colors and share more details on that further down. I also have a lot of  technical information regarding the formatting of the digital designs and the creative process, so buckle up, grab your favorite beverage and hang with me for a bit!

If you've never worked with digital images, my hope is that in sharing my experience and knowledge, it will be a little less scary! The cost is so much more affordable than physical stamps, and you have creative license to do so many things with digi files. Plus, Angie often has really great sales! 


 (FTC Disclosure: as an affiliate for various companies in the craft industry, I will receive a small commission for purchases made through my convenient affiliate links, at no additional cost to you.)


I'm using 2 different digital collections, Love The Lake Background and Let Your Light Shine Girl, using the sentiment from that set.

I also do all my editing and printing in Microsoft Word. I have an older version, so your version make look a little different but, below is a synopsis of my edits.

I keep an A2 size blank document in my computer files since that is generally the size of cards I make. When I add graphics, I simply save it under a different file. I also keep a saved file on my computer of every card scene I create, so all I have to do is print, if I want to make another later on.

You'll notice below, I sized my images to be offset all the way to the edge of my A2 size word document. That's because I wanted the image to fully cover my card. I did very little trimming afterwards. When I do this, I usually get a word "error" stating my edges are outside the printed margins, or something like that. I always click yes, that I want to proceed.


I download all my Angie Blom digital designs into a dedicated folder on my desktop. In the photo above, I selected the png file I wanted to use from that folder and printed it using 100 lb cardstock. When working with multiple images that may need to be resized and formatted, always use the png file, not the jpeg file.

I had added some other elements, colored everything up and just wasn't happy with it. The reason I mention this is, I wanted to salvage the coloring from the upper portion of my sunset and trees. I trimmed my colored upper half at the "path", so I could splice it together with the lower half later.
To splice it together, I did use another white panel as backing, to adhere them together and line them up right and trim the edges as needed. You can't even tell, unless you run your finger across the center!


I ended up cropping out the bottom section of trees and water, so I only had the upper scene. I flipped it upside down and moved it to the bottom of my cardstock. I also wanted to make my trees look a bit more blurred, as a reflection in the water, so I found a really cool artistic feature called "glass" and converted it.

I should mention, you need to right click on your image first, and select format picture to find your options.

Once finished, I printed that on a separate sheet of cardstock and colored it just like I did for the top part of my scene.


All the designs are inserted as pictures when adding to a word document. I inserted my sentiment but needed to center it and scale it down just a bit. Because I wanted to print my sentiment onto my already colored cardstock, I needed to leave my lake image intact.

In order to move my sentiment, I had to "wrap text" "in front of text". This allows you to move an image around your screen when there are multiple images. Often times I have to edit my images, move some to the front and move some to the back in order to center everything just how I want it prior to printing.

Once, I had my sentiment centered, I deleted the other images from the screen so I could run my colored cardstock back through my printer and have my sentiment print on my scene.

You could also just print your sentiment on a separate piece of cardstock and adhere it to your colored card, but I really wanted to keep this a one layer card. They're my favorite cards to make!


I was really surprised how intense my coloring turned out, however, I laid down a lot, and I do mean a lot of color. I wanted to get as seamless of a blend as I possibly could.

To avoid any blotchiness, I used a side to side swipe technique. I don't know if that's a thing, but it works for me. I started with the base of my sun, coloring in oranges, then reds, and going back over several times, blending it all together. Start with light colors and work your way up to deeper colors.


 It's so easy have your colors be blotchy in a large scene like this, so don't color in circles. Color all the way across, placing your marker so the side of your brush tip touches the paper. I try to do continuous coloring from left to right or vice versa. 

I also added paint splatters and used a white gel pen in places; dotting the trees, adding some to the pathway and around the edge of the sun on the lower water scene, to soften the circle's edge.

For my pathway and around the lower sun, I would smudge the gel ink after it was applied, with my finger.

I did use a strip of low tack tape to cover my sentiment before creating the paint splatters.


Here's a breakdown of all the OLO colors that I used. Some are pictured above, but some were on the flip side of what you see pictured, since I typically purchase the half markers and use the ring connectors. So basically, you can have 2 markers in your hand at once! Also, another plus that I love about these artist markers is that they have a ton of ink in them. There's more ink in a half marker than any other brand of FULL markers on the market! 

Colors:

RV0.1, RV0.2, RV0.4, BV1.1 (sky)
OR1.2, OR1.3, 02.4, OR2.5, R1.5 (sun)
BG2.3, B4.3, B0.5, BG 0.8 (water)
OR3.4, 02.7 (path)


My full card dimensions, after creating my card panel, trimming a backing with black cardstock and scoring my own card, was 4 1/4 x 5 3/4 inches.

I hope this has been helpful. I would love to hear from you in the comments! Also, I'm an affiliate for OLO Marker so if you decide you'd like to start your own collection of these amazing artist markers, or add to your current collection, I would really appreciate if you shop through my affiliate links, or even if just to browse for product information. These links are provided at no additional cost to you. The company pays me a small commission, a few cents per dollar for purchases made through my affiliate links. It also allows them to see how their customer base finds their way to their site, so make me look good, haha!

Browse or shop OLO Marker, here. Check out their resource section too, they have printables you can color, and also swatch sheets to print!

Thanks so much for stopping by. If you stuck around for all my chit chat, I appreciate you so much! Have a great day!


Terri


#wavingmywand #olomarker #angieblomdigitaldesigns #coloring #artistmarkers #olomarker #cardmaking #cards #scripture #bibleverse #sunset #lake #letyourlightshine #digifiles #digitalimages #digitaldesigns #printables


Monday, November 4, 2024

O Holy Night Stenciled Card for Erin Lee Creative

Today's card features the O Holy Night stencil from the new Erin Lee Creative Christmas release. I love religious Christmas cards. They're my favorite style of Christmas cards to make because of my belief in the reason for the season! I've done a lot of ink blending and paint splatters. Scroll down for creative details and tips. My clickable supply list will be at the end, if you're interested in any of the products that I've used today.


(FTC Disclosure: as an affiliate for various companies in the craft industry, I will receive a small commission for purchases made through my convenient affiliate links, at no additional cost to you.)


I used small blending brushes and also tiny detailer brushes for this stencil. It's not perfect but I'm ok with that. I would call this more of a mixed media style. 

For my green color, I used Catherine Pooler Deck The Halls Ink. My gold color is actually gold paint.


I love using my Wendy Vecchi Make Art Staytion for stenciling because of the magnets that hold both my stencil and cardstock down. Even so, when stenciling with paint, it can definitely eeek out under the stencil.

I would recommend using Pixie Spray on the back of your stencil to help prevent this. Just let it dry for about a minute before laying down on your cardstock. If you're a reckless crafter, like me, haha, you can just take care to hold your stencil down as tight as possible while stenciling. Just be real careful when lifting up your stencil that you don't smear your paint.


My favorite tip for paint splatters is to drop a small amount of paint onto an acrylic block, spritz with a tiny bit of water and mix with a paintbrush. Flick the paint off the edge of your acrylic block with your wet paintbrush, randomly around your card. This is such a quick and easy technique and gives great results! Just be sure and rinse your paintbrush and acrylic block immediately.

Lastly, I backed my card with some pretty plaid paper from one of my Christmas paper pads in my stash. I tend to create and measure after I'm done. I would recommend starting out with a trimmed 6x6  inch piece of white cardstock for your stenciling.

My full card dimensions measure at just under 5 x 5 1/2". I trimmed my inked panel and another backing of white cardstock accordingly to fit my dimensions over the plaid paper and white card.

In essence, I worked backwards! Yes, you heard it right. I ink up my card panel first, trim it down by eyeballing how I think it will look on a card with other layers and go from there. 

If you'd like to shop, I have convenient affiliate links below. There is no added cost for you to use my links and I appreciate it so much when you do. See you next time!

Terri

*******************************************

Ranger US HEAT IT CRAFT TOOL
Shop at:
Scrapbookcom
Neenah Solar White Cardstock 8.5x11 inch
Shop at:
Scrapbookcom
Wendy Vecchi Make Art Stay-tion
Shop at:
Scrapbookcom
Wendy Vecchi Makeart Non-stick Craft Sheet
Shop at:
Scrapbookcom
Refillable Permanent Adhesive Runner - 49 feet
Shop at:
Scrapbookcom
Dylusions Paint Brush Set
Shop at:
Scrapbookcom
Exclusive Blending Brushes - Small - 3 pc
Shop at:
Scrapbookcom
Catherine Pooler Ink Pad - Deck The Halls
Shop at:
Scrapbookcom
Tim Holtz Distress Palette Knife Set - 2 pc
Shop at:
Scrapbookcom
Tiny Detail Blending Brush Bundle
Shop at:
Scrapbookcom
O Holy Night Stencil
Shop at:
Erin Lee Creative
Christmas Patterned Cardstock Paper Pad - 6x8 in
Shop at:
Scrapbookcom
Stamperia Vivace Acrylic Paint
Shop at:
Scrapbookcom
Therm O Web Pixie Spray Light Tack Adhesive
Shop at:
Scrapbookcom


#wavingmywand #erinleecreative #christmascards #oholynight #stenciling #inkblending #catherinepoolerink #stamperia #goldpaint #paintsplatters #holidaycards #scripturecards #religiouscards #cardmaking #diycards

Saturday, October 26, 2024

Nativity Christmas Card for Erin Lee Creative

Hello cardmakers. The new Christmas release from Erin Lee Creative went live yesterday. I couldn't wait to ink up this card that features the Thrill of Hope stamp set. Scroll down for creative details, plus my clickable shopping supply list at the end. Also, shopping through these ELC links will get you a 10% discount!


(FTC Disclosure: as an affiliate for various companies in the craft industry, I will receive a small commission for purchases made through my convenient affiliate links, at no additional cost to you.)


I started by taking an A2 sized card panel and doing some ink smooshing along the bottom edge with Ranger distress oxide ink in Vintage Photo. This involves pressing your ink pad onto a craft mat, spritzing with water, then dabbing your card panel into the wet mixture. I let a lot of the ink run and pool, then dried with my heat craft tool

Next, I stamped my image and colored it with OLO Markers.  I also did some ink blending for my sky and around the image using Ranger Prize Ribbon distress ink and Catherine Pooler Drive-In ink, with my blender brushes.


For my stars, I splattered some water droplets onto my sky, blotting with a paper towel, and also used my Spellbinders Splatter White. The best way I find to use the Splatter White, is to grab an acrylic block, use a paintbrush to dip a tiny bit of the thick paint onto the block then mix with a bit of water. Swipe and flick the mixture off the edge of the acrylic block with the paintbrush to splatter the wet mix. It's quick and easy to do.

For my rays of light shooting out from my star, I laid down two pieces of non-tacky tape and blended some white pigment ink in the space in between, using my tiny detailer blending brush. If you use any other tape, such as washi tape, I highly recommend you prep your tape first by laying it across your arm and rubbing. This picks up the oils from your skin and will prevent the tape from sticking to your inked surface and peeling off bits of paper. You don't want to destroy your pretty creation and start over, right?

Lastly, I used a white gel pen to accent a light effect on some of my images, as if beams of light were hitting that spot.


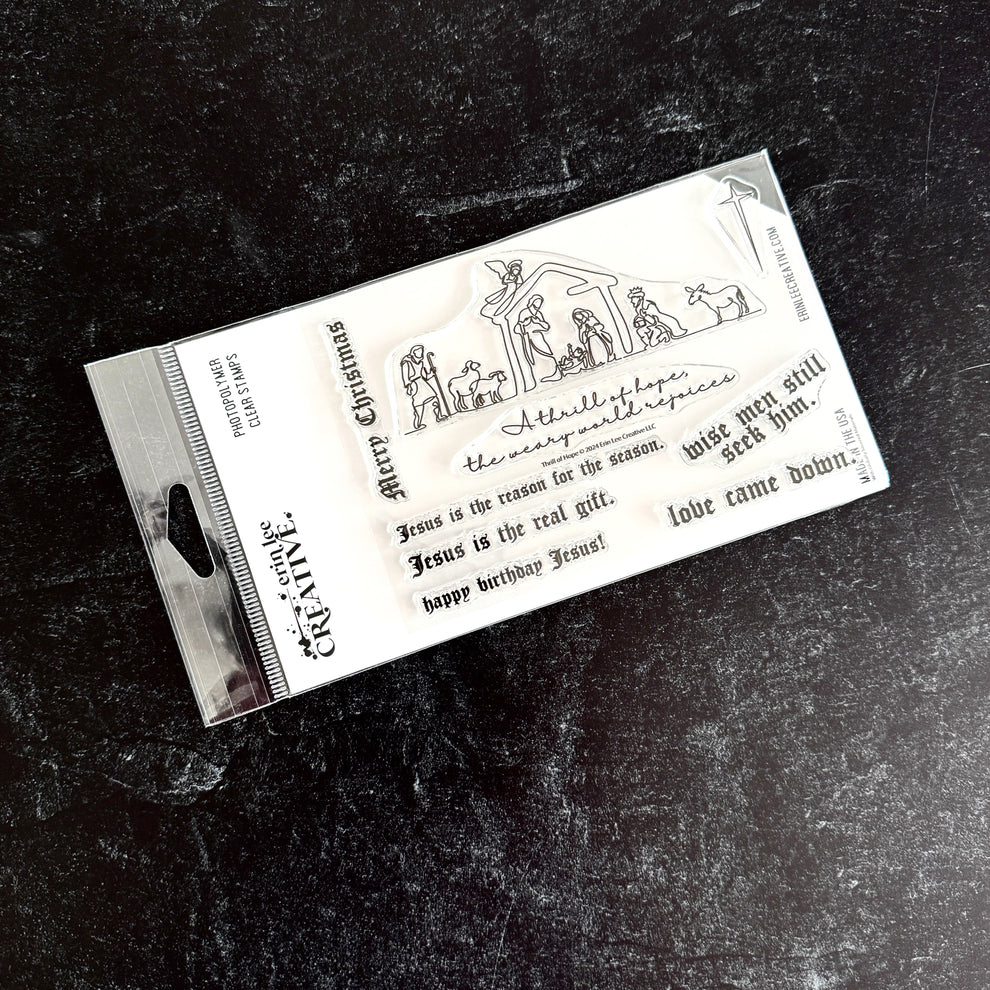
There are 7 different sentiments with this stamp set, in a variety of fonts, including one scripture verse.
Check out the entire new release, here, as there are some other amazing products! I'll be sharing more in the coming days and weeks, stay tuned!

Thanks so much for popping in. If you decide to shop, please use my affiliate links. Clicking this affiliate link, will get you a 10% discount on your entire purchase, not to be combined with any other offer. Have a great day!

Terri

************************

Ranger US HEAT IT CRAFT TOOL
Shop at:
Scrapbookcom
Lawn Fawn Black Licorice cardstock
Shop at:
Scrapbookcom
Neenah A2  Solar White Card/Env. 25 pc set
Neenah A2 Solar White Card/Env. 25 pc set
Shop at:
Scrapbookcom
Neenah Card Front Solar White 5.5 x 4.25 inch 25 pk
Shop at:
Scrapbookcom
Ranger Ink Distress Ink Vintage Photo
Shop at:
Scrapbookcom
Premium Pigment Ink- Pure White
Shop at:
Scrapbookcom
Scrapbook.com Hybrid Ink - Black
Shop at:
Scrapbookcom
Wendy Vecchi Makeart Non-stick Craft Sheet
Shop at:
Scrapbookcom
Refillable Permanent Adhesive Runner - 49 feet
Shop at:
Scrapbookcom
Dylusions Paint Brush Set
Shop at:
Scrapbookcom
Ranger Distress Ink Pad - Prize Ribbon
Shop at:
Scrapbookcom
Exclusive Blending Brushes - Small - 3 pc
Shop at:
Scrapbookcom
Rose Quartz Misti Stamp Positioner
Shop at:
Scrapbookcom
Spellbinders Splatter White
Shop at:
Scrapbookcom
3mm Adhesive Strips 160 ct.
Shop at:
Scrapbookcom
Mint Tape - 1 inch roll - 11 yards
Shop at:
Scrapbookcom
ELC Thrill of Hope Stamp Set
Shop at:
Erin Lee Creative
Tiny Detail Blending Brush Bundle
Shop at:
Scrapbookcom
Catherine Pooler Ink Pad - Drive-In
Shop at:
Scrapbookcom
Gelly Roll White Pens - 3 pk
Shop at:
Scrapbookcom


#wavingmywand #erinleecreative #thrillofhope #christmas #cards #cardmaking #scripture #bibleverse #religiouscards #faithbasedcards #oholynight #rangerink #catherinepoolerink #spellbinders #scrapbookcom #nativity

Sunday, October 6, 2024

Blackout Inspiration Card for Erin Lee Creative

Hello my lovely friends! I'm back with another card featuring products from the new Erin Lee Creative release and testing out the blackout technique for the first time. I've also got some coupon codes! Scroll down for details.


(FTC Disclosure: as an affiliate for various companies in the craft industry, I will receive a small commission for purchases made through my convenient affiliate links, at no additional cost to you.)


First, let me tell you about the new Faith Over Fear stamp set. It comes with inspiring quotes and scripture but what really caught my eye was a lyric from one of my favorite contemporary Christian songs sung by CeCe Winans - Goodness of God. It's a gorgeous song, look it up! In fact, it's been in my head for days, thanks to working with this stamp set, haha!

I decided on a floral backdrop, so I chose my 3D embossing folder, Botanical Bliss, to test out my technique. This embossing folder is currently on markdown and any markdown items are 60% off when you use coupon code OCTOBER at checkout.


I first saw my crafty friend Ilda (@ilovedoingallthingscrafty) on Instagram do the blackout technique a couple months ago. I've been wanting to try it and finally made the time.

Basically, you dry emboss your cardstock (I used white), then flip your embossed cardstock over to color on the negative side. Don't color the empty space that surrounds your embossed images. I also used my OLO Markers to color. 

You don't have to be precise or worry about coloring outside the lines. This technique may work best with 3D embossing folders because of the deeper impression, but I haven't tried it on regular embossing folders so I can't be sure.


When finished coloring, grab a black ink pad and swipe it from top to bottom on your colored cardstock. I recommend you make sure your ink pad has plenty of ink. 

You can go in after adding the blackout and touch-up your coloring if needed. I also did some embellishing with a white gel pen on some of my florals and also added lots of white paint splatters.


For my sentiment, I stamped on white cardstock using my Misti stamp positione, then ink blended all around the the outside of the sentiment with my Catherine Pooler Cove Blue ink. Next, I went in with some Ranger Distress Oxide Ink in Vintage Photo. I trimmed my cardstock and also a black backing and popped it up on adhesive foam strips.

Lastly, I finished off my card with some sequins and a string bow.

I've already heard that some of the items from this new release are about to sell out, so if you see something you really, really want, get it! You can stack your coupon codes and use code WAFFLE for an additional 10% off any of the new release products. Hurry, these codes won't last for long.

I have clickable affiliate links below, if you'd like to shop or browse. Thanks so much for stopping by!

Terri

**********************************

Lawn Fawn Black Licorice cardstock
Shop at:
Scrapbookcom
Ranger Ink Distress Ink Vintage Photo
Shop at:
Scrapbookcom
Scrapbook.com Hybrid Ink - Black
Shop at:
Scrapbookcom
Refillable Permanent Adhesive Runner - 49 feet
Shop at:
Scrapbookcom
Neenah Solar White Cardstock 80 lb, 25 pk
Shop at:
Scrapbookcom
Exclusive Black Platinum 6
Shop at:
Scrapbookcom
Dylusions Paint Brush Set
Shop at:
Scrapbookcom
Artis Glue
Artis Glue
Shop at:
Scrapbookcom
Exclusive Blending Brushes - Small - 3 pc
Shop at:
Scrapbookcom
Rose Quartz Misti Stamp Positioner
Shop at:
Scrapbookcom
Spellbinders Splatter White
Shop at:
Scrapbookcom
Neenah Solar White A2 Vertical Cards - 25 pk
Shop at:
Scrapbookcom
3mm Adhesive Strips 160 ct.
Shop at:
Scrapbookcom
Catherine Pooler Ink Pad - Cove Blue
Shop at:
Scrapbookcom
Faith Over Fear stamp set
Shop at:
Erin Lee Creative
Project Grip Mat - Black - Medium
Shop at:
Scrapbookcom
Reverse Tweezers
Reverse Tweezers
Shop at:
Scrapbookcom
Botanical Bliss 3D Embossing Folder
Shop at:
Erin Lee Creative
Buttons Galore Blue Diamond Sequins
Shop at:
Scrapbookcom


#wavingmywand #erinleecreative #cards #3dembossing #botanicalbliss #florals #scrapbookcom #catherinepoolerink #cardmaking #handmadecards #diycards #stamping #spellbinders #faithoverfear #faith #inspiration #encouragement #songlyrics #goodnessofGod #cecewinans #blackouttechnique #cardmakingtechniques #rangerink #inkblending #olomarkers