Sunday, April 30, 2017

AAA Card Challenge with So Suzy Stamps

I'm sharing this CAS card today over at the AAA Card Challenge, as So Suzy Stamps is sponsoring the challenge.  Be sure and visit and link up your own CAS card, (clean and simple).  You can get all the details, here.


I've made a speckled floral card featuring a couple stamps from the the newest release at So Suzy Stamps.


This was easy to create by fussy cutting a few stamped flowers for masking, using my Misti stamping tool.


My flower stamps are the Button Flower Left and Button Flower Right designed by our very own Olesya Kharkova.  I watercolored them with my Marvy Lettering brushes and a water brush.  I also used the dot splatters stamp to make the "speckles" on my flowers.


Just swipe directly with your marker on the stamp and impress.  Easy and fun!  Thanks for stopping by!


Purchase Button Flower Left, here.

Button Flower Left

Purchase Button Flower Right, here.
Button Flower Right

Purchase Simple Love You, here.

Simple Love You
Purchase Dot Splatter, here.

Dot Splatter


Friday, April 28, 2017

Guest Designer for Miss Kate Cuttables

I'm guest designing today for Miss Kate Cuttables, featuring their svg files with my Cricut Explore. Be sure and stop by their blog, here, and check out my card duo, using several of their cut files: Layered Rose Doily BloomCard Phrases and Flourish Leaf Set.


You'll find additional photos, creative details and product information as well as tons of inspiration from the Miss Kate Cuttables design team.


Thanks for popping in!  Terri


#misskatecuttables #guestdesigner #guestdesignteam #cutfiles #svg #rosebloom #layeredrosebloom #leaf #leaves #cardphrases #hello #thankyou #wavingmywand #terriburson #ranger #cricut #cricutexplore #printandcut #designspace #cards #scrapbook #craft #papercrafts #DIY #cre8time #blackandwhite #doubleclickskittles #cratepaper #bloom #maggieholmes #abandonedcoral #distress #twine #glitter #perfectpearls #thread


Monday, April 24, 2017

Gnomes & Coffee for Coffee Loving Cardmakers

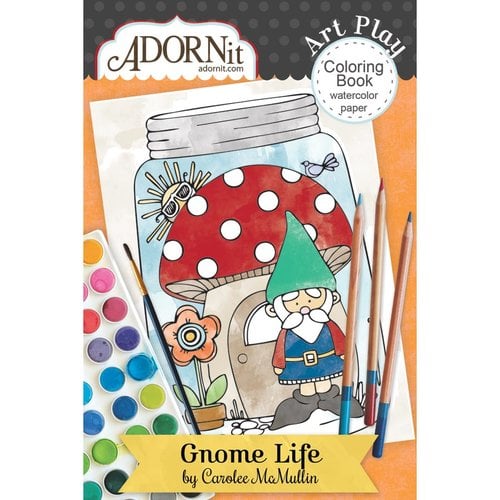
I'm up on the Coffee Loving Cardmakers blog today with my Coffee Buzz feature.  Stop by to get all the details on this Coffee and Gnome card that features products from Adornit mixed with my own drawing, as well as a bit of coffee industry news.

(affiliate links below)


from: Scrapbook.com


Also linking to:


Supplies:
Adornit Gnome Life mini coloring book
Adornit watercolor pencils
Adornit waterbrush
Adornit blender paper
Adornit scrapbook paper by Laura Kelly Hot Pink Dots
Adornit lettering art stamps by Carolee McMullin -
(available by inquiry only at info@adornit.com)
Queen & Co pink bubble gems


Shop Your Fav Brands at Scrapbook.com


#coffeelovingcardmakers #gnome #gnomelife #adornit #coffee #coffeecup #cup #mug #coffeetogo #watercolor #queenandcompany #scrapbookadhesivesby3l #pencils #spring #kite #cottoncandy #clouds #sky #wavingmywand #terriburson #artplay #paintables #drawing #sketch #handmade #diy #card #cards #scrapbook #cre8time

Thursday, April 20, 2017

New Release at So Suzy Stamps

We are super excited today as it's the official 3rd birthday of So Suzy Stamps.  The team has some amazing creations that you can check out on the blog, here.  In addition, there's some special deals, today only with the new release, including free shipping for orders over $25.00 for US and International.  All the details can be found by clicking the blog link above.  


Image may contain: text


Also, our very own Olesya Kharkova has designed some of the stamps in the new release, some of which bear her name, including the "Olesya Side Bloom", that I'm featuring today.  How awesome is that?  They are so gorgeous and Olesya is uber talented.  Obviously!


Let me quickly share how I made this card.  

1. First, cut an A2 sized piece of watercolor paper (Strathmore 300 series).  
2. Stamp image 3 times using Versamark ink and the Misti for best coverage.  
3. Heat emboss your image (Nuvo Hot Chocolate embossing powder) as pictured.
4.  Place in a large box and spritz upper section with water, then Ranger distress spray stain.  Dry slightly with heat emboss tool, then blot excess with paper towel.


5.  Repeat spritzing with water and Ranger Cracked Pistachio distress spray, covering the bloom, for the lower portion.

5. Grab a bubble stencil and place over colored areas.  Hold down as tight as possible, working in sections, and spritz with water.  Wait approximately 10 seconds, then blot with paper towel.  Dry with heat emboss tool.


6.  Cut a large circle by tracing a bowl or large cup or use a die cutting machine to cut a circle from a piece of cardstock.  (I used some scrap vinyl on my die cut circle for easy wipe up and re-use.)  

7.  Use a blender tool and white chalk or pigment ink and blend all around the edge of the circle.  I used Suzy's Angel Wings pigment ink.  


8.  What do you say, we make some paint splatters?  I love this technique.  Grab an old toothbrush, get it slightly wet and pour a touch of white (Decoart Satin Multi-surface Cotton Ball) paint onto your acrylic block or craft mat.  Dip your slightly wet toothbrush into the paint.  Place your project in a large box and, using your thumb, rub it across the paint dipped toothbrush and "spray".  Repeat as desired.  Dry with your heat emboss tool.  


9.  Color your image.  I used two different Zig clean color brushes, one for the petals and one for the center section.  Distribute the color with a water brush.  Blot with a paper towel to add a "light" effect.  Dry with heat emboss tool.


10.  Again, since we are using watercolor paper, it's best to use the Misti to stamp your sentiment, at least 3 times for full coverage.  Trim and mat your gorgeous art with your favorite adhesive (Scrapbook Adhesives by 3L) onto a black piece of cardstock, also trimmed and matted to fit an A2 sized card.  


I love how this turned out.  It's totally open to interpretation.  Is it a cosmic flower in space?  Or is it under water?  That's the beauty of art.  Beauty is truly in the eye of the beholder.  Thanks so much for stopping in today.  I hope you will add this gorgeous flower to your collection!  Be sure and check out the entire release, here.  


Purchase Miss You,  here


Purchase Olesya's Side Bloom,  here


Also linking to:


#sosuzystamps #newrelease #olesya #bloom #missyou #strathmore #ranger #distress #kuretake #zig #neenah #wavingmywand #terriburson #decoart #decoartblogger #designteam #scrapbookadhesivesby3l  #freeshipping #DIY #craft #cards #cardmaking #scrapbook #cre8time #spring #stencil


Monday, April 17, 2017

Tulip Background Feature for So Suzy Stamps

We're featuring the Tulip Background stamp today, at So Suzy Stamps.  Be sure and visit the So Suzy Stamps Blog and see how this amazing background stamp is being used, by the design team.  


Isn't it gorgeous?  I love this stamp.....so much!  


My background is completely heat embossed, then watercolored inside each tiny tulip.


My large tulip was watercolored and then fussy cut, with a popped out flower petal and added to my vellum panel that also includes ribbon embellishments, a golf foil sticker sentiment and die cut flourished frame.   Look closely and you'll see that I added some tiny white dots (gel pen) to the flourishes on my tulip background.  Wouldn't this make a gorgeous wedding card?  Change up the sentiment and it doubles as a Mother's Day card.


Visit the blog to see all the amazing projects today, featuring the tulip background stamp.


Purchase Tulip Background, here.


Purchase Tulip Stem, here.


#sosuzystamps #tulip #wedding #mothersday #birthday #card #wavingmywand #terriburson #craft #cardmaking #floral #flowers #stamps

Sunday, April 16, 2017

Birthday Doodles with So Suzy Stamps

I've got a fun birthday doodle card today, featuring stamps from So Suzy Stamps.  April 20th is the official, bonafide birthday of So Suzy Stamps and there have been celebratory events happening all month long.  Scroll through Suzy's blog to see what you've missed, including free shipping offers, product discounts and giveaways.


Let me briefly share how I made this fun card and how you can re-create it as well.

For this 4" x 5" card you will need: 

black cardstock 
white cardstock
So Suzy Stamps Present and Happy Birthday stamps
Tombow dual brush pen *optional
white gel pen
white dye or pigment ink
adhesive
trimmer
watercolor paper *optional

1.  Cut 3 pieces of black cardstock, two as a base layer (inside and outside) and a smaller piece as your top layer.   

2.  Cut 2 pieces of white cardstock, one 4" x 10" (scored in half) and a smaller section to layer in the middle. 

3.  Draw doodle lines on one piece of your larger black cardstock, using a white gel pen.  It doesn't have to be perfect.  Freehand doodling has a charm all it's own!  You do however, want to avoid smudging, so take care not to rub your hand against where you drew.  You may wish to use a heat tool to quickly zap/dry.


4.  Stamp your present stamp with white ink (I used a white dye ink) and fill in the ribbon and circles with a white gel pen.  Allow to dry, then reapply another layer.  Use a light touch the second time around, so you don't dig into the first coat with your pen.


5.  Mask your sentiment and stamp the word "Happy" underneath your present image.  Use a white gel pen to enhance the letters. 


6.  Mask your sentiment and stamp "birthday" on your other large piece of black cardstock, writing over it with the white gel pen.  Adhere to the inside of your card.


7.  Originally, I was going to use a black/white theme, however I really thought a pop of color would be nice.  You can go two ways with this; color or paper piece.  I chose to watercolor the ribbon and fussycut/piece it onto my stamped image.  The watercolor offers a nice contract to the rest of the doodling theme.  I used my Tombow marker and a waterbrush, blotting with a paper towel to get this effect, on Strathmore water color paper.


What do you think?  Do you like the contrast?  I noticed that the ribbon on top pops even more because I colored in the white first.  Let's call that an added bonus, shall we?


Thanks so much for stopping by.  Here are a few noteworthy birthday happenings that you'll want to take note of:

April 6th - 20th - Free Shipping all orders over $25 including international
April 16th - 20% off Cupcake Stamps April 17th - 20% off Ice Cream Stamps April 18th - 20% off Sentiment Stamps April 19th - 20% off Fairy Stamps


Purchase Present, here.

Purchase Happy Birthday, here.


#sosuzystamps #happy #birthday #wavingmywand #terriburson #present #gift #doodle #doodling #watercolor #celebration #celebrate #party #cards #DIY #cardmaking #craft

Tuesday, April 11, 2017

Celebrate With Simply Charming Bags

Hello lovely crafters and bag lovers.  I'm partnering monthly, with Miss Denise over at simplycharmingbags.com, the new home for Bunkie Bags and more.  Today's feature is this brand new, custom zip pouch for the Original Misti Stamping Tool.  Oh, but wait.....

You know what else will fit in this bag?  Your ipad!  Yes!  It's well padded and will perfectly fit your lap top computer up to 10".  With graduation events on the horizon, and summer weddings, isn't this balloon celebration bag the perfect gift?  Not to mention, birthday celebrations.  Of course, you can have this fabric customized into Bunkie Bag totes as well, which is a great accessory for your bridesmaid gifts.


I was so inspired by this amazing fabric, that I made a matching card, to join in the celebration!  Lots of stenciling, paint splatters and stamps from So Suzy Stamps.  I even drew in some fun stripes and dots on my balloons, to match the fabric.


The bag dimensions are 11.5" x 10" and is well padded and fully lined with this gorgeous gold polka dot and black fabric.  Miss Denise pulls out all the stops!


The zipper even gets a little treatment with this polka dot finish and gold plated zipper pull.  Yup, there's a party going on right here.......


Be sure and visit the Simply Charming blog and look around, then stop by the store and see what you like.  Don't forget, Miss Denise can customize just about anything and I do mean anything.  I have a nice little stash to prove it.  My favorite?  My Rudolph the Red-Nosed Reindeer large tote!

Thanks for stopping by.  Tell Miss Denise that Terri sent you, when you pop in!   Be sure and follow/visit Miss Denise on her Facebook page and Instagram page too.


Simply Charming Bags


#wavingmywand #simplycharmingbags #bunkiebags #zippouch #custombags #computerbag #laptopbag #wedding #birthday #graduation

Monday, April 10, 2017

Easter Critters for Coffee Loving Card makers + Freebie

(**This post contains affiliate links and I will be compensated if you make a purchase after clicking on my links)
Ah, it's Monday and the smell of coffee is in the air.  I'm up on the Coffee Loving Cardmakers blog today with lots of good stuff, including this cute critter shaker card, filled with yummy mini coffee cups, designed with my Cricut Explore.  


If you hop on over to the CLC blog, I've got a free Cricut design space cut file so you can cut out those mini coffee cups to your hearts content.  Plus, there's a few other images that go with the cups that you can use as well.  You can also get all the details on this fun Easter Shaker Card by following the above link.  

Be sure and enter the Sip N Share Sketch Challenge or the CASEing DT Link up Party while your there.  There's always a fun prize up for grabs.  Thanks for popping in!


Don't have a Cricut cutting machine?  Get one here. (affiliate link)


Linking to these challHop
es:


#coffeelovingcardmakers #cricut #cricutexplore #unitystamps #unitystampcompany #stampendous #resistemboss #rangerink #zig #kuretakezig #zigcleancolors ##doodlebugdesign #underthesea #easter #animals #critters #rabbit #bunny #easterbunny #lamb #babychick #chick #shaker #cardmaking #wavingmywand #terriburson #coffee #coffeecups #coffeemug #cards #craft #DIY

Sunday, April 2, 2017

Ink Mixing, Smooshing and Ice Cream!

If you popped on over from So Suzy Stamps, you're in the right place.  I'm sharing this delicious birthday card today, mixing my inks, using the smoosh technique and playing with some fun products that you can snag from Suzy's one stop shop.  So let's dive right in, shall we?


Grab these items:

heavyweight cardstock
distress ink
Angel Wings pigment ink (So Suzy Stamps)
Fancy Happy Birthday sentiment ( So Suzy Stamps)
Ice Cream Fun Stamp (So Suzy Stamps)
waterbrush or small paint brush
craft mat
black archival ink pad
Misti stamping tool
embellishments (twine/buttons)
adhesive runner (Scrapbook Adhesives by 3L)
trimmer/scorer
heat embossing tool


The card dimensions are 3.5" x 6" so trim and score a piece of heavyweight cardstock measured 
12" length, 3.5"width and score at the 6" mark, or if you prefer, use a card panel for the card front.


To begin, pick the distress ink colors of your choice.  I'm using Ranger Abandoned Coral and Cracked Pistachio.  Or, for ice cream colors, I'm calling them, "strawberry and pistachio"!

Dab your distress ink onto a craft mat.  Grab the So Suzy Stamps Angel Wings pigment ink and dab as well.  Use a small wet paintbrush or waterbrush, to mix the two together.  Starting with the pink color, dredge or smoosh your cardstock until you've covered the top one fourth of your card with ink.  Make sure your cardstock is covered sufficiently with ink.  

Use your heat emboss tool to dry.


Repeat with the green ink for the second section and dry.  Continue alternating your smooshed colors, making sure to dry in between each inking.


Next, grab your Misti stamping tool.  Starting with the upper left, begin stamping the ice cream image, alternating each stamping upside down.  You may wish to begin by offsetting your stamp off the cardstock edge.  You can use a strip of washi tape, if you like, to more easily line up your image.  Continue alternating until you have completely stamped your cardstock.


Next, stamp your sentiment with your Misti and black archival ink on a section of heavy cardstock, trimmed to 3.5" x 1".   If you wish, go ahead and use the same ink mixing and smooshing for the upper and lower edge of your sentiment piece.  Dry and mount with foam squares.


I also made a fun embellishment out of twine, a button and my WRMK striped acetate pad, using a mini heart punch on my striped acetate for the heart.


For a little fun decoration, I made a mini ice cream cone banner to go along with my card.  I might have to save this and use it at work.  How fun would it be to celebrate your co-workers birthday by draping this fun banner across their computer?  


It's super easy to make.  I used my WRMK banner punch board set at 2.5" and DCWV papers for my "cone".  I trimmed a few "pistachio" scoops from my DCWV papers but you could also use a 1.5" circle punch, then cut it in half.  Chop up a lace doily or use a circle punch on it as well, then adhere with your adhesive runner to the backside of your triangle cone.


Thanks so much for popping in today.  This card was quick and easy to make and I hope you will give it a try and have fun with it.  Have a great day!

Terri


Purchase Happy Birthday Fancy, here.
Happy Birthday Fancy

Purchase Ice Cream Fun Cone, here.

Ice Cream Fun Cone


Purchase Angel Wings pigment ink, here.

Angel Wings - Ink Bite


#sosuzystamps #sosuzyinkbites #rangerink #abandonedcoral #stamps #icecream #party #birthdaypary #timholtz #angelwings #smooshing #birthday #happybirthday #crackedpistachio #waterbrush #banner #dcwv #wrmk #doily #heart #punch #wavingmywand #card #cardmaking #watercolor #watercoloring #craft #diy #terriburson #scrapbookadhesivesby3l