Showing posts with label explore. Show all posts

Thursday, November 8, 2018

Christmas Favor Boxes for Scrapbook Adhesives by 3L

 Have you begun your Christmas crafting?  I'm getting a jump start today, with this trio of Christmas Favor Boxes for Scrapbook Adhesives by 3L.  Be sure and visit their blog to see all the boxes in detail.  I'm creating with the Authentique Nostalgia paper collection and using a file that I purchased from Cricut, for use in my design space.  It was only $1.49 and I can use it over and over!  Scroll down for more details on the file.


(FTC Disclosure: as an affiliate for various companies in the craft industry, I will receive a small commission for purchases made through my convenient affiliate links.  This does not affect your purchase price.)


This is the Open Favor Box from the Martha Stewart Beginner's Collection and is Cricut design space file #M54C4C42. I expanded the file out to approximately 11.5 inches in width to create my scored and folded boxes.  They were super easy and quick to assemble.  This file is only available for purchase if you have access to Cricut's design space.  You can upload the file, then purchase it prior to cutting.


  Once assembled, my favor boxes measured 3.5"W by 4.5" L.   You can simply copy and paste the link below into your design space and click "Make It", to begin cutting with your Cricut Explore.


Let me mention that I love the thickness of the Authentique Nostalgia paper.  Its perfect for cutting and I had no problems with paper tearing or the blade not cutting all the way through.  It worked perfectly on the regular cardstock setting.


I have shopping links for most of the products that I used, below.  Thanks so much for stopping in and click this link, to see the rest of my products and creative tips over on the the Scrapbook Adhesives by 3L blog.  See you next time.... Terri


SUPPLIES:

I’m listing the products I used throughout this post. Click on the link to go directly to the product. Where available I use compensated affiliate links which means if you make a purchase I receive a small commission at no extra cost to you. Thank you so much for your support!
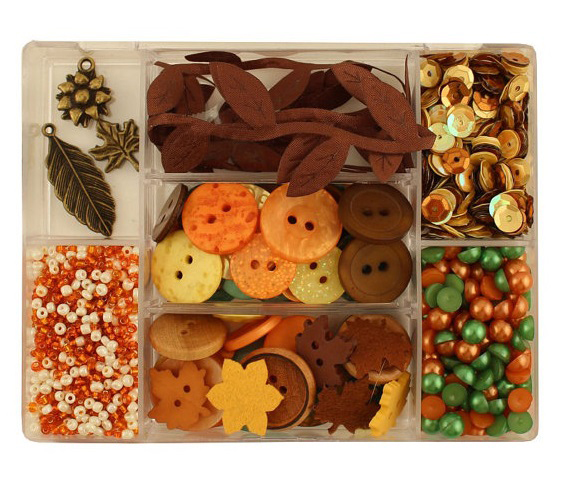


28 Lilac Lane Autumn Afternoon Embellishment Kit
Shop at:
Scrapbook.com | Simon Says Stamp
Umbrella Crafts Jumbo Decorative Nesting Tag Dies
Shop at:
Scrapbook.com
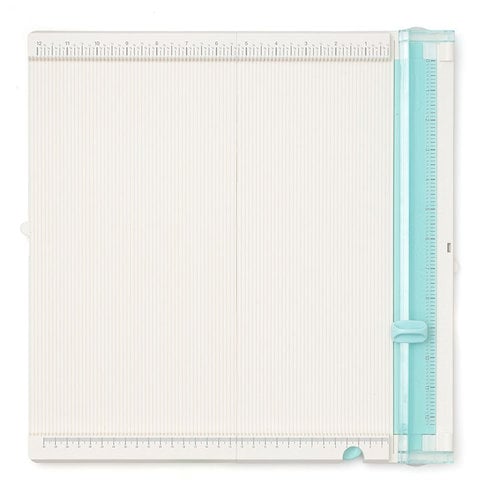
WRMK Trim and Score board
Shop at:
Scrapbook.com
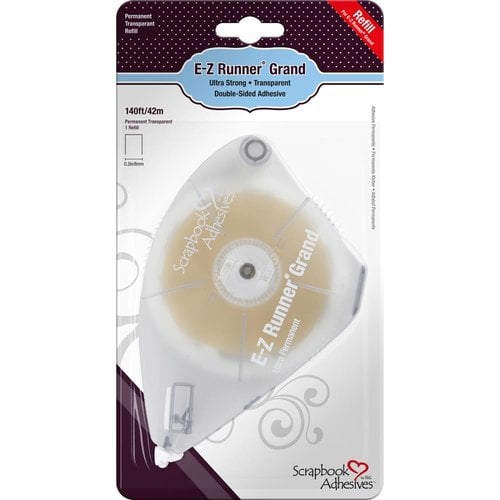
Scrapbook Adhesives by 3L EZ Grand Ultra Refill - Clear
Shop at:
Scrapbook.com | Simon Says Stamp
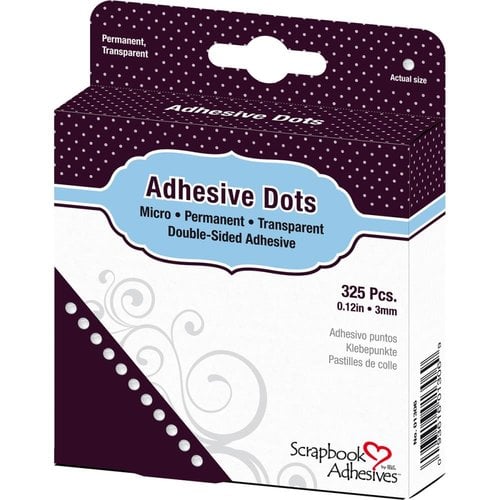
Scrapbook Adhesives by 3L Micro Dots
Shop at:
Scrapbook.com
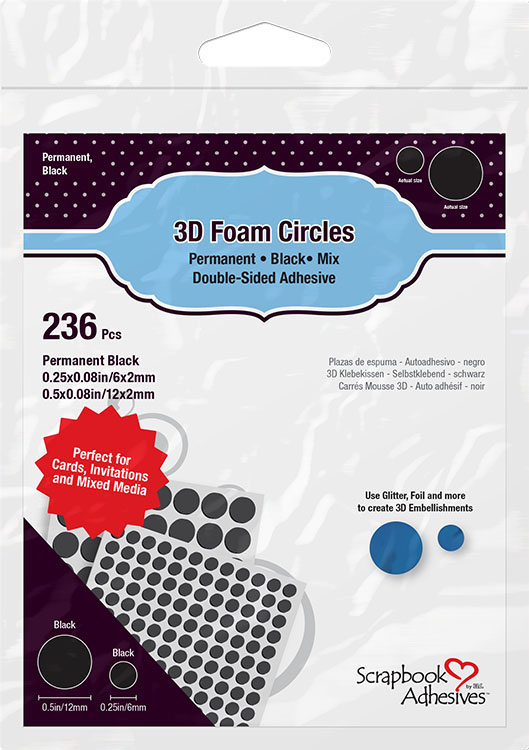
Scrapbook Adhesives by 3L 3D Black Foam Circles
Shop at:
Scrapbook.com
Scrapbook Adhesives by 3L E-Z Grand Runner
Shop at:
Simon Says Stamp
Scrapbook Adhesives by 3L Crafty Foam Tape
Shop at:
Simon Says Stamp
Authentique Nostalgia Paper Collection
Shop at:
Simon Says Stamp
Buttons Galore Aquamarine Sparkletz
Shop at:
Simon Says Stamp
May Arts Ribbon Ivory Burlap String
Shop at:
Simon Says Stamp


#scrapbookadhesivesby3L  #EZRunnergrand #foamcircles #wavingmywand  #scrapbook #cardstock #diecuts #adhesives #stickers #DIY #papercrafts #partyfavors #scrapbooking #terriburson  #scrapbookcom #handmade #photocorners #kraft #treatbox #favorbox #partydecor #mayartsribbon #buttonsgalore #sparkletz #autumnafternoon #buttons #authentique #nostalgia #vintage #christmas #christmasdecor #holidayfavors #dogs #cats #pets #deer #tags #wermemorykeepers #simonsaysstamp #cricut #cricutexplore #marthastewart

Friday, April 28, 2017

Guest Designer for Miss Kate Cuttables

I'm guest designing today for Miss Kate Cuttables, featuring their svg files with my Cricut Explore. Be sure and stop by their blog, here, and check out my card duo, using several of their cut files: Layered Rose Doily Bloom, Card Phrases and Flourish Leaf Set.


You'll find additional photos, creative details and product information as well as tons of inspiration from the Miss Kate Cuttables design team.


Thanks for popping in!  Terri


#misskatecuttables #guestdesigner #guestdesignteam #cutfiles #svg #rosebloom #layeredrosebloom #leaf #leaves #cardphrases #hello #thankyou #wavingmywand #terriburson #ranger #cricut #cricutexplore #printandcut #designspace #cards #scrapbook #craft #papercrafts #DIY #cre8time #blackandwhite #doubleclickskittles #cratepaper #bloom #maggieholmes #abandonedcoral #distress #twine #glitter #perfectpearls #thread


Monday, August 8, 2016

Graphic 45's Halloween in Wonderland......Get the Deluxe Collector's Edition today!

(FTC disclosure: This post may contain affiliate links so, if you purchase a product using the link I may receive a small commission. I only participate in affiliate programs that feature products that I use and love. Your purchase price is not affected in any way, by using my links)

Graphic 45 is one of my absolute favorite paper companies.  Having the pleasure of meeting the G45 family personally, and spending time interviewing them for a Craft and Hobby Association trade show a few years back, only deepened my love and respect for this amazing company.   The history of how Graphic 45 came to be is even more fascinating, considering owner Diane Schultz started her life over at the age of 45 to go back to school and learn the graphic design trade, hence the name, "Graphic 45".  

Every paper collection is a hit.  Every one.  Many of the collections have color schemes that can be interchangeable with previous sets, adding extra mileage and versatility.

Now, just in time for your Autumn and Halloween crafting comes the 
"Halloween in Wonderland collection", available now at Scrapbook.com.  This has been one of the most requested collections, by fans, to become a re-release.  The Deluxe Collector's Edition is one of those sets that you don't want to miss out on.  It's Alice in Wonderland, meets Halloween.  Originally released in 2010, fans have been clambering for its return ever since.


Graphic 45 - Halloween in Wonderland Collection - 12 x 12 Papercrafting Set

from: Scrapbook.com

Have you ever waited to buy an item because you couldn't make up your mind, then later when you finally did decide to click "purchase", it was sold out?  For good!  Haha, yes, we've all been there.  Don't let this be one of those times!  Some of the items in this collection have just gone out of stock.....so if you see something you really want, don't wait.  


Graphic 45 - Halloween in Wonderland Collection - 12 x 12 Double Sided Paper - Wonderland Classifieds - $1.15

from: Scrapbook.com

These papers are perfect for so many of your Halloween and Fall crafting projects and cut beautifully with your die cut machines.  I'll share a couple of my favorite projects that I've made with G45 papers, at the end of this post, some made with my Cricut Explore die cutting machine.  Each 12x12 inch sheet is double sided which offers you additional choices in your creative uses.


Graphic 45 - Halloween in Wonderland Collection - 12 x 12 Double Sided Paper - Through the Looking Glass - $1.15

from: Scrapbook.com


Grab the Deluxe Collector's Set before it's gone, then come back to check on the availability of anything else that you have to have, here.  Click and bookmark that link if you like or bookmark this blog post for reference.


Now, here's a few of my favorite projects that I've made with Graphic 45 papers.......


Thanks for stopping in!  Get all your favorite craft supplies at Scrapbook.com!


Shop Your Fav Brands at Scrapbook.com


#graphic45 #g45 #halloween #halloweeninwonderland #aliceinwonderland #wonderland #scrapbookcom #scrapbook #wavingmywand #terriburson #eerietale #bookmark #craft #papercrafts #card #treatbox #cricut #cricutexplore #diecuttingmachine #diecut #designspace #Fall #autumn #thanksgiving #diy #cre8time #homedecor #partydecor

Wednesday, October 14, 2015

New Halloween Challenge at DoubleClick Skittles

Welcome to the newest edition of the DoubleClick Skittles Challenge!

Challenge #33 - Halloween

Oct. 14 - Oct. 20


There are so many fun and amazing Halloween paper products on the market right now.  I am such a paper addict and as you can imagine, I have several of those collections in my crafty domain at this very moment.  It was a total no-brainer deciding which paper collection I would use to feature the new Skittles release aptly titled Witches Brew; the Graphic 45 Rare Oddities collection.  It's the perfect companion for the newest Skittles colors, Frog, Witch and Pumpkin.  For goodness sake,  there's even tiny little potion bottles that say Witches Brew and Frog!

Another first for me today.... I made my first French Fry box.  I broke in my Cricut Cartridge Tags, Bags, Boxes and More 2 and used my Explore to cut these G45 papers.  


I fussy cut those little potion bottles and even "burned" my white tulle from The Ribbon Resource by melting it a bit with my heat embossing tool, so it would resemble cobwebs.  It looks pretty cool in person.  The Witches Brew Skittles are scattered about on my box and perfectly match the colors of my paper... or is it the other way around?  The paper matches the Skittles?  Haha.  Regardless, I'm sure there's room in this box for some spooky treats.  My teenager will love getting his favorite Halloween candy in this super cool box.


Did you know that the new Skittles release, Witches Brew is almost sold out?  Everyone is going nuts for these bubbly little gems and if you hurry, you might snag one of the few remaining sets.   Carri has 3 different price options for this set, starting at a price point of $3.75 for the 3 pk set.  That includes free USA shipping and PAYPAL accepted.  But, you better hurry.

You can shop here:


 Join the Halloween challenge and be entered for a fun prize, but be sure and read the rules, as backlinking is not allowed.  Skittles are not required to play so come on... link up and come and play with us!


Thanks for stopping by!

Terri


Linking to these other challenges:

Additional Supplies:
May Arts Ribbon / The Ribbon Resource purple velvet polka dot ribbon
Scor-pal 1/4" tape
Tombow adhesives

#skittles #doubleclickconnect #cricut #cricutexplore #cricuteverywhere #tombow #graphic45 #g45 #rareoddities #halloween #pumpkin #pumpkins #witch #frog #witchesbrew #potion #frenchfrybox #tulle #polkadot #polkadots #diy #mayartsribbon #ribbonresource #ssswchallenge

Saturday, September 5, 2015

Making a Pinned Badge With Cricut and the WRMK Fuse!

(FTC disclosure: This post may contain affiliate links so, if you purchase a product using the link I may receive a small commission. I only participate in affiliate programs that feature products that I use and love. Your purchase price is not affected in any way, by using my links.)

School has just begun, but we're already having our Homecoming and it's only the second game.  My child is in the marching band for the first time and having a ball, wailing on the saxophone.  I thought I would help out and work in the concession stand (also another first) and at the last minute, threw this badge together, so I could wear it for Homecoming and proudly show off that I'm a Band Mom.  I had 30 minutes before I had to leave.  Could I pull it off?  Does a cow moo?  

Luckily, I had already created this bear claw in my Cricut Design Space, when I made one for my son's saxophone case last year.  It was a jpeg photo that I converted to an svg file, using a free online converter.  Technical stuff, but if you're into that kind of thing, you can do a little research and pick it up easily.  Luckily, I'm a member of several Cricut Facebook groups, and the information in those groups is invaluable.


I quickly added some text, copied it so I could add some layers and see how I wanted it to look.  When I got ready to cut, I lined up all my red layers to cut on a strip of red vinyl on my mat, then arranged my black layers to cut just below on a strip of black vinyl.  If you use the design space for the Cricut Explore, be sure you attach all your items prior to cutting.


Next, I pulled out a page protector, my We R Memory Keepers Fuse, 
a gorgeous piece of musical scrapbook paper and some embellishments.  
from: Scrapbook.com


First, I added my layered Cricut cut vinyl to the front of my page protector.  Next, 
I trimmed my paper and embellished it, even running an adhesive runner across some sections and sprinkling glitter for sparkle, then placed inside my page protector and began fusing the edges.  It took about 30 seconds or less to fuse all sides.  So easy!  You could also cut some cardstock letters or use stickers with your badge, but I just love the clean look of the vinyl, plus it lasts forever!  Well, a really, really long time, at least.  There are so many different things I can make for school events, parties and more, with my Fuse.  The badge alone can be made for a number of different occasions.   


To finish off my badge, I used my hot glue gun to glue this gorgeous bow that I made with glitter polka dot ribbon from The Ribbon Resource.  It's brand new and not available just yet, but it will be soon, so click the link, bookmark it and check back.  If you shop through my affiliate link in the month of September, visit the Ribbon Resource blog as they are giving away a Ribbon Rack and every purchase enters you to win.  Nice!

Get 10% Off Your Next Order at The Ribbon Resource


Supplies Used:
The Ribbon Resource 533-15-14 Red Glitter Dots Ribbon (available soon)
DoubleClick Skittles Believe in Magic bubble embellishments
Tombow mono aqua glue and power bond adhesive runner
Doodlebug Design Sugar Coating glitter Lily White
My Mind's Eye Follow Your Heart paper by Rhonna Farrer

(FTC disclosure: This post may contain affiliate links so, if you purchase a product using the link I may receive a small commission. I only participate in affiliate programs that feature products that I use and love. Your purchase price is not affected in any way, by using my links.)

#fuse #ribbonresource #cricut #explore #wrmk #wermemorykeepers #americancrafts #giveaway #designspace #cricutexplore #glue #skittles #tombow #band #badge #cre8time #cricuteverywhere #cricutexplore

Wednesday, September 2, 2015

New Challenge at DoubleClick Skittles - Monsters or Robots

Welcome to another DoubleClick Skittles Challenge!

Challenge #30 - Monster or Robot

Sept. 2 - Sept. 15


For this challenge I decided to go with Monster.  I had the perfect Fancy Pants Design papers and a digital image that I hadn't used yet.

The Skittles that I'm using are Citrus and Believe in Magic.  You know how sometimes you have a little accident while crafting?  Yup, I had a bit of a smudge with my liquid pearls.  What's a girl to do?  Cover it up with a Skittle!  I popped that Citrus Skittle on top of that green smudged mess and covered it up perfectly.  I liked the look so much, I decided to plop one down on the other side too.  I love how Skittles magnifies whatever is underneath it.  In this case, the Citrus Skittles, which are a pale green, were further enhanced by the green liquid pearls.  Bonus!

Let me tell you, I really jazzed up this Party Monster.  I used my Cricut Explore's Print and Cut feature which I love, because you don't have to worry about assembling a bunch of tiny die cut pieces with an svg file.  This monster was green all over so I added some spots of brown and white.  Isn't he adorable?

Skittles come in a multitude of fabulous colors and are handmade in batches in Carri's "lab".  There are 25 of these fun, bubble embellishments per bag and you can purchase most 3 pack sets for under $4.00 or individually.  Plus shipping is FREE in the USA and PAYPAL is accepted.

You can purchase Skittles here:


The newest release, "Believe in Magic" is still available.  Perfect for all your Disney themed projects (Mickey, Pirates of the Caribbean, etc.)


Come join the Skittles challenge here.  There's always a fun prize up for grabs and plenty of inspiration.

Be sure to read the rules for the challenge as backlinking is not allowed. 

Thanks for stopping by!


Terri

Additional Supplies:
Fancy Pants Design Be Different Paper collection
May Arts Ribbon/The Ribbon Resource
Tombow Adhesives
Too Cute By Jessica Party Monsters svg
Ranger liquid pearls
Gelly Roll white gel pen
Star punch
Zig Clean Color Markers

#cricut #cricuteverywhere #skittles #doubleclickconnect #ranger #mayartsribbon #theribbonresource #zig #kuretake #tombow #cre8time #toocutebyjessica #svg #fpd #fancypantsdesign

Friday, August 28, 2015

Making Stickers With Cricut and Xyron

(FTC disclosure: This post may contain affiliate links so, if you purchase a product using the link I may receive a small commission. I only participate in affiliate programs that feature products that I use and love. Your purchase price is not affected in any way, by using my links.)

My Xyron Creative Station and my Cricut Explore have been getting quite the workout lately.  I've been a devoted user of both products for many, many years.  As a craft blogger, I'm always looking for ways to incorporate these tools into projects for daily life.


Many of us have kids involved in sports, band, dance.... the list is endless.  I can tell you this; kids love their name on stuff.  T-shirts, cups and even book covers for school.  I made these big 4" stickers for that very purpose - Emmah's notebooks for school.  She loves them!  I'm sorry to say, I can't claim Emmah as my own, because she's a real sweetheart, but my friend informed me that  Emmah went all nutso over these stickers.


Emmah is a star pitcher for a very well known and successful traveling softball team.  Of course, her friends are going to want some too.  Who are they going to call?  Hopefully, me! 

If you're a crafter who sells their wares, this is another fun item to make and promote.
So how did this come together?  I created and welded my design in the Cricut Design Space™ which is exclusive to the Cricut Explore, and chose the print and cut option.  I LOVE this feature!  You can design something, print it and then cut the image with your Explore.  When it prints, there are line markers when the Cricut then scans and perfectly cuts.  It's fabulous.  Truly.


 To finish off my project, I ran all my die cuts through my Xyron 9" Creative Station.   It quickly and completely covers the back of your die cut with adhesive.  It also has laminating capabilities and so much more.   The final touch is a little bit of glitter glue on the wording.  Because, glitter makes the world a happy place......  


These fun stickers are perfect for your sports fan.  Stick them on a thermos, lunch box, inside a locker, on school notebooks.  Get creative and make one for every member of the team! 


(FTC disclosure: This post may contain affiliate links so, if you purchase a product using the link I may receive a small commission. I only participate in affiliate programs that feature products that I use and love. Your purchase price is not affected in any way, by using my links.)

#cre8time #cricut #cricuteverywhere #xyron #sports #baseball #softball #soccer #basketball #volleyball #hockey #football #tennis #stickers #print

Wednesday, April 15, 2015

Spring Appreciation Challenge with Mountain Plains Crafters + Cricut DS file & Prize

We're having a challenge over at Mountain Plains Crafters today, which is to create a Spring Floral card in Appreciation of someone and put it in the mail to that special someone this week!  Plus, an MPC fan will win a nifty little prize offered up by our co-founder Pam Stang, so check our FB link above or visit our blog below for details.  You have until Thursday, Apr. 24th at noon EST to link an Appreciation creation to our FB page to qualify for the prize winnings.

 http://mountainplainscrafters2.blogspot.com/2015/04/springtime-flowers-appreciation-creation.html

While mulling over who to send my card to, I finally decided on a friend who has a special needs child.  This friend and her family deal with the medical needs of this sweet angel on a daily basis.  Recently, they found out that their precious 2 year old daughter now has cancer which compounds all her other medical problems, as well.  I appreciate all the loving mothers and fathers in this world who are granted the task of raising up the children that the good Lord has given us.  I especially want my friend to know how appreciated and loved she is for being such a wonderful mother in spite of the circumstances that have been handed to her.  We can take nothing for granted in this one life that we are given.  This is for you, Jennifer.


The papers that I chose for this project are Graphic 45, A Time To Flourish (June) and G45 Come Away With Me (pink polka dot).  I created a bracket shaped card (cut with my Cricut Explore)  with 2 panels and a circle accent which is covered with polka dot vellum.  The sentiment is heat embossed and I've also fussy cut the mini card and bird from the same cardstock.  The pewter key is also from G45 and the little bird's nest was created with May Arts Ribbon natural burlap string and adhered with Tombow adhesive dots.

The 3D Bow was also cut with my Explore and if you are a Cricut Explore owner, you can purchase the bracket frame file and 3D bows in Cricut Design Space™. (Or use my file for free, if you have the CDS subscription)


If you're a Cricut Explore owner, and interested in how I made this file, continue on to the next couple photos of how I designed this to be digitally cut.  The dimensions are listed at the bottom of this post.


You can either make a panel card and glue/attach the tabs to form your card, or you can make a display card as I've done today.  In addition, you can make an additional copy of panel one, which is the white panel on my card (beige in the photo) and use it for the inside of your card as the G45 papers are double-sided.


Above, is how the layers look all put together for the front of the card.  I'm simply showing you how they'll stack once cut. 


Here, you can see how I've laid out the front of my card and popped out the top panel with foam squares.


            Dimensions:
Bracket Card 5.75"x 5.75" (to fit a 6"x 6" envelope)
Bracket Panel 1 - 5"
Bracket Panel 2 - 4 1/4"
(with 3.75" circle accent)

Thanks for popping in today!


https://us.cricut.com/design/#/canvas/26903097

You can use the link above in Cricut Design Space to re-create the bracket card, however it is a subscription file so there will be a small cost incurred once you try to cut the file, I believe it is $2.97.  If you have a subscription to the Cricut Design Space, then the file should be free for you to use.  Just click the link and login to your Cricut Design Space to access. (3D Bows file can be purchased separately)


Additional supplies: Tombow Mono Aqua Glue, Tombow Mono Super Bond adhesive runner, Close To My Heart sentiment from Family is Forever acrylic stamp set, Queen & Co clear bubbles, American Crafts Zing Aqua embossing powder, Versamark clear ink, polka dot Vellum (maker unknown), The Paper Studio foam squares


Disclosure: This post may contain affiliate links so, if you purchase a product using the link I may receive a commission. I only participate in the affiliate programs linked above because they are products that I use and love. Your purchase price is not affected in any way, by using my links.  Thank you for your support and helping me keep my content free!

#cricut #cricutexplore #cricutdesignspace #cricutds #cricuteverywhere #graphic45 #g45