Thursday, September 22, 2022

Woodgrain Pumpkin Slimline Card

Hey friends, today I've got a fun technique that I don't use often but I really should. Stamping over stencils. It yields such cool results and is so fun to do. This project for Scrapbook.com features the Pumpkin Patch stencil and Hi Fall stamp set, both new in the shop.  Scroll down for creative details. You'll also find product links at the end of this post.


(FTC Disclosure: as an affiliate for various companies in the craft industry, I will receive a small commission for purchases made through my convenient affiliate links, at no additional cost to you.)


The dimensions of my card are close to the traditional size of a slimline card, measuring in at 4x8 inches, edge to edge. I trimmed my kraft cardstock to fit, then trimmed my white panel to fit.

I sprayed the back of my stencil with Thermoweb Pixie Spray then masked around 2 rows of pumpkins and centered the stencil on top of my white panel. Yes, my stencil is covered in some adhesive and glitter and needs a good cleaning, haha! Even though I had tape on my stencil, I used the spray for a better seal and to prevent any of the gloss spray that I used (further down this post) to seep underneath the stencil. The Pixie Spray is currently out of stock but click the link if you'd like to be notified when it's back in stock. It's a must have staple in my craft room.


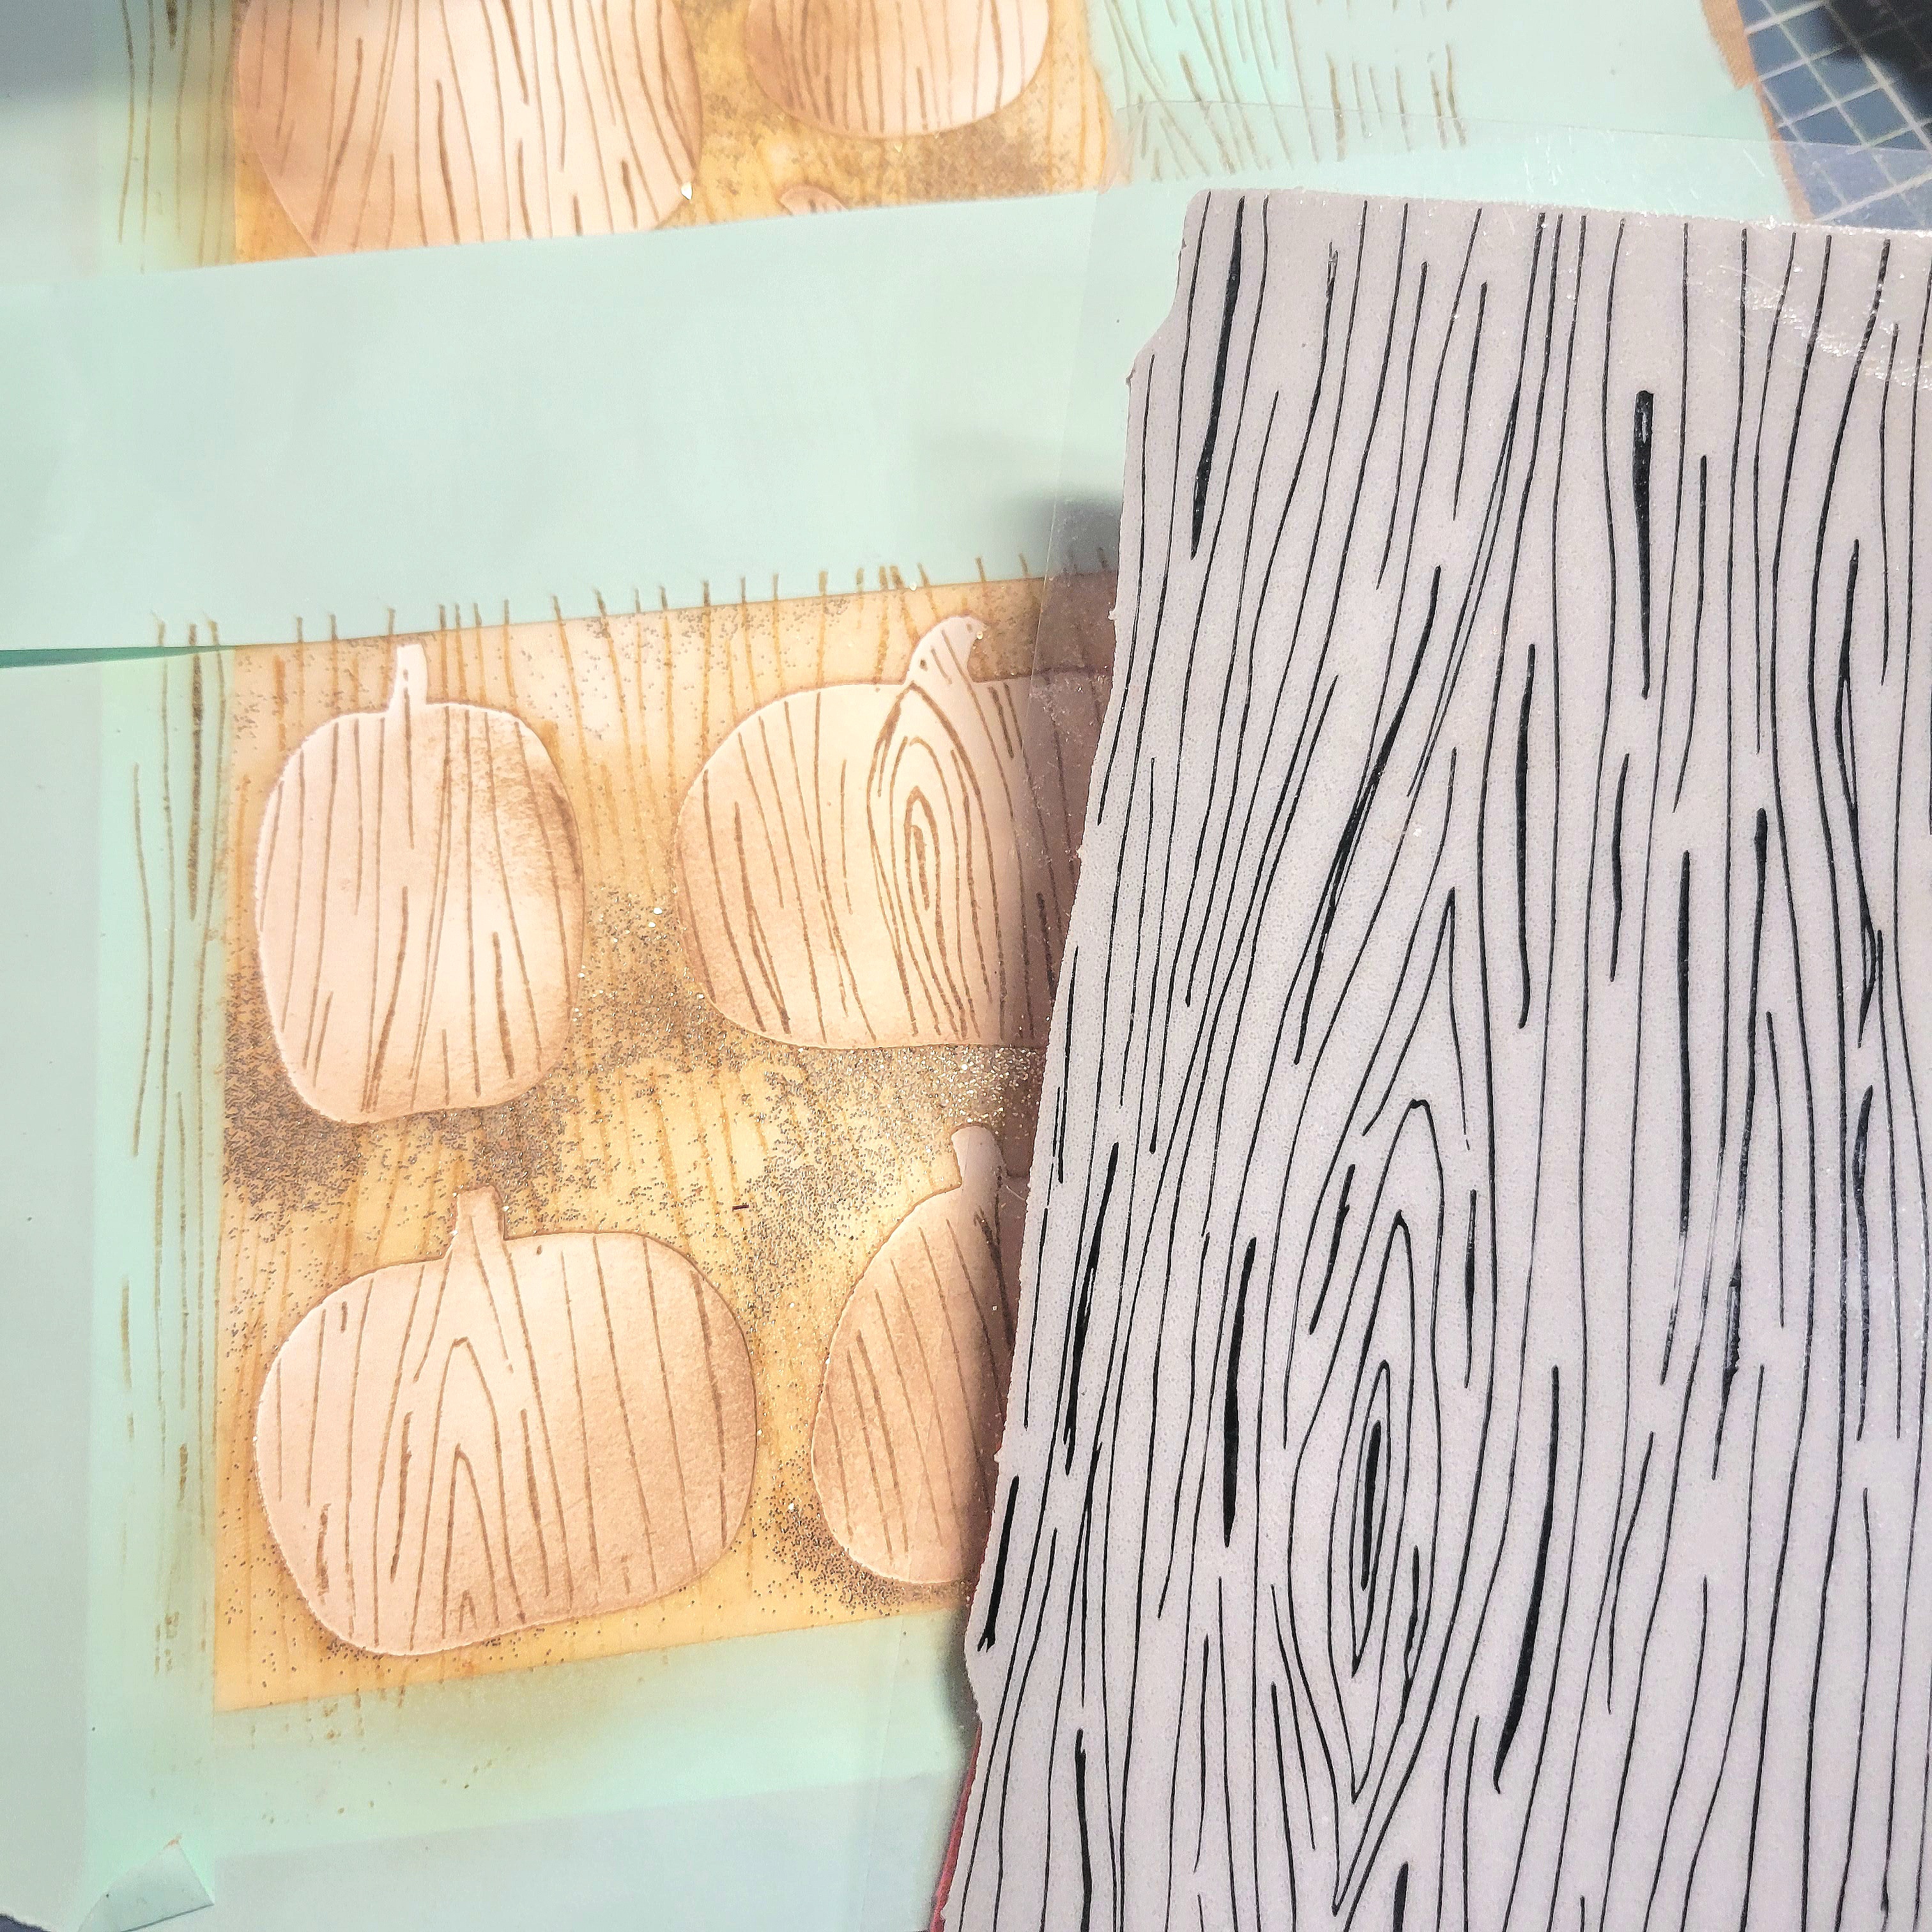
Next, I used my Scrapbookcom hybrid ink in Leather to ink blend lightly inside my pumpkins. Once this is done, LEAVE YOUR STENCIL IN PLACE! You're going to stamp right on top of your ink blended pumpkins with a woodgrain background stamp. No need for a stamp positioner, just ink up the cling stamp and press directly onto your pumpkins, If it's a large background stamp, like mine, you may need to mask some of your area to stamp 2 different sections evenly. You can also use a small woodgrain stamp and acrylic block to stamp individual pumpkins.

I should mention, the background stamp I'm using today is no longer available but I've linked a very similar woodgrain stamp at the end of this post.


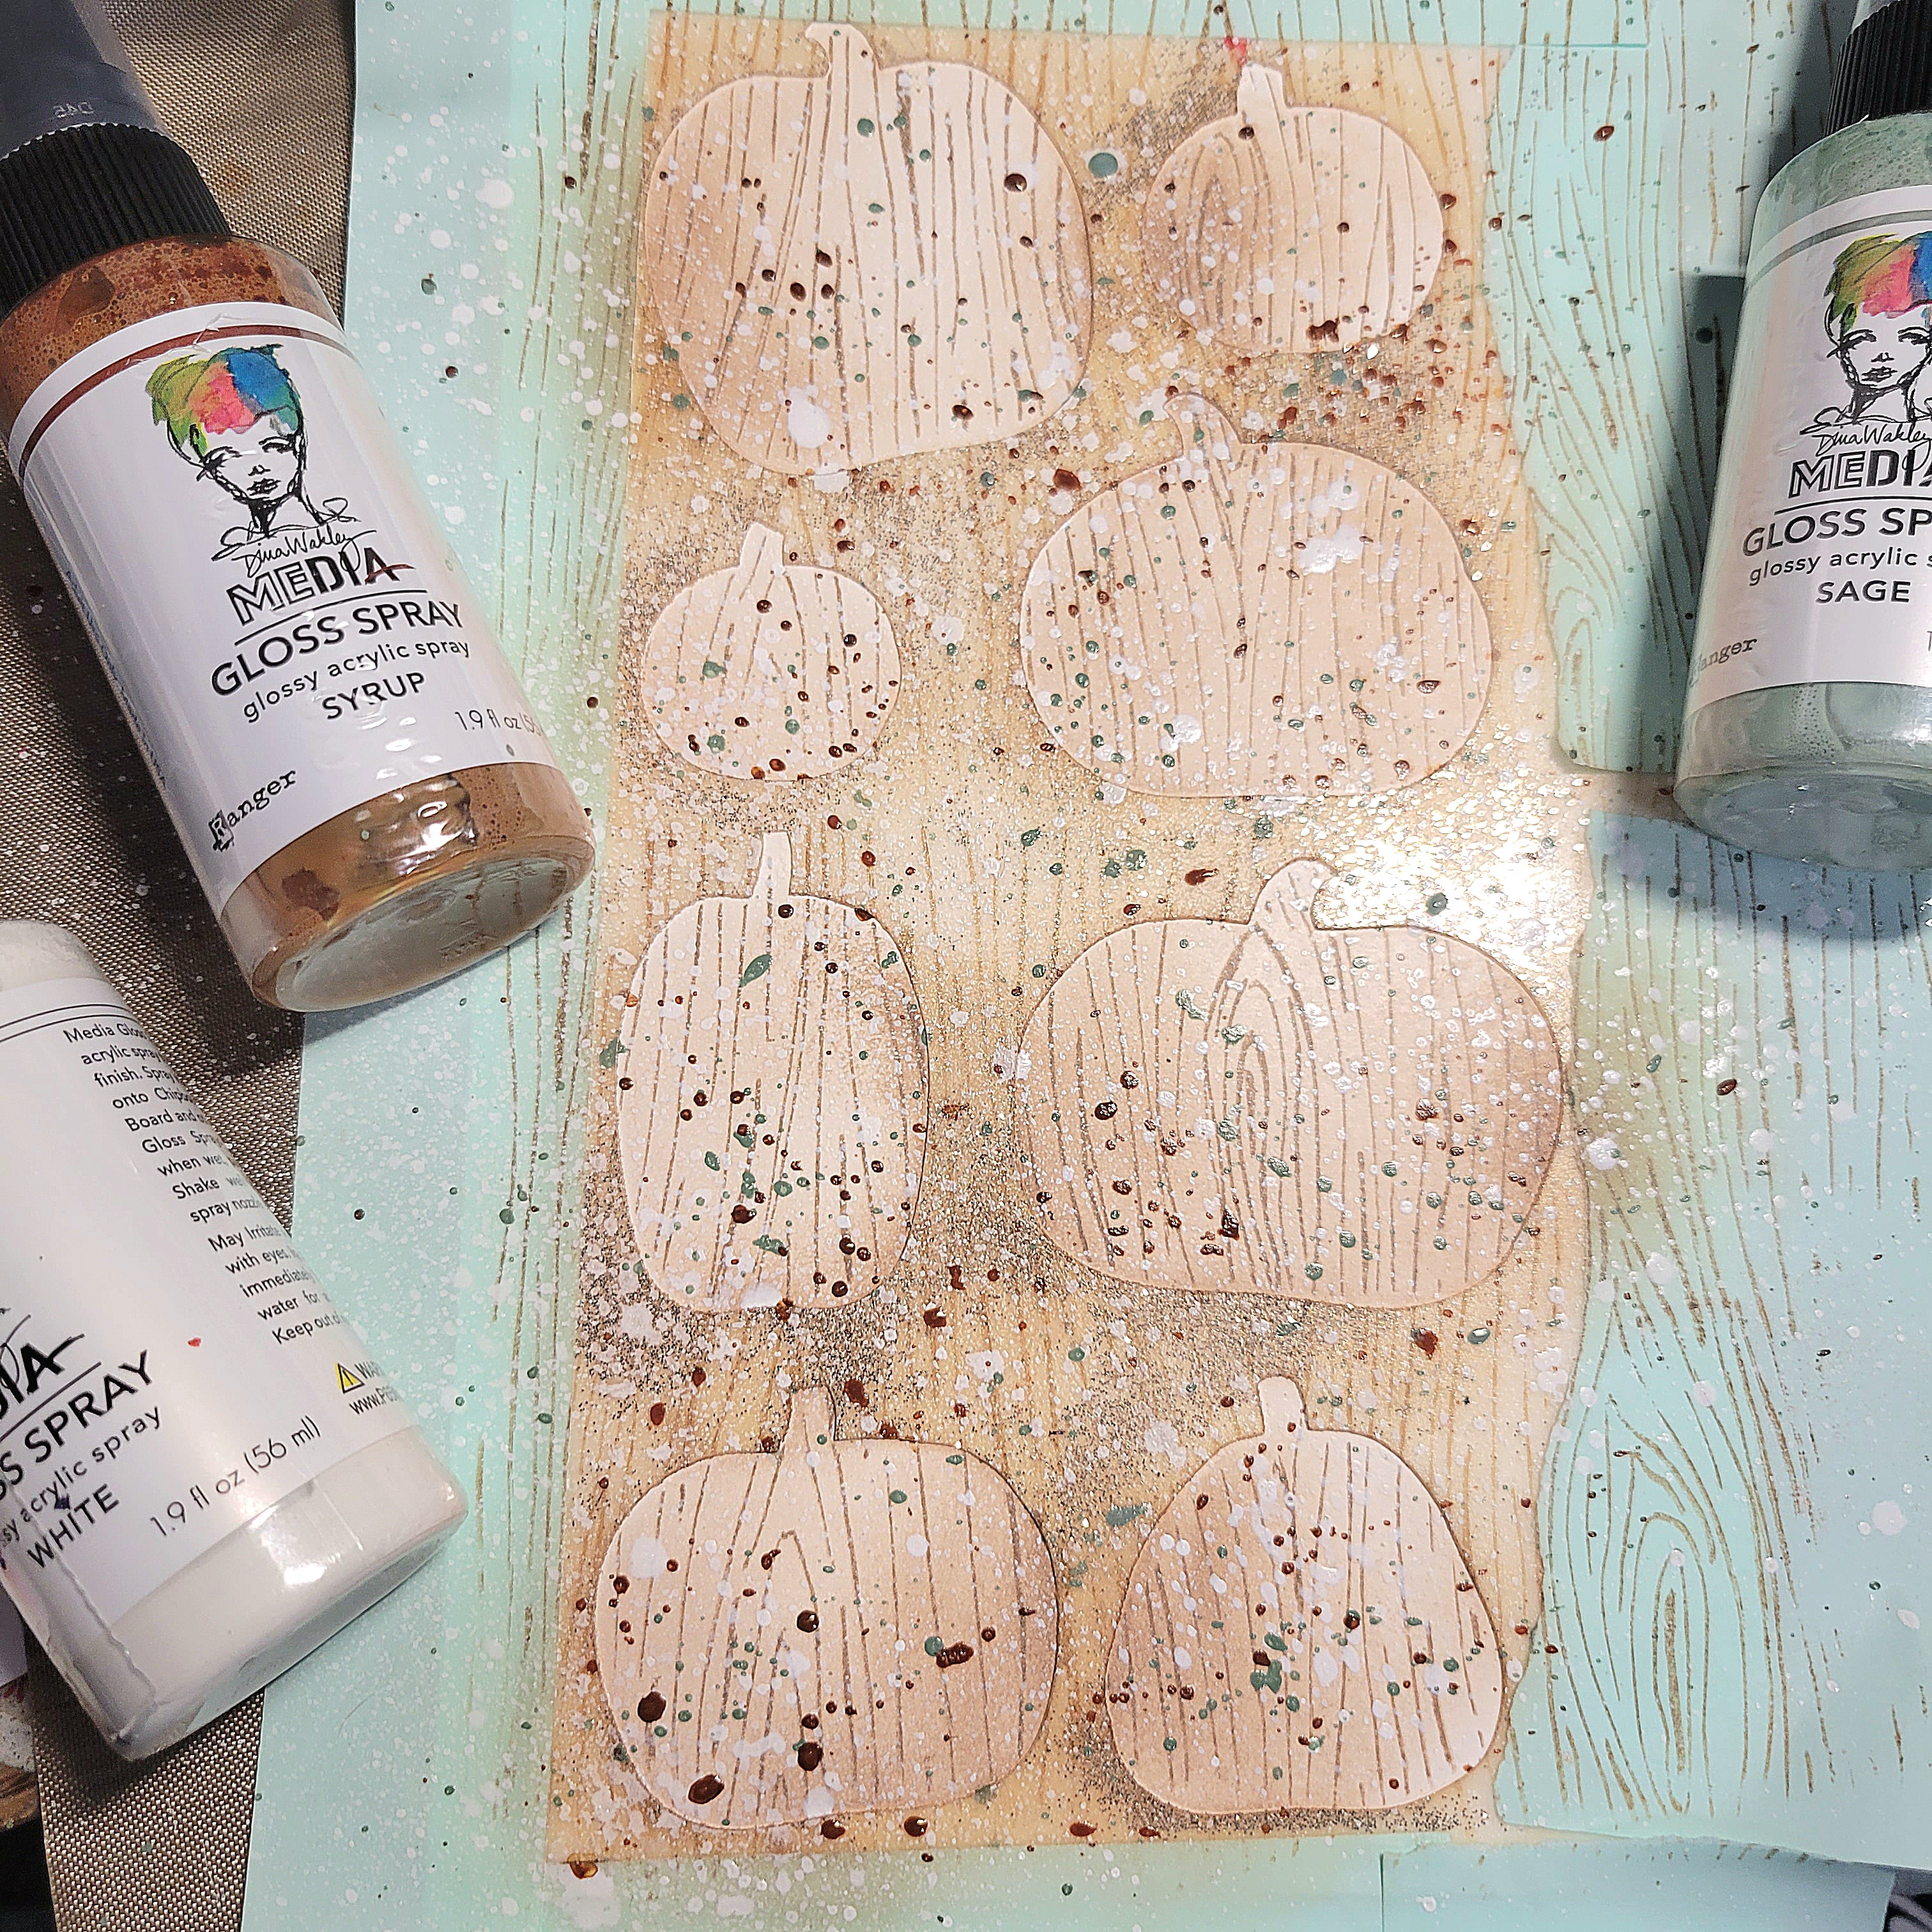
Continue to leave your masking and stencil in place for this next step. We're going to jazz up the pumpkins with some Dina Wakley Gloss Spray. I love that it dries fairly quickly and adds such pretty color, shine and dimension.

I generally unscrew my bottle top and simply tap the gloss all around with the end of the spritzer tube. It allows me a little more control this way and I don't over saturate my area.
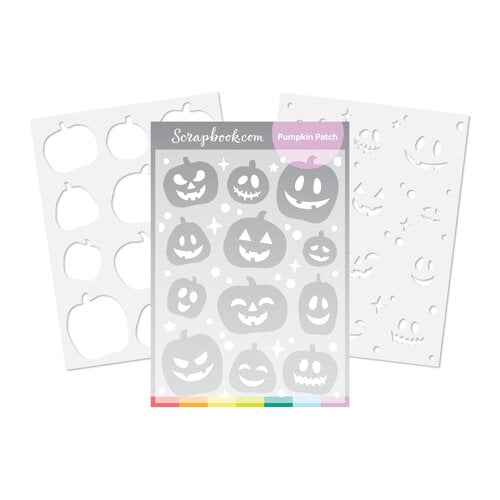


Now, it's time for the magic. Peel off your stencil and masking tape.


Isn't it gorgeous? I decided to go in and ink blend a few pumpkin "shadows" but this was easily done without masking. I also used the 2nd stencil that comes in the set to blend in some bubbles and stars. My sentiment was stamped with gradient color, stamping half my sentiment with Leather ink and the other half with Catherine Pooler Eucalyptus ink, to tie in all my colors together. I fussy cut it and backed it with a matching trimmed kraft cardstock.

Glue a few sequins for sparkle and call it a day!


As always, I've provided convenient affiliate links below, if you'd like to do some shopping. There's no additional cost involved and I appreciate your support!

Be sure and stop by the Deals/Coupon section at Scrapbook.com as there are often free gifts that you can add to your cart with purchase. Who doesn't love free?? As of this writing, Scrapbookcom Exclusive products are on super sale which includes the stencil and sentiment set!

See you next time...... Terri

*****************************************

Scrapbook Adhesives by 3L EZ Grand Runner
Shop at:
Scrapbookcom
Scrapbook Adhesives by 3L EZ Runner Grand Refill
Shop at:
Scrapbookcom
Scrapbook.com Domed Ink Blender Tools
Shop at:
Scrapbookcom
Wendy Vecchi Make Art Stay-tion
Shop at:
Scrapbookcom
Wendy Vecchi Makeart Non-stick Craft Sheet
Shop at:
Scrapbookcom | Ranger Ink
Exclusive Hybrid Ink Pad - Leather
Shop at:
Scrapbookcom
Ranger Heat It Craft Tool
Shop at:
Scrapbookcom | Ranger Ink
Mint Tape
Mint Tape
Shop at:
Scrapbookcom
Slimline Cards, Panels & Envelopes - 30 pcs
Shop at:
Scrapbookcom
Hi Fall Stamp Set
Hi Fall Stamp Set
Shop at:
Scrapbookcom
Ranger Gloss Spray - White
Shop at:
Scrapbookcom
Smart Glue
Smart Glue
Shop at:
Scrapbookcom
Catherine Pooler Ink - Eucalyptus
Shop at:
Scrapbookcom
Catherine Pooler Woodgrain Background Cling Stamp
Shop at:
Scrapbookcom
Bazill Basics Dark Kraft Cardstock
Shop at:
Scrapbookcom
Catherine Pooler Dublin Sequin Mix
Shop at:
Scrapbookcom
Dina Wakley Gloss Spray - Sage
Shop at:
Scrapbookcom
Dina Wakley Gloss Spray - Syrup
Shop at:
Scrapbookcom
Exclusive 6x8 inch Pumpkin Patch Stencil - 2 pc set
Shop at:
Scrapbookcom


#wavingmywand #scrapbookcom #pumpkinpatch #pumpkins #stencil #stenciling #hifall #Fall #Autumn #cardmaking #cards #rangerink #dinawakley #glossspray #3L #catherinepooler #slimlinecards #wendyvecchi #makeartstaytion #papercrafts #DIY #cardmakersofinstagram #cardmakersoftiktok #seasonal #techniques

Wednesday, September 21, 2022

Boo Stitched Halloween Card

Hey friends, I'm back today with a card that features products from Spellbinders. I simply had to have this fun ghost die set called Dancin' Ghost from the Boo Party Collection. I love making seasonal cards and this one definitely puts me in the mood for Halloween cardmaking. Stick around for some tips and details on the huge Fall Warehouse Sale! You'll also find product links at the end of this post.


(FTC Disclosure: as an affiliate for various companies in the craft industry, I will receive a small commission for purchases made through my convenient affiliate links, at no additional cost to you.)


I used the stitched diamond argyle cover plate for my panel, cut with my Platinum 6 die cutting machine. I chose several DMC floss colors that spoke "Halloween" to me; 553, 550, 971 and 907.

Back in May of this year, I ordered the Stamp of the Month club selection which was the Stitched Color Wheel stamp set pictured below. I used one of the stamps to make those paper floss thingies below. What's it called, haha?  Are you a club member? Find out about their clubs here.

Not only will you get 10% off all your Spellbinders purchases, you can order past club kits, if they're not sold out.


I share a lot of "work in progress" photos on Instagram and in Stories (pictured below). Are you following me on Insta? If not, I would love to see you there!

I'm also the founder of The Seasonal Cardmaker Facebook Group, if you'd like to join. Pop in and share your seasonal cards with us!


So, back to my sweet lil' ghost. I ran white cardstock through my Platinum 6 die cut machine, popping out the eyes, and again with black cardstock, keeping the eyes intact. I backed my white ghost with the black ghost, offsetting it to one side for more of a shadow effect. Adhesive foam on the back, keeps everything intact, including the eyes, and adds dimension.

I really wanted to pull color from my threads onto my ghost because sometimes, that's how I roll, haha. I used 4 different Copic Markers, all linked at the end of this post, plus a blender brush to smooth out the color near the top. 

For my sentiment, I layered 2 strips of black cardstock with a trimmed section of adhesive sheet peeled and adhered between the two strips, so when I ran it through my Platinum 6, it's more sturdy to work with. Just a little glue on the back works to adhere it to my layered strip panel near the bottom. I usually dredge intricate dies gently through a small amount of glue on my craft mat, then blot the excess around my die cut with a paper towel.


I mounted my A2 size black cardstock on an A2 white card, then mounted my stitched panel with die cuts attached. Such a fun project! I love how the stitching kind of looks like cobwebs, don't you think?

Thanks so much for stopping by! Don't miss out on the Fall Warehouse Sale that runs now through Sept.30th. It's a huge event so check it out! 

See you next time............. Terri


***********************************


Scrapbook Adhesives by 3L EZ Grand Runner
Shop at:
Scrapbookcom
Scrapbook Adhesives by 3L Foam Circles Mix, White
Shop at:
Scrapbookcom
Scrapbook Adhesives by 3L EZ Runner Grand Refill
Shop at:
Scrapbookcom
Copic Sketch Marker - YR15 Pumpkin Yellow Light Orange Bright
Shop at:
ScrapbookPal
Copic Sketch Marker - YR68 Orange Bright Bold
Shop at:
ScrapbookPal
Copic Sketch Marker - YG17
Shop at:
ScrapbookPal
Copic Sketch Marker V15
Shop at:
ScrapbookPal
Shop all Copic Markers at ScrapbookPal!
Shop at:
ScrapbookPal
Spellbinders Platinum 6 Die Cut/Emboss Machine
Shop at:
Scrapbookcom | Spellbinders
Neenah A2 Card Front Panel 25 pk
Shop at:
Scrapbookcom
Stitched Argyle Diamond Etched Background Die
Shop at:
Scrapbookcom | Spellbinders
Spellbinders Tool N One - Rose Gold
Shop at:
Scrapbookcom | Spellbinders
Neenah A2 Scored Cards - 25 pk
Shop at:
Scrapbookcom
Boo Dance Party Collection - Dancin' Ghost
Shop at:
Scrapbookcom | Spellbinders
Spellbinders Onyx Cardstock - 10 pk
Shop at:
Scrapbookcom | Spellbinders


#wavingmywand #spellbinders #boodanceparty #dancinghost #halloween #cards #cardmaking #copicmarkers #neverstopmaking #teamspellbinders #cardmakersofinstagram #cardmakersoftiktok #stitching #stitched #dmcfloss #dmcembroideryfloss #DIY #copicmarkers #scrapbookcom

Monday, September 19, 2022

Christmas Tree Stenciled Card

Hello fellow cardmakers. I have another card that I created for Scrapbook.com, this one featuring the Peppermint Forest stencil using my Rudolph Red Pops of Color. I've also created "candy stripes" with trimmed pieces of paper. Scroll down for creative details and product links!


(FTC Disclosure: as an affiliate for various companies in the craft industry, I will receive a small commission for purchases made through my convenient affiliate links, at no additional cost to you.)


The Peppermint Forest stencil set consists of a 2 pack of 6x8 inch stencils, one with trees and one with tiny stars.


I applied mint tape on an A2 card panel, to mask off diagonal stripes where I planned to stencil my trees. When I remove the tape after stenciling, that's where I'll place my strips of paper diagonally.


This can get a little messy, so be sure and wash your stencil right away when you're finished.


I left a wide gap near the lower section of the card to stamp several sentiments from the Fa La La stamp set. I used my Misti stamp positioner and lined them up all at one time, stamping multiple times to get the desired depth of inking that I wanted.


I love the dimension that you get from stenciling with Pops of Color. There's so much brilliant color which can really be hard to achieve sometimes with ink.

Once I finished my panel, I trimmed it down a bit to fit onto a piece of paper from the Roses paper pad, which was sized to top an A2 white card.


I had enough space between my rows of sentiments to stencil some tiny stars with the accompanying stencil. I use my Cardinal Red hybrid Ink from Scrapbookcom with a blender brush, then dotted each star in the middle with a tiny drop of more Rudolph Red Pops of Color.

Thanks so much for stopping by. There's no time like the present to start building your stash of holiday cards for mailing to friends and family. If you'd like to do some shopping, I've provided convenient affiliate links below. There is no additional cost for you to use these links! 
Thanks so much!

Terri


SHOP:
***********************************


Scrapbook Adhesives by 3L EZ Grand Runner
Shop at:
Scrapbookcom
Neenah Solar White Cardstock 8.5x11 inch
Shop at:
Scrapbookcom
Scrapbook Adhesives by 3L EZ Runner Grand Refill
Shop at:
Scrapbookcom
Scrapbook.com Hybrid Ink - Black
Shop at:
Scrapbookcom
Catherine Pooler Blending Brushes - 4 pk.
Shop at:
Scrapbookcom
Tim Holtz Distress Palette Knife, 2 pc.
Shop at:
Scrapbookcom
Wendy Vecchi Makeart Non-stick Craft Sheet
Shop at:
Scrapbookcom | Ranger Ink
Mint Tape
Mint Tape
Shop at:
Scrapbookcom
Neenah A2 Card Front Panel 25 pk
Shop at:
Scrapbookcom
Pops of Color - Rudolph Red
Shop at:
Scrapbookcom
Slimline Cardstock - Roses
Shop at:
Scrapbookcom
Double Sided Adhesive Foam Tape - 32 feet
Shop at:
Scrapbookcom
Peppermint Forest Stencil - 2 pc.
Shop at:
Scrapbookcom
Wordfetti Stamp Set - Fa La La
Shop at:
Scrapbookcom
Roses A2 Paper Pad
Roses A2 Paper Pad
Shop at:
Scrapbookcom
Neenah A2 Scored Cards - 25 pk
Shop at:
Scrapbookcom


#wavingmywand #scrapbookcom #stencils #stenciling #peppermintforest #popsofcolor #rudolphred #christmas #cards #wordfetti #falala #merrychristmas #itsthemostwonderfultimeoftheyear #roses #stars #seasonsgreetings #tistheseason #holiday #seasonal #christmastrees #DIY #papercrafts #crafting #cardmaking