Showing posts with label mod podge. Show all posts

Friday, October 27, 2017

Mail Art with Digi Stamps and Tombows for Graciellie Design

I can't begin to tell you how happy I am that it's Friday!  We're finally having cooler weather here where I live and I'm actually having to wear a light jacket.  I'm really enjoying all the seasonal things, right now.  Which brings me to today's project, courtesy of a fabulous digital stamp bundle from Graciellie Design.  I thought it would be fun to color up some envelopes a.k.a mail art, for adding that extra special touch to your holiday invitations or seasonal greeting cards.  I've got brief instructions below, plus a coloring technique video.


I'm using the Bountiful Season set which is included in the Thankful Words bundle and includes 24 images.  It's an amazing set and perfect for all occasion cards.  As a bonus, it's on sale right now!


Working with digital stamps is so easy!  For these envelopes, I opened up a Microsoft Word document and resized my document under page layout, to 5" x 7".  Add your images by selecting "insert picture" and flip your images sideways.  I chose sideways because of how my envelope will be inserted into my printer.  Your printer set up may vary.


If you have multiple images, sometimes, they don't want to move.  Here's the easiest way to move multiple images around.  Click on the image that you want to move and "right click" once and select "wrap text" then select "in front of text.  Now you can move your image all over.   Try this with each image, if needed.


Before printing, I always make my image transparent so there's no square background that prints behind my image.  Click on your image.  In my version of Microsoft Word, the "picture tools/format" tab pops up on the toolbar.  Select "color" and scroll down to select "transparent color".  Now, you simply place your magic wand in the blank space around your image and click.  Done!


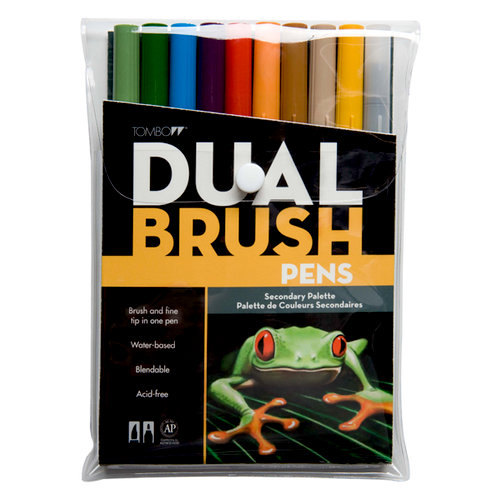
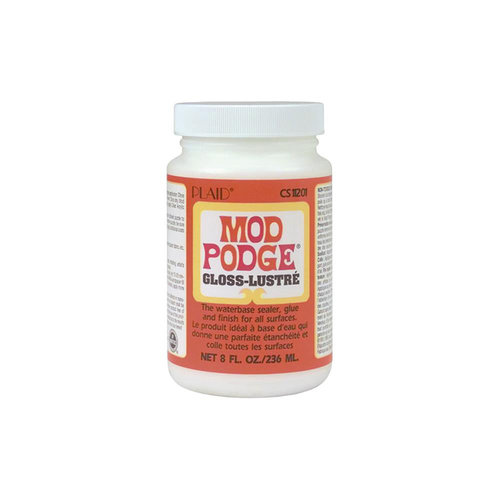
The beauty of this project is doing multiples all at once and then sitting down to enjoy the coloring process which is quick and easy with my Tombow dual brush markers.  Once the coloring is dry, you'll want to "set" your image with clear gesso or Mod Podge to make sure your coloring won't ruin, if its a rainy day in the recipient's mail box!


Gracie is having a celebration over on her Facebook page for hitting 4000 followers.  Be sure and head over and look for the post so you can enter to win her giveaway.  Follow her page, if you're not already.


I've also got a coloring/technique 7 min. YouTube video.  I would love it if you would follow my channel and give me a thumbs up on the video.  Comments are welcome too!


Be sure you're following me on social media!  I have giveaways from time to time and you don't want to miss out!


Also linking to these challenges:


SUPPLIES

I’m listing the products I used below. Click on the link to go directly to the product. Where available I use compensated affiliate links which means if you make a purchase I receive a small commission at no extra cost to you. Thank you so much for your support!
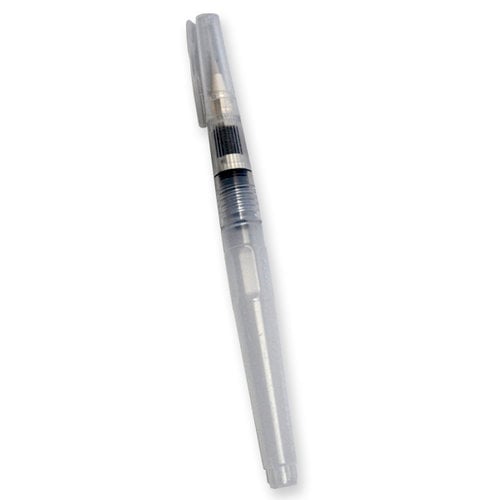


Ranger Tim Holtz Detail NIB Water Brush
Shop at:
SBC
Ranger US HEAT IT CRAFT TOOL
Shop at:
SBC
Tombow Dual Brush Secondary 10 pc set
Shop at:
SBC
Mod Podge Glossy 8 oz
Shop at:
SBC
Graciellie Design Thanksful Words digi bundle
Shop at:
Graciellie Design
WRMK A7 White Envelopes 25 pc.
Shop at:
SBC
Ranger Ink Dina Wakley clear gesso
Shop at:
SBC
Tombow Dual Brush Markers Primary
Shop at:
SBC


#gracielliedesign #digitalstamps #bountifulseason #thankfulwords #bundle #stamps #newrelease #thanksgiving #pumpkins #givethanks #thankful #gratitude #wavingmywand #terriburson #wermemorykeepers #WRMK #rangerink #tombow #tombowusa #brushmarkers #dualbrushmarkers #modpodge #gesso #DIY #mailart #coloring #envelopes #happymail #craft #seasonal #papercrafts

Tuesday, August 23, 2016

Pocket Style Cards with Two Paper Divas and Pumpkin Spice Lattes! *recipe

Did you know that September 22 is the first day of Autumn?  Fall is my absolute favorite time of year and with the heat that we've experienced this summer, it can't get here soon enough.  Cooler weather, changing leaves and pumpkins popping up on the neighbor's porch can only mean one thing.  Fall is here.  Of course, with the arrival of Fall, comes seasonal coffees - another added bonus to the season, if you're a coffee lover, which I undoubtedly am.

With that in mind, I've made a set of pocket style cards featuring the stamp set, Coffee on the Go, by Two Paper Divas Stamps.


These 3"x 4" cards are perfectly sized for Project Life style scrapbooking or using as a base for a larger card.  I've turned my coffee stamp into a Pumpkin Spice Latte, my favorite seasonal drink, pairing this with the Simple Stories Pumpkin Spice paper collection.  

My cup is paper pieced and I've colored the coffee with a Zig Clean Color pen in Oatmeal and topped my whipped cream with Mod Podge glitter dimensional glue and copper colored extra fine glitter that I purchased from the Stamp & Scrapbook Expo.
So delicious!


Now, as an added bonus, I'm sharing the Pinterest link to my favorite Pumpkin Spice Latte recipe.  I've made this many times, even making batches of it at work, to share with my co-workers, and they all love it.  Enjoy!


Purchase Coffee on the Go, here.


Visit the Two Paper Divas Blog for daily project inspiration and on Wednesdays for the Design Team Roundup.  Check out the newest release right here:


Shop Two Paper Divas for a wide selection of clear stamps, digital stamps and accessories.

Also linking to these challenges:


Additional Supplies:
Elizabeth Craft Designs Scalloped Pierced dies
28 Lilac Lane embellishment kit, Autumn Afternoon
foam mounting tape
hot glue
burlap string
Xyron adhesive runner


#twopaperdivas #tpdstamps #coffeeonthego #coffee #latte #pumpkinspice #pumpkin #modpodge #elizabethcraftdesigns #xyron #simplestories #28lilaclane #buttonsgalore #xyron #autumn #Fall #leaves #kuretakezig #zig #glitter #scrapbookexpo #recipe #wavingmywand #terriburson #diy #pocket #projectlife #scrapbook #craft #card #stamp

Wednesday, July 6, 2016

Altered Art Journal and New Release at TPD Stamps

It's day two of the new stamp release from Two Paper Divas and I've got a pretty altered art journal for you today that features 3 of the new stamp sets; those sweet birds from "Stuck on You", Doodle Alphabet and Journal It!1.  I'm super excited that TPD is introducing fun journaling stamps, also perfect for Bible Journaling!  Be sure and visit the TPD site to check out all of the journaling stamps as I'm only featuring one today.

I'll have a full supply list at the end of this post but primarily I'm including a few key "ingredients" in making this art journal; DecoArt Multi-Surface Satin Paint, 28 Lilac Lane Embellishment Kit, DCWV papers, Bo Bunny shimmer spray.


First, I painted my journal in 2 layers of white paint.  When dry, I added my DCWV tissue paper, covering both sides with Mod Podge and sped up the drying process with my heat embossing tool.  Next, I used my Tim Holtz Crackle stencil and painted another layer of white over my stencil.  Cover with Mod Podge and dry.

To make the gold, shimmery birds, I took my Bo Bunny shimmer spray and added a few droplets on my craft mat, spritzed with a little water and stamped my birds into the mix, then stamped onto my journal.  Blot with paper towel as needed.  Leaves a gorgeous shine!


My sentiments were stamped with Colorbox archival ink and I touched up my birds and the word, "Joy" with my mix of white and neon blue paint.  I hot glued all my embellishments, including the ribbon, and embellishments from 28 Lilac Lane which included those buttons and sequins.  I carefully sealed my birds and sentiments with one last swipe of Mod Podge to make them waterproof.


I'm so happy with how this turned out!  I plan on using this as a devotion journal.  I hope this inspires you!  If you've been thinking about creating your own art/devotion journal, it takes a bit of time but it's so worth it.


Purchase Stuck on You here.


Purchase Journal It!1 here.


Purchase Doodle Alphabet here.


Visit the Two Paper Divas Blog for daily project inspiration and on Wednesdays for the Design Team Roundup.  Check out the new July release right here:


Additional supplies: DecoArt Multi-surface Satin paint in Cottonball and Neon Blue, DCWV Vintage Essentials Tissue Paper Stack, 28 Lilac Lane Autumn Afternoon embellishment kit; Bo Bunny Bronze Shimmer Spray, May Arts Ribbons, Mod Podge, Colorbox Saddle archival ink, Prima flower, hot glue and glue gun, Tim Holtz Crackle stencil


#tpdstamps #twopaperdivas #cre8time #summer  #planner #plannerstamps #timholtz #decoart #decoartblogger #stuckonyou #doodle #alphabet #journal #devotion #artjournal #altered #upcycle #28lilaclane #embellishmentkit #paint #stencil #crackle #bobunny #shimmer #dcwv #dcwvinc #vintage #tissuepaper #diy #modpodge #plaidcrafts #colorbox #prima #mayartsribbon #biblejournaling

Saturday, January 2, 2016

Product Review for Heartfelt Creations Coffee Talk (Part 2)


Welcome back to the second half of my product review for the Heartfelt Creations Coffee Talk collection.  Last week, I shared my review of the Coffee Talk paper collection and if you missed it, you can see my scrapbook layout and review, here.   Today, I'm going to share my insights into their new Coffee Mug Cling Stamp Set.  


I've learned a lot of techniques over the years and you can learn many of these techniques at the Hearfelt Creations website by scrolling through their blog or tutorial links found on their home page.  Today, I'm going to watercolor this stamped image and create a mug shaped card; 
without a die.  


Before we get started, I wanted to show you the size of the stamp.  It's massive.  Seriously.  You're going to need a 4"x 6" acrylic block for use with this cling stamp.  It spans nearly the entire length of my hand, at 5" x 4".  


I wanted to make a mug shaped card, however, I didn't have the die.  That's where a little creativity and ingenuity comes into play.  I pulled out a pencil and started tracing the outside image of the cling stamp with the stamp placed faced down.  Next, I carefully flipped my stamp over, traced the outside edge of the stamp with the image face up.  Those arrows indicate where I plan on scoring my paper, which by the way, is watercolor paper (Bristol Strathmore 300 series).


Here, you can see the final outline.  It's not a perfect science and I did use my fine tipped scissors to completely clean up any uneven edges.  Do I recommend that you purchase the accompanying die?  Yes! It would certainly increase productivity, particularly if you want to make multiples of a mug shaped card.  You can find the die, here.  Take a peek at some of the other Coffee Talk cling stamps that are available, here.  As my budget allows, I certainly plan on adding to my collection.   


Your best bet, would be to purchase the Coffee Talk Creative Essentials Collection, receiving the paper, mug stamp and dies at a collective discount.  


Now, let's wrap this up.   Before, trimming the outline of my mug shaped card, I watercolored my stamped image using Ranger distress inks.  My favorite technique, and it's an easy one, is to stamp your distress ink onto an acrylic block or craft mat, spritz with a water mister, then grab a wet paintbrush and start painting with your diluted ink.  For more intense color, add more ink and less water.


For the inside of this card, I've stamped onto some patterned paper and trimmed it to fit inside my card.  You'll want to leave a little bit of an outer rim to your card and not trim it completely to the edge of your stamped image.


I used a craft knife to trim a little circle, bringing the "inside" of my card, for viewing on the outside, trimming the inner part of the mug handle, as well.  For a little added sparkle, I added some tiny sequins and Mod Podge Dimensional Magic glue to the colored coffee.


Thank you so much for spending this time with me today.  I know you are going to love this new collection from Heartfelt Creations, as much as I do.  I would love to see what you make too, so please share be sure and share your creations at the social media sites listed below.  If you're not already following the various links below for Heartfelt Creations and myself, I encourage you to do so.  You don't want to miss a thing!

Terri from Waving My Wand


Other links:


Social Media for Waving My Wand:


#heartfeltcreations #coffeetalk #coffeelovers #coffee #mug #papercrafting #scrapbooking #cardmaking #tags #sentiments #borders #frames #dies #cre8time #diy #homedecor #shapedcards #watercolor #distressink #ranger #timholtz

Tuesday, December 15, 2015

Winter Coffee Lovers Hop + International Tea Day

 (FTC disclosure: This post may contain affiliate links so, if you purchase a product using the link I may receive a small commission. I only participate in affiliate programs that feature products that I use and love. Your purchase price is not affected in any way, by using my links.)
Today is International Tea Day.  I live in the South and we love our tea.  Usually, I drink it as a tall iced cold glass of sweet tea, but on occasion, I do enjoy a nice hot cup of tea.  My favorite is Sweet Coconut Chai.  Oh yes.  It's that good.

(**Visit this link for another giveaway that ends 12/20/15:  MPC G45 Giveaway)


 Of course, there's a super fun blog hop going on all week, the Winter Coffee Lovers Blog Hop.  You should join in!  It's a whole lot of fun and there's so much creativity, inspiration and sponsored giveaways as well.  Earlier in the week, I linked up my creation for The Ribbon Resource and celebrated with a cocoa themed project. 


Today, it's all about the tea.


I got this great coffee cup stencil from Stamplorations.  It's perfect to use as a tea cup as well.  I went all mixed media and CAS (clean and simple) on this project.  Lots of ink, glitter, splatters and bling!


I outlined my stenciled image with Mod Podge Dimensional Magic glue, then sprinkled some green super fine glitter and allowed it to dry.  My background was watercolored with Ranger Brushed Corduroy in varying diluted shades, and splattered with several inks, which I'll list at the end of this post.


Finally, I've inked a brand new stamp, also from Stamplorations and designed by my crafty pal, Becca Dawn from her Big Grins line.  This set is called, "Caffeinated Christmas" and I've chosen this fun tea sentiment to accompany my project.  It was inked with my Hero Arts green ombre ink, then outlined with a Bic Mark-It lime green pen to enhance the image.  I love how it turned out.   I rounded this card out with some bling which includes bubble embellishments from DoubleClick Skittles, and tiny sequins.

Thanks for stopping by and I hope you have a wonderful holiday season.  Merry Christmas!

Also linking to:


Additional Supplies:
Quick Quotes Powder Puff Chalk ink in Coconut White and Mocha
Mod Podge Dimensional Magic Glue
PPP 4 mm Christmas Mix sequins

#holidayclh #coffeelovers #tea #coffee #stencil #stamplorations #caffeinatedchristmas #biggrins #caffeine #Christmas #card #craft #ranger #timholtz #distress #heroarts #doubleclickskittles #skittles #sequins #modpodge #modgepodge #bobunny #americancrafts #spellbinders #cuttlebug #watercolor

Tuesday, October 13, 2015

Breast Cancer Awareness Pin for The Ribbon Resource

(FTC disclosure: This post may contain affiliate links so, if you purchase a product using the link I may receive a small commission. I only participate in affiliate programs that feature products that I use and love. Your purchase price is not affected in any way, by using my links.)

Hey ribbon lovers, I've got a gorgeous pin featured at The Ribbon Resource today, the online retail store for May Arts Ribbon.  Unless you live under a rock, then you know October is Breast Cancer Awareness month.  Head on over to the Ribbon Resource blog and read my family's brief story and check out the tutorial for making one of your own!


Leave a comment over at the RR blog and share your own story.  I'd love to hear about it.  Sharing is caring!  Feel free to shop my affiliate links below, at your convenience, any time.  Thanks for stopping by.... Terri

Ribbons used:


from: Ribbon Resource

from: Ribbon Resource

from: Ribbon Resource


The Ribbon Resource - May Arts Ribbon Retail Store


#bca #breastcancerawareness #breastcancer #ribbon #ribbonresource #mayartsribbon #tulle #rosette #beads #modpodge #xyron 

Saturday, July 25, 2015

Bloom with ADORNit and Zig Clean Color

Hello crafty friends and welcome to Saturday!  As a workin' girl, I have to get crafty whenever I can.  That means late nights, weekends and even lunch breaks at work!  Hey, whatever works, right?

I jumped on the Zig Clean Color bandwagon.  Yes, I did.  Recently, I worked a booth at the Scrapbook Expo for the first time.  It was hard work, let me tell you, but a wonderful experience.  I re-connected with artist/designer/vendors from the Craft & Hobby Association, when I was the guest blogger last summer at the Paper Arts show, made new friends and had fun when some of my fellow crafty friends from my hometown popped by my booth to say hi!

Working the Expo does have it's perks.  For example, the vendor discount, which is how I snagged my brand new Zig markers.  


I have to admit.  I have a hard time just coloring.  I always want to add more.  Today's project is no exception.  Yes, I grabbed my Stickles glitter glue and added some sparkles on this ADORNit Art Play Paintable from the "Be Awesome" collection.


I've added some of my favorite products to my Bloom creation, including May Arts Ribbon, Skittles bubble embellishments and Plaid Dimensional Magic Glue for the vase.  


Want to know a secret?  My initial creation was a disaster!  I added a bunch of stuff to the background of my painted image and it was a total flop.  Hey, the creative process is definitely not a perfect science.  Learn from your mistakes and move on.  Which is why I rescued my lovely vase by fussy cutting the entire colored image and ditching my disastrous background.

I think it turned out better than what I originally planned.  It's my first time cutting out an ADORNit colored image which leads me to my next statement.  There's always a lesson to be learned.  Don't limit yourself.  Cut up your image and use it in different ways, if you so choose.  You never know where your art will lead you.  Mistakes are often blessings in disguise.  I love that.


Additional supplies:  Zig Clean Colors (green, carmine red, light gray, light green, persian blue, flesh, violet, brown, cobalt blue, purple, orange, yellow), DoubleClick Skittles in banana, blue raspberry and strawberry, May Arts Ribbon mini pom in white and blue floral print, Tombow Power Bond adhesive runner and foam strips, Ranger liquid pearls, Ranger Stickles glitter glue Eucalyptus, Neon Flamingo, yellow, magenta, Plaid Mod Podge Magic dimensional glue, American Crafts DIY kraft card/envelope, white gel pen, Marvy Le Pen black fine point pen, Doily

Disclosure: This post may contain affiliate links so, if you purchase a product using the link I may receive a commission. I only participate in the affiliate programs linked above because they are products that I use and love. Your purchase price is not affected in any way, by using my links. Thank you for your support and helping me keep my content free!

#adornit #artplay #mayartsribbon #tombow #ranger #rangerink #cre8time #zig #zigcleancolor #plaid #modpodge #stickles #glitter #americancrafts #kraft #skittles #doubleclickconnect #scrapbook #card #coloring #paint

Tuesday, April 21, 2015

Be Happy, Be Inspired

 It's been awhile since I've linked up with the Unity Stamp Company's Be Inspired Challenge.  This is a monthly event and I decided I'm long overdue.  So, I went with the color challenge.  You can also choose the card or layout sketch challenge for inspiration. 

For my project, I decided on a mixed media piece that features the September 2013 Kit of the Month, Happiness Has No Limit.  I did some watercoloring and added some glittered straw fibers, along with some Bo Bunny Pearlescent and Plaid Mod Podge Dimensional Glue for added texture.


 Look closely at the bottom and you can see that I've added layers of scrap paper that closely match the color scheme.  I've also "scrunched" up the paper to give what I like to call "scruffiness"!

This started out as a 6"x6" white card, but I really wanted to give it a unique shape, so I simply hand trimmed the bottom of the card with my scissors, along with the stacked papers so all the layers matched.


I used my Tombow Dual Brush Markers for all the coloring, directly inking my stamp with multiple colors, then adding additional color by spritzing water onto an acrylic block that had been swiped a few times with my markers.

Join in the fun and link up, if you have Unity Stamps.  The contest ends May 13th, 2015.


Challenge Link: