Showing posts with label thermoweb. Show all posts

Saturday, January 25, 2020

How to Become a Craft and Hobby Affiliate!

If you've ever thought about taking your love of arts and crafts to the next level and wonder what an affiliate is or does, then stay with me.  I'm going to be covering some basics about how to become an affiliate and what that entails.  Although affiliates come from many other skill sets and industries, my primary focus will be on the craft and hobby industry, as that is where my personal experience lies.  I am by no means an expert, but am happy to share what I do know, in the hopes that you can make that choice for yourself and decide if this is something that would be a good fit for you.


(FTC Disclosure: as an affiliate for various companies in the craft industry, I will receive a small commission for purchases made through my convenient affiliate links, at no additional cost to you.)


So, what is an affiliate? They come from all walks of life. If you have any interaction with social media, whether it be a company site or a craft group on Facebook, then you've probably interacted with an affiliate. An affiliate is someone who has an affiliation or relationship with a company, to sell and promote their products.  It might be a DIY blogger, a design team member or an avid fan of the product.


Not all companies have an affiliate program. Some reserve that right specifically for their design team.  However, many do. The programs vary, as do the requirements to become an affiliate. The burning question is, "How do I get started?".  


Keep in mind, most companies are looking for someone who has an active presence on social media. It never hurts to be a fan and user of the product but you will need to have a plan on how you're going to promote the product for the company, in order to be accepted as an affiliate.

There are so many different affiliate programs with different requirements. One site, that houses multiple companies under it's roof, is Shareasale.com.  I'm an affiliate for Shareasale and it's a wonderful program. You'll find so many articles and information for new affiliates on their blog.  In fact, if you sign up as an affiliate through my link above, I will receive a lead commission, once you have generated $20 in commissions.  I would be remiss if I didn't share that with you!

Why should you sign up at Shareasale? Well, it's the hub for a ton of craft companies. This is where you go if you want to become an affiliate for brands like:


See what I did there? I linked my affiliate link to each company above and yes, I'm an affiliate for all of them and several others, through Shareasale!


You will need to fill out an application at Shareasale which involves adding your bank account information and your tax information.  This is required.  As you earn commission, the money accrues in your Shareasale account.  There is a lock date for disbursement of commissions earned ($50 minimum) once a month and it is direct deposited into your bank account.  I don't want to confuse you and throw too much information out there at one time, but you do need to know these requirements when applying. Once you've filled out your Shareasale application and linked all the required information then, you must be approved by Shareasale.  



Once you're approved, you can then do a merchant search on the site for any brands that you're interested in becoming affiliated with. You will then fill out an application for that brand, who will require a plan of action on how you plan to promote their products. 

Keep in mind, you may or may not be approved.  Depending on your plan of action (promoting on your various social media channels, sharing sales, new releases and promotions, etc.) a company may automatically approve your application, may consider your application and notify you at a later date, or may even refuse your application.  

Honestly? I've never had a company refuse me as an affiliate. I'm selective about who I chose to become affiliated with. I also will only apply as an affiliate if I absolutely love the brand or company.  If you don't love a product or brand, it will show.  I cannot stress enough how important it is to have a relationship with the brand. That may be the key factor in whether or not you're accepted as an affiliate.

There are other companies who have their own affiliate programs through other sites. Typically, you can scroll to the bottom of a company corporate page and find a link or informational page to apply to their affiliate program (as pictured in my 2nd graphic).

Some companies will want to know the links to your social media, how many followers you have on Pinterest or YouTube, for example. Whether you have 500 or 10,000 followers, that's not necessarily a deal breaker in being accepted. Some companies simply want the information for tracking purposes and reports. 

There is so much information out there on affiliates, so many different programs, and so many unique ways to share your love of a product and perhaps earn a few bucks in the process.


I know a lot of crafters who have turned this into their full time job. Each one will tell you, it's a lot of hard work, albeit, work that they love!  Although I work a full time job outside this industry, I've chosen to do affiliate work on the side. As a part time craft blogger (but full time lover of all things stamping and paper!), I spend many evenings each week and some weekends, creating and in preparation for promoting my projects on social media.  Most of the projects and work I do are affiliated projects.  However, I also do other projects that are not affiliate related but simply because I love the product.

The bottom line is this. If you wish to become an affiliate in this industry, I believe there are 3 key components that every affiliate should strive for, in addition to being tech savvy.  Let's face it, if you don't understand how technology works, this is not for you. There is a learning curve involved, but if you have the will and desire, you can make it happen! So, here it is:

  1. Relationship. Having a relationship with the brand is key. Being active in their forums, groups, etc and interacting with others who are like minded, gets your name out there and recognized.

2. Determination. If you don't have the desire or drive to continually be involved with the brand, interact with others and promote, promote, promote, then affiliate work may not be for you.

3. Quality. Let's be honest. If you love what you do, it shows. However, as an affiliate, you have to not only love what you do, but you have to put your best foot forward. That means, putting out quality work and imagery. If you want someone to purchase a product, imagery sells. Imagery is not only a top notch project, but excellent lighting and staging of your project. You are not only selling the product, but you are selling yourself as well. That's a whole other topic for another day!


So, let's wrap this up. Does it take money to make money? Some companies will send you products free of charge, or in exchange for product reviews. I still purchase stamps, paper and supplies that I love. The bonus factor in becoming an affiliate is some companies allow you to make a commission off your own purchases through their affiliate link. It's just a small way to offset the cost of outright buying the product at full price.

You do need to know this; there are laws and guidelines in place for affiliates. The federal trade commission requires that you make FTC disclosure and notify others that you are receiving product or commission on purchases made through your affiliate links. This is in place to avoid deceptive practices. You can learn more about FTC disclosure, here.  If you'll notice under the first paragraph of this blog post above, I always place FTC disclosure!  You also need to disclose affiliate status when sharing on other social media, whether it be a  simple "affiliate" mention somewhere in the post, or a "paid sponsorship" post.

You also need to be aware of laws in your state.  For example, I live in what's considered a Nexus state.  That means a law has been passed that requires any company who does business in that state to pay online taxes. This can affect whether you are accepted as an affiliate on a commission basis or per click basis. Because I live in a Nexus state, some of my commissions are per click.  That means if you click any of my affiliate links, I will receive a less than 0.25 cent commission, whether you make a purchase or not.  You have no idea how much I appreciate you clicking those product links!!  
The laws are different in each state and each company sets their own commission, so commission rates will vary.

Do I make a boatload of money?  I wish the answer was yes! What I do make is about enough to buy a handful of Starbucks drinks for myself and a friend, every month! It's all about time. The more time you put in, the more work you put in, the more relationships you develop with others, the more you receive. Being an affiliate, for me, is not about the money. What I do make helps offset the expense to run my blog, giveaways on social media and technology expense that is often involved for the creative process. There are free apps out there for editing photos but good quality photos often need the assistance of a paid program or software. 

I've probably gone way over my time limit here. If you've hung out until the end, then God bless you! I know I've thrown a lot at you and I hope this is invaluable information to you.  I hope I haven't scared anyone off!! Listen, if you are a lover of a product, just start out with one company. See if they'll take you on and give it a go. Learn all you can and then just blossom from there.  Good luck and I would love to hear your comments below, if this information was helpful.

Have a great day and stay crafty, my friends!  Terri 


#wavingmywand #shareasale #affiliate #howtobecomeanaffiliate #scrapbookcom #rangerink #simonsaysstamp #tombowusa #pinkandmain #trinitystamps #thermoweb #sunnystudiostamps #cricut #heroarts #craftblogger #tutorial #papercrafter #hobby #crafts #stamping #scrapbooking #mixedmedia #terriburson

Friday, December 1, 2017

Graciellie Design Blog Hop featuring Thermoweb

Welcome to the Graciellie Design blog hop!  This month we are so excited to be collaborating with Therm O Web  and featuring their amazing products, including the New Gina K Designs Winter 2017 Collection.  Of course, we are merrily still playing with the new holiday collections from Graciellie Design as well, for the perfect pairing.   

(Please note, I've created convenient affiliate links throughout this post, where applicable, for your shopping convenience.)


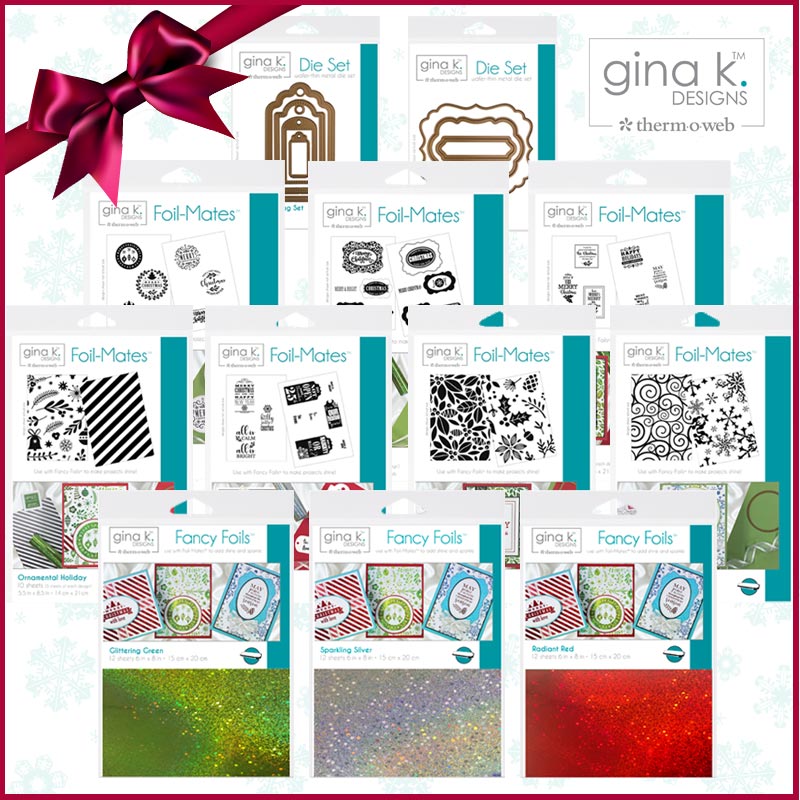
For my project today, I'm using the Therm O Web Holiday Cheer Foil Mates Sentiments, the Ornamental Holiday Background Foil Mates and the Fancy Foils in Radiant Red and Glittering Green.


For my sentiment, I wanted to do some partial foiling and leave the pre-inked black wording   I'm always up for a challenge and it was a little tricky to cut little sections of red and green foil, and avoid any of it getting on the black wording.  If you're not familiar with how the toner/foiling works, these images are printed with toner ink.  When laying down the foil and running through a heat laminator, the foil adheres to the toner.  It's magic!  There is a process involved and I went straight to a Gina K Designs video to see the process and sandwich technique for foiling with a heat laminator.  You can check that out here:  Thermoweb/Gina K Design Holiday Foil Mates Video  
(You'll spot the sandwich technique around the 8 min, 50 second mark)  

To make it easier, I foiled the red first, then ran it back through and foiled the green.  I love the look!


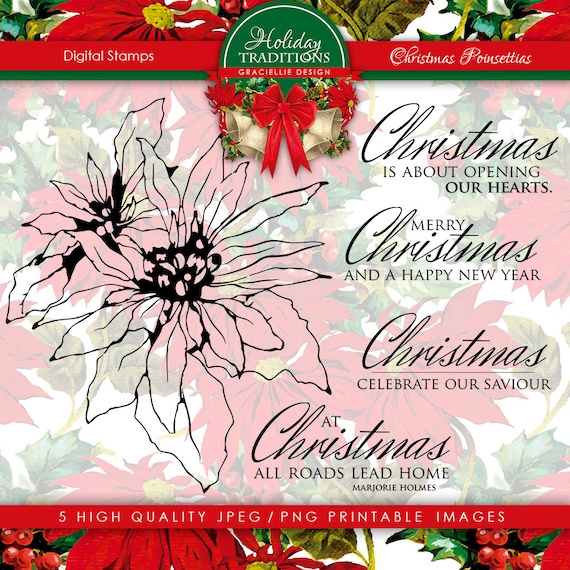
Of course, I'm also working with Gracie's lovely Christmas Poinsettia digital stamps.   I had already been playing around with this poinsettia, printing two images and watercoloring with my Tombows and a waterbrush, in the style of no-line coloring.  The bottom layer is colored lighter for added dimension and Therm O Web Mounting Squares add an extra layer of depth by popping up the top image, which was also splattered with white acrylic paint.  I love how all the accents compliment one another to create this festive card!


Since I have that big pop of red with the poinsettia, I decided to foil my background with the Glittering Green foils on the Ornamental Holiday background, and foiling the striped background with Radiant Red foil, as well, trimming a section to use as a border.  Don't forget your Therm O Web adhesive runners!  I used the sticky strip runner to tack down my backgrounds.  It gets the job done!


I love, love, love how this card turned out!  I'm new to foiling as well so if I can do it, you can do it!  By the way, all of Gracie's designers are also featuring her new holiday digi stamps and paper release.  You an also find some of Gracie's new holiday stamps available in red rubber, over at Unity Stamps which include Winter Blessings and Cheery Christmas, perfect for the crafter who likes to work with hand stamping.

Gracie has also just introduced a brand new SVG Winter Word Bundle and you can check that out via my links at the bottom of this post.   It's on sale at 50% off for a limited time,  no code needed.   Perfect for users of Cricut,  Silhouette and other die cutting machines! 


Thanks so much to Therm O Web for sharing these amazing products with us today!  I'm your last stop on the hop, so be sure and comment on all the blogs to be entered to win a $20 gc to Gracie's shop.  If you get lost along the way, head back to Gracie's blog.


Also linking to these challenges:

Simon Says Stamp Wednesday Anything Goes Challenge

SUPPLIES

I’m listing the products I used throughout this post. Click on the link to go directly to the product. Where available I use compensated affiliate links which means if you make a purchase I receive a small commission at no extra cost to you. Thank you so much for your support!


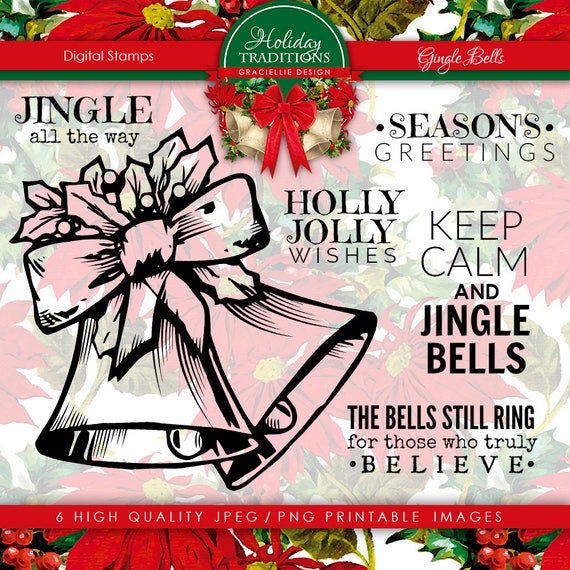
Graciellie Design Jingle Bells Digital Stamp set
Shop at:
Graciellie Design
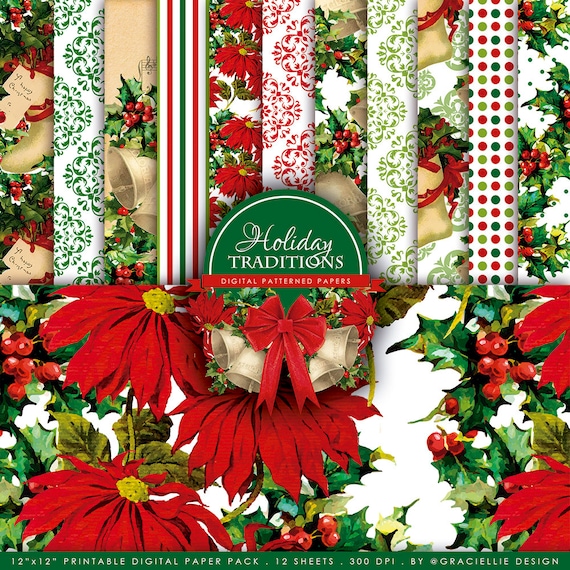
Graciellie Design Holiday Traditions Digi Paper Pack
Shop at:
Graciellie Design
Graciellie Design Christmas Poinsettias digi stamps
Shop at:
Graciellie Design
Graciellie Design Winter Blessings digi stamps
Shop at:
Graciellie Design
Graciellie Design Cheery Christmas digi stamps
Shop at:
Graciellie Design
Graciellie Design SVG Winter Bundle Words & Shadows
Shop at:
Graciellie Design


#gracielliedesign #digitalstamps #newrelease #svg #svgbundle #winter #christmas #holiday #holidaytraditions #thermoweb #foilmates #ginakdesigns #foiling #foil #toner #laminator #poinsettia #poinsettias #terriburson #wavingmywand #winterblessings #cheerychristmas #ornamental #backgrounds #adhesive #holidaycheer #fancyfoils #red #green #silver #jinglebells #christmascards #christmascrafts #papercrafts #cards #DIY #technique #scrapbook

Sunday, January 1, 2017

A New Year With So Suzy Stamps

I'm thrilled to be kicking off the first day of 2017 by joining the design team of So Suzy Stamps!  Last year, I served a term on the Stamp of the Month Design Team, if you'll recall.  When Suzy asked me to join her main design team, I, of course, said yes.  

I've got a step by step tutorial today, showing you how to make a glitter embossed winter scene, featuring the sentiment, "No Midnight", and the "Beech Line Leaf".  A fully supply list is at the end of this post.


We are using the theme and technique as shown below, for the month of January.


Image may contain: text


1.  To begin, ink the raised negative section of your embossing folder background with black archival ink.  Insert cardstock and run through your embossing machine.  Dry the embossed image with your embossing heat tool for a minute.


2.  Spread Stickles glitter glue in random areas of your embossed trees and sprinkle with extra fine gold glitter.  


3. Now, use your fingers to add clear glue on the black inked negative space, then sprinkle with black extra fine glitter.  Tap off excess.  Clean up edges with a wet q-tip.  Use a heat emboss tool to dry before proceeding.


4. For the moon, use a circle punch (1 or 1 1/2") and punch on white cardstock.  Take a scrunched paper towel and dip into your yellow dye ink.  I'm using So Suzy Stamps Sunflower Sue from the Autumn Equinox mini Ink Bites.  Dab onto your punched circle and add more or less ink to your liking.


5.  With a craft knife,  Place your inked moon in the upper right corner and trim only the negative background, where I've marked, using your moon as the outline to trim.  Remove your moon, then trim along the inside edge of trees from the top of your trimmed edge to the bottom. (see next photo)


6.  Run an adhesive runner over the backside of your trimmed tree area, then place your moon behind it, with the inked side peering through.  Having fun yet?


7.  Trim a piece of vellum and ink your entire strip with Versamark.  **Do not add sentiment for this step. ** Add black Nuvo embossing powder, tap off excess and heat with embossing heat tool.  


8.  Now, stamp your sentiment with Versamark on top of your black embossed vellum.  Add white embossing powder, tap excess and heat with embossing heat tool.  If I see an area that looks smudged or needs a cluster of powder removed before hand, I will use a fine tip tool, such as my Cricut weeding tool, to easily scrape away the cluster, for a smoother emboss.  Fussy cut around the edges of your sentiment.


9.  Ink the Beech line leaf with black archival ink onto heavyweight white cardstock.  Use a glue pen (I'm using the Zig two-way) and add random glue lines and dots.  Sprinkle sparkly extra fine glitter on top and heat with emboss heat tool for a few seconds.  I used a rainbow sparkle glitter (maker unknown).  Fussy cut around edges of leaf.


Use adhesive or a section of glue line (Thermoweb) to the back of your leaf and adhere to bottom of your card.  I ran my fussy cut sentiment through my Xyron 2.5" sticker maker, but you could use glue lines here as well.  To finish, I layered onto black cardstock and a white A2 sized white card.


Hop on over to the So Suzy Stamps blog to check out all the design team projects today - your source for winter inspiration!


Supply list:

-Darice birch tree embossing folder (or similar)
-Embossing/die cut machine such as Cuttlebug or Sizzix Big Shot
-Black, white embossing powder
-clear glue (Tombow aqua)
-glitter, black, gold (extra fine)
-Stickles glitter glue (stardust)
-yellow dye ink ( So Suzy Sunflower Sue)
-vellum
-Versamark watermark ink
-White, black cardstock (Neenah)
-Black archival ink (CTMH)
-embossing heat gun
-paper towel, q-tip
-glue pen
-adhesive runner (Xyron)
-glue lines (Thermoweb)


#sosuzystamps #wavingmywand #sosuzystampsblog #DIY #card #winter #vellum #babyitscoldoutside #birch #beechlineleaf #leaf  #trees #emboss #embossing #moon #nomidnight #midnight #xyron #thermoweb #tombow #versamark #zig #Ranger #stickles #glitter #darice #neenah #cuttlebug #inkbites #sosuzyinkbites #terriburson #craft #scrapbook

Friday, October 21, 2016

GIU Girl for Unity Stamps - Day 5

For my last day as the Growing in Unity Girl for the Unity Stamp Company, I've got a mixed media project for you, featuring "Nature's Holiday".  If you were smart enough to snag this last week when it was on sale, good for you!  It is such a precious stamp set.  Now, keep in mind, I set out with a vision in my head but, as often happens, I ended up with something totally different than what I intended.   Different is good, though.


Here's a close-up of my mixed media bird.  I went from stamping the original image with brown distress ink, to adding Flower Soft, Glitter Dimensional Glue, various inks and splatters of paint.


A friend had given me this amazing designer paper, I don't even know what brand, but it was a nice backdrop for what I had in mind.  My pinecones?  Lordy, they got the treatment, let me tell you; stamped, watercolored, dried, embossed, sanded, glued and splattered!

I dipped my wet toothbrush in DecoArt Americana paint, then ran my thumb across the brush to "spray" snow on my project.  I made some larger "snowflakes" with a paintbrush.  For my sentiment, I stamped it on canvas ribbon then used a glitter pen to embellish.


For my bird nest, I used burlap string and the trimmed edges of some wired faux burlap ribbon that I could fold and bend to my liking.


Purchase Nature's Holiday, here.

Thanks for stopping by.  Don't forget to leave a comment to be entered to win one of two prizes, a grab bag of 25 stamps. 

I'll be announcing the winners on Monday.


#unitystamps #unitystampcompany #naturesholiday #stamp #mixedmedia #decoart #distress #bird #snowbird #winter #pinecone #holiday #seasonal #thermoweb #wavingmywand #xyron #american #cottonball #burlap #thecraftersworkshop #tcwstencillove #tcwstencils #inkagold #elizabethcraftdesigns #scallop #die #cuttlebug #emboss #stencil #queenandcompany #bubble


Wednesday, October 5, 2016

New release at TPD Stamps Day 1 + SALE!

It's day one of the brand new release from Two Paper Divas and I'm featuring a hidden shaker card.  This card includes the new sentiment, "Enjoy The Little Things", and as an added bonus, you are getting a little sneak peek at one of the new releases for tomorrow, "Fern".  As an added bonus, TPD is having a storewide 25% off sale!

Believe it or not, this project came together fairly quickly, once I figured out what I wanted to do.  To begin, I stacked two different sheets of designer paper under my square pierced die and ran them through my Cuttlebug, then I sliced both on the diagonal with my trimmer and adhered two separate pieces to my card front, to get that cool, duality.


I'm using the Queen & Company shaker pop-up frames as well which simplifies things a bit.  I stamped my fern on an angle and watercolored it, and used the same nesting pierced dies from Spellbinders to cut the watercolored piece for the backdrop and the frame that sits on top of my shaker.  To keep the shaker hidden, I took a tiny piece of Thermoweb glue lines and rolled it around and tucked it in the lower right corner of my front shaker.  That helps keep it closed until the recipient is ready to open.  

To make the hidden door, I used the same sized square as my die cut watercolored piece, heat embossed my sentiment, sponged ombre inks and made a little "hinge" out of a trimmed piece of cardstock, scoring my hinge for an easy fold and adding trimmed pieces of gold adhesive tape for decor.  I've even included some of the Two Paper Divas sequins in my shaker.  Shop for some of the Divas "Whatnots", here.  Lots of fun doilies, sequins and other accessories.   


Shop for Enjoy the Little Things, here.


Shop for Fern, here.

Visit the Two Paper Divas Blog for daily project inspiration and on Wednesdays for the Design Team Roundup.  Check out the newest release right here:


Shop Two Paper Divas for a wide selection of clear stamps, digital stamps and accessories.

Additional supplies:  Spellbinders Celebrations Square Pierced dies, Neenah white cardstock, Websters Pages Ombre paper, DCWV Spiced Cider paper stack, Queen & Co foam shaker square pop ups, American Crafts Glitter tape, Queen & Co fabric flowers, Hero Arts ombre inks, Tim Holtz water brush, Xyron adhesives, Tombow mono aqua glue, Pretty Pink Posh mini sequins, Susan Weckesser mini color pop black ink, Hero Arts clear embossing powder, Tim Holtz blending tool


#twopaperdivas #tpdstamps #newrelease #october #fern #enjoythelittlethings #shaker #card #spellbinders #die #cuttlebug #websterspages #dcwv #heroarts #prettypinkposh #wavingmywand #terriburson #diy #sequins #glitter #americancrafts #tombow #susankweckesser #colorbox #minicolorpop #timholtz #queenandcompany #scrapbook #cre8time #thermoweb

Friday, June 17, 2016

SUMMER Coffee Loving Cardmakers Hop! Plus, Blog Candy!

It's time for all things coffee, tea and cocoa related, plus bring on the summer sunshine!  The quarterly blog hop from coffeelovingcardmakers.com begins today, hosted by the always lovely, Amy Tsuruta and her team.


My project today features a free digi from Stamplorations (cups) and a sentiment from one of their stamp sets.  You can grab those here and here (scroll down to find the digi).   I colored up my cups with Tombows and made colorful, tropical coozies for my cups out of scrap paper.  The coozies and lids are both popped up with foam squares.


Aren't they adorable?


I made my own background paper with Bristol Strathmore watercolor paper, Ranger distress sprays, TCW Stencils and Inka Gold.  I also inked up a white doily with distress ink and white splatters.


I hope you'll create something and join in.  There are over 50 sponsors who are giving away prizes as well.  The hop ends on 6/24/16 at 11:55 pm pacific time.  Scroll to the end of the hop post to find the Inlinkz button to link up.  Be sure and read the rules as back linking is not allowed.  Most importantly?  Have fun!

P.S.  I will be offering blog candy!  Winner's choice of a Starbucks $10 gift card or a Dunkin' Donuts $10 gift card.  Here's how to win:

* Leave a comment on this post
*Extra Entry for following me on Google Friend Connect (upper right on my blog sidebar)  - please comment that you followed.
*Extra entry for commenting on any of my other posts shared on the coffee hop this week.

If you'd like to follow me on any of my social media, that would be lovely as well, but not required.


Also linking to:


Supplies: Bristol Stathmore 300 series watercolor paper, The Crafter's Workshop stencils (well rounded), Ranger distress sprays (seedless preserves, wilted violet, dusty concord), Stamplorations digi and sentiment, Pretty Pink Posh mini sequins, DoubleClick Skittles bubble embellishments, Inka Gold, Tim Holtz water brush, Lil Inker Designs oval stitched mat die, Xyron adhesive, Thermoweb foam squares, Coredinations A2 Ivory card, Neenah extra heavyweight white cardstock, Tombow dual brush markers

#summerclh #coffee #tea #cocoa #summer #coozies #coffeecup #latte #distress #ranger #timholtz #TCW #thecraftersworkshop #bristolstrathmore #strathmoreart #thermoweb #tombow #tombowusa #doubleclickskittles #prettypinkposh #inkagold #viva #coredinations #Neenah #xyron #watercolor #wavingmywand #stamplorations #digi #digital #stamp #card #craft #scrapbook #papercrafts #diy #stencil #lilinkerdesigns

Wednesday, May 18, 2016

Patriotic Party Favors/Decor and Video for Two Paper Divas Stamp

Here's another fun project featuring one of the brand new stamps from Two Paper Divas called, "USA".   Just think of all the fun things you can do with this stamp; party invites, cards and even party favors, as I've done today. 


Check out my 30 second Flipagram video, showing how I put these together.  So fun! 


Shop Two Paper Divas for a wide selection of clear stamps, digital stamps and accessories.

Supplies:
TPD USA Stamp, Thermoweb glue lines, ribbon, twine, Spellbinders Celebrations Build a Tag 1 dies by Richard Garay, Doodlebug Designs Sugar Coating Glitter in Lily White, red/blue extra fine glitter from the Scrapbook Expo, Tombow mono aqua glue, soda bottles, DCWV basic dark blue cardstock, Valentine straws, Recollections white pigment ink


#twopaperdivas #tpd #usa #patriotic #party #decor #favors #tag #spellbinders #celebrations #richardgaray #scrapbookexpo #dcwv #thermoweb #tombow

Tuesday, April 12, 2016

Butterflies and Love With So Suzy Stamps

(FTC disclosure: This post may contain affiliate links so, if you purchase a product using the link I may receive a small commission. I only participate in affiliate programs that feature products that I use and love. Your purchase price is not affected in any way, by using my links)
Here's a project that I made especially for my crafting bestie's wedding Anniversary.  It was a big shindig, celebrating 25 blissful years.  Well, we all know.... not every year is blissful!  She finally got her card, so now, I can share it with you all.  I'm so in love with this butterfly from So Suzy Stamps.  It's been awhile since I last broke it out.  I thought it was the perfect opportunity to pair it with a newer sentiment that I've also had in my supply; a fabulous quote from the famous actress, Audrey Hepburn which aptly, is the name of the sentiment stamp.


For the butterflies, I stamped with my Hero Arts ombre green ink, then sprinkled clear embossing powder and heated with my heat embossing tool.  Both were stamped onto Kaisercraft Heirloom patterned paper and I fussy cut one of the butterflies for dimension.   This butterfly stamp is the most intricate that I've ever seen and is simply stunning.   Click on any of the highlighted affiliate links, if you'd like to purchase one for yourself.  Or, two or three!  They make lovely gifts for your crafty friends.


Doesn't it look like it will simply fly off the page?  To be able to slide this into an envelope, I simply scored both sides where the wings connect and simply folded one wing.   It's adhered with a thin strip of Thermoweb glue lines.   My friend will be able to unfold and open both wings for display.  Magic!


  Visit So Suzy Stamps today!   It's a one-stop shop where you can find many of your crafting supplies; adhesives, stencils, embellishments and more. 

Be sure and bookmark the store once you get there.  I promise it will soon become one of your favorite stops!  Don't forget to stop by the blog for daily inspiration, fun giveaways and random craziness!  Join Suzy's Flaunt it Group on Facebook to share your projects as well and hang out with the rest of the cool crowd! 


P.S.  Happy Anniversary Nancy and Larry!


#sosuzystamps #butterfly #fancybutterfly #butterflies #audreyhepburn #kaisercraft #thermoweb #heroarts #xyron #emboss #anniversary #love #celebration #party #cardmaking #papercrafts #scrapbook #cre8time #diy #homedecor